Ahead of its launch on February 11, Proton has opened the order books for the 2026 Proton S70 at all 3S and 4S centres nationwide starting from today. The refreshed sedan is also making a special appearance at showrooms across the country this February 7-8 weekend, and it is at one of these that we caught up with the Flagship and Flagship X examples, effectively offering a full visual preview of the S70 MC1.
The rework on the S70 brings about minor exterior and interior revisions. On the outside, the changes are essentially lifted from the 2025 Geely Emgrand, as reported previously. The car gets new LED headlights, but gone is the flashy start-up sequence, and the turn signal indicators are now bulb units, having previously being integrated into the eyebrow-like LED daytime running lights. The turn signals take the place of the old high beams near the inner edge, so the high beam is now integrated into the main projector unit.
Other new bits include 17-inch two-tone alloy wheels for the Flagship, and these are almost identical to the outgoing unit, but with a more blade-like design for the spokes. As for the tyres, both the Flagship and X are shod with GitiComfort F22 tyres. These replace the previous Kumho Ecowing ES31, which took over from the Goodyear Assurance Triplemax 2s that were dropped when the Goodyear plant in Shah Alam closed in 2024.
As indicated by the earlier studio shots of the car, there’s a new bodykit, and here it can be seen on the Flagship X here. Design cues include a distinct accent framing the air intake, a more aggressive diffuser-like rear skirt and a boot lid lip spoiler with a sizeable centre cutout. Oh, and there are red accents too, although it’s only for black and white versions of the car, and so it’s not on the blue display example.
The big news is with the powertrain, with the S70 now featuring a 1.5 litre BHE15-EFZ i-GT turbo direct-injected four-cylinder engine, which replaces the GEP3 three-pot. This will equip all four variants available for the car, which are the base 1.5TD Executive, mid 1.5TD Premium, high 1.5TD Flagship and range-topping 1.5TD Flagship X.
With 181 PS at 5,500 rpm and 290 Nm of torque between 2,000 and 3,500 rpm, the new unit offers a considerable 31 PS/64 Nm jump over the old port-injected mill. The seven-speed wet dual-clutch transmission has been retained, but the new engine allows the 2026 car to do the 0-100 km/h run in 7.5 seconds, which is 1.5 seconds faster than before.
Proton says this boost in performance comes at no expense to fuel economy, which is rated at 5.7 litres per 100 km (17.5 km per litre). The company says that running costs will lower thanks of a switch to a toothed timing chain, and recalibration work to the transmission means smoother gearshifts on the new car.
Inside, the cabin remains unchanged from the current S70, with only the headliner switching to black on the Flagship X (it remains beige for the rest of the range), and so you’ll find the familiar horizontal dashboard with a full-width air vent design and broad centre console topped by a T-shaped gear lever.
Standard fit items on the Executive include fabric seats, an 8.0-inch infotainment head unit, five USB ports, rear parking sensors and 16-inch alloys. The Premium adds on auto LED headlamps, a rear tail light bar, leatherette seats and a leatherette-wrapped steering wheel, auto air-conditioning, front parking sensors and a reverse camera.
Move up to the Flagship and that’s where the 17-inch rollers come in. The 10.25-inch TFT instrument display and 12.3-inch infotainment touchscreen from before continues on unchanged, but there’s now wireless Apple CarPlay and Android Auto.
The variant also adds on a wireless mobile charger, 360-degree HD camera with 3D display, a six-way powered driver’s seat and security window film from the Premium. As for the Flagship X, aside from the bodykit and black headliner, you get a sunroof and a front DVR.
Safety-wise, the S70 comes equipped with six airbags and items such as lane change assist, door opening warning, rear collision warning and rear cross traffic alert as standard. That’s for the Executive and Premium. As before, only the Flagship (and X) get Level 2 semi-autonomous driving features such as adaptive cruise control, lane centring assist and autonomous emergency braking.
No prices as yet, but this – along with full specification – will come later this week when the car is launched. For reference, the current S70 is priced at RM73,800 for the Executive, RM79,800 for the Premium, RM89,800 for the Flagship and RM94,800 for the sunroof-equipped Flagship X.
GALLERY: 2026 Proton S70 MC1, Flagship X
GALLERY: 2026 Proton S70 MC1, Flagship
AD: Drive the Proton model of your dreams. Submit your details and Proton PJ will get in touch with you.
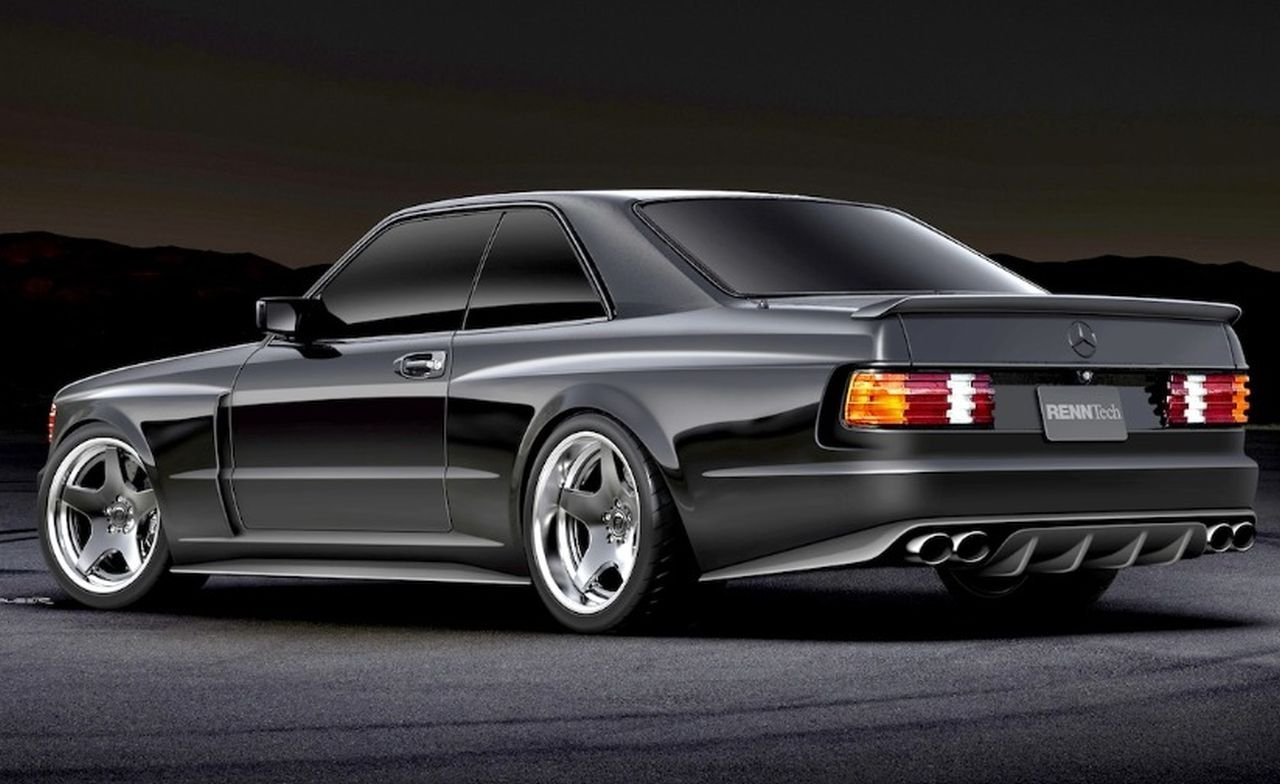
US-based aftermarket tuner ReNNtech has revealed the SEC V12 Sledgehammer. This limited edition model is a tribute to the legendary Mercedes-Benz M120 V12 engine and “the ultimate evolution of the C125 SEC platform”.
The M120 V12 engine is the unit that was used in legendary models like the CLK GTR and Pagani Zonda. The 7.5-liter, naturally aspirated V12 is hand-built at ReNNtech. It is reengineered to produce 660 hp and 450 lb-ft of torque, while the hand-built equal-length headers deliver a signature V12 sound.
This legendary motor is wrapped in an equally iconic Mercedes SEC C126 body, which has been modified to give it a wider stance. It also gets enhanced cooling and revised aerodynamics for high-speed stability. The flared wheel arches house a set of custom forged wheels.
ReNNtech is building only 12 examples of the SEC V12 Sledgehammer. The first customer cars are expected to arrive in 2027.
This post may contain affiliate links. See our affiliate disclaimer here.
When you think about traveling across Japan, you probably envision going to Tokyo, hopping on bullet trains, and hopscotching around Osaka and Kyoto to tackle some of the most popular sights in Japan.
However, my family and I recently took a slightly different route approach for our Japan visit. We rented a 16 ft camping car.
Side note: I recently wrote a post on what I wish I’d known before renting an RV in Japan, such as how to find a great rental company or book your campsites. You can read that article here.
Then we drove it around some of the less touristy parts of Japan. Some of these places you’ve maybe heard of, but some of them you probably haven’t. And yes, we of course visited some of the popular spots too, AND with a one and three-year-old our trip would not have been complete without a trip to Disney.
In this video, we’re sharing our 13-day RV road trip itinerary across Japan, in case you ever decide to hop in an RV or van and make your way across this amazing country. For each day we mention in this itinerary, you can learn more or watch our vlog from that specific day by clicking the card we link to in the upper right-hand corner.
And stay tuned for the end of the video where I’ll share some numbers from our trip, such as the cost of our campsites, RV rental, and how much we paid in toll roads.
You’ll see more details, like links to where we stayed, below.
Day 1: Tokyo
Where we stayed: Shiba Park Hotel
What we did:
We flew directly into Tokyo. What trip to Japan would be complete without a visit to this amazing city? Not ours.
Before arriving in Tokyo, we searched for family-friendly accommodations. One recommendation that popped up was the Shiba Park Hotel. Upon looking at their website, I noticed they had rooms with bunk bed configurations and with two little ones, we jumped on it.
The location was great, and we were just a short walk away from the Tokyo Tower and an epic playground for the kids.
We had a short stay in Tokyo but tried to fit in as much as possible. Here is what we squeezed into one day:
The Shinjuku Gyoen Gardens are located right next to the Shinjuku Train Station, the most popular train station in the world. The gardens were an oasis in a bustling city and we were even able to see cherry blossoms in their full beauty in the garden.
If you have kids (or just if you want to hit up an animal cafe), we spent our first afternoon in Tokyo at miPig cafe, which was a hit with our one-year-old but our three-year-old couldn’t get out fast enough. It was a cool spot just a two-minute walk from Takeshita Street.
After hanging out with the pigs, we found a kid-friendly karaoke bar in Tokyo called Rainbow Karaoke in Shibuya. They had soft serve on tap and we jammed to Disney classics. Fun was had by all.
Day 2: Tokyo
Where we stayed: Shiba Park Hotel
What we did:
Our second day in Tokyo we hopped in a cab visit to DisneySea. Despite traveling with a baby, both of our kids could do the majority of the rides in the park. On the day we visited, it rained almost the entire day but we still had a blast. If you visit while in Tokyo, you’ve got to hop around all of the popcorn stands and try out all the unique flavors. Our favorite was the white chocolate matcha!
Even jetlagged and in the rain, everyone had a great time!
Day 3: Picking Up Our Camper Van!
Where we stayed: Onoji Family Camping Ground
What we did:
On our third day in Japan, we picked up our RV rental from El Monte RV. We’d researched and found a few different RV rental companies in Japan and because we were visiting during peak cherry blossom season, availability was challenging. El Monte had good reviews and two locations in Tokyo. The team was very responsive over email, so we booked with them. (And yes, this is the same El Monte you see in the States!)
The pickup process was relatively seamless and the staff were amazing. We did a walk-through of the RV, learned about the systems, and loaded up on supplies at the grocery store across the street.
One last-minute decision that helped us out a ton with our rental was adding on an ETC card, aka an electronic toll collection, so basically a toll pass. The majority of the roads we would travel across Japan were toll roads, so having this card allowed us to easily pass through each automated toll gate without having to stop and pay. (I share the total amount we spent in tolls at the end of the video).
We opted to drive straight out to Mount Fuji with our new to us RV. And because of a wrong turn on Google Maps, we ended up detouring through downtown Tokyo. What was originally supposed to be an hour and a half drive turned out to be much longer!
Still, we made it to our Onoji Family Camping Ground before it closed and woke up the next morning to the most epic views ever.
Day 4: Mount Fuji
Where we stayed: Fumotoppara Campground
What we did:
We woke up to crystal-clear views of Mount Fuji, which is rare in Japan. The campground was the very first auto park in all of Japan, built in the 70s. We were one of a few different RVs and most people camped in tents.
We woke up to everyone outside cooking their breakfast and making coffee and had the best time making friends with locals from Tokyo who had driven out for a weekend camping trip.
From our campsite we drove out to Lake Kawaguchi, which was supposed to be one of the best places to get a vantage point of Fuji. Other people got this memo too. It was a cute town along the lake and we were there on a weekend, so it was a bit packed.
We then drove over to the Chureito Pagoda. There were a lot of stairs to the top, but the views were worth it.
We ended the day at Fumotoppara Campground with the most epic sunset of Mount Fuji.
Day 5: Magome-Juku
Where we stayed: Hokonoko Camping Ground
What we did:
After a morning at Fumotoppara campground, we set out to explore a small postal town called Magome-juku.
It was idyllic Japan, with cute waterwheels and pathways that wind through an ancient village that has been restored and preserved over centuries.
The town is right on the Nakasendo trail, which stretches from Tokyo to Kyoto and is a famous walking path. We walked a quarter mile of the path up to an epic viewpoint, but not before trying out some of the local street vendor food—that we ended up going back to for seconds.
We camped at Hokonoko Camping Ground, which felt like camping in a national park. It would also be the place that would seriously test my driving skills as I tried to drive out of it the next day…
Day 6: Cafe KuraKura
Where we stayed: Cafe KuraKura
What we did:
On day 6, We drove toward Yoshino NP and what would be our favorite campsite of the trip.
But first, after three days of traveling, it was time to fill up the gas tank. This cost about $100. At this gas station, there were attendants who filled the tank for us, saving us from accidentally choosing the wrong fuel.
Using Google Maps, we found a cafe with three campsites behind it and booked one. BTW, almost every campground in Japan requires advanced reservations. We made all our reservations online before leaving the States. (If you book at KuraKura with a camping car, we recommend the “Jungle” campsite!)
Our Campsite at Cafe KuraKura was a highlight of our entire road trip in Japan, mostly due to the amazing family who hosted us. Upon arriving, they let me drill holes into freshly cut lumber that was set up to grow their organic shitake mushrooms.
We ate an incredible lunch, played at the playground next door, and for dinner, Heath went out and cut down one-month-old bamboo with the owner who taught us how to season and boil it. It was the type of experience that will stay with us forever.
Day 7: Green Tea Plantation
Where we stayed: Mizuno Camper Base
What we did:
On day 7 we visited the small town of Wazuka to tour a green tea plantation. This town has been home to green tea plantation farmers for generations. However, there’s one farmer in town who sticks out as a first-generation family to make green tea products. Their business is called D: Matcha and it’s not too far outside of Kyoto.
We spent an afternoon getting a tour of their farm and learning how they bring their matcha products to life. It was a mixture of a history lesson, matcha tasting, and a delicious meal all wrapped into one experience. It rained on us most of our tour but nobody seemed to mind and umbrellas were provided.
Day 8: Kyoto
Where we stayed: Miami Beach Auto Campground
What we did:
On day 8 we woke up at Mizuno Base campground. While it felt isolated in nature along a river, it was just a short drive into Kyoto where we were set to explore the famous bamboo gardens and take the kids to the monkey park.
We were able to easily find a parking spot within a short walking distance of the bamboo garden. However, if I could go back and do it again I’d aim to arrive earlier in the morning. By the time we arrived, we were shoulder to shoulder with other guests and it made navigating the area a bit more challenging. Nonetheless, the bamboo garden was still magical.
For lunch, we walked across the river and found some of the best desserts we’d had so far in Japan. We ate mochi balls, soft serve matcha ice cream with fried sweet potato, and a dessert called a Mont Blanc, which looked kinda like spaghetti noodles on top of ice cream.
In the afternoon, Alyssa and Ellie walked over to the monkey park. To visit, it cost about $5 and requires you to walk up 20 minutes of stairs and switchbacks. Once at the top, you’re surrounded by monkeys climbing and swinging around you. Our 3-year-old had a magical time getting to see the monkeys and play at the park. We barely scratched the surface of what you could do in Kyoto, but in such a short visit, it was time to move on to the next thing.
Day 9: The Sea of Japan
Where we stayed: Hakusan Yoshino Auto Campsite
What we did:
On our 9th day in Japan we woke up at Miami beach campground (yes, this is the real name of this campground). This campsite was one of our favorites. We had an epic view of Lake Biwa and a massive campsite for the kids to run around and explore.
This day we wanted to make our way to a highly recommended city called Kanazawa. We discovered that it would only take us an extra hour or two to drive a route that went right along the sea of Japan, so naturally we opted to take that route.
The coastal route didn’t have much information online, but we found plenty of road side gems that made for an epic day of driving— castles, waterfalls, jagged cliffs we could hike, and even a jellyfish aquarium that gave the kids a chance to stretch their legs and run around for an hour.
Day 10: Kanazawa
Where we stayed: Kanazawa
What we did:
On our tenth day in Japan we explored the town of Kanazawa after camping 20 minutes outside the city. Kanazawa was described to us as “older Japan”, but much of what we explored felt like a newer city. We had no trouble finding a place to park our van in the downtown area!
Highlights for us in Kanazawa were walking the Kenroku-en gardens, seeing Kanazawa Castle, and stumbling on a street market with some amazing local vendors.
On this night due to the heavy rain, we grabbed a hotel so we could stay in the city of Kanazawa instead of heading 45 minutes away to our next campsite.
Day 11: Our First Onsen!
Where we stayed: Okuhida Spa Auto Campsite
What we did:
On our 11th day we drove into Chubu National Park. The drive into the national park was littered with waterfalls, mountain views, and rushing water.
The campsite we found for the night was stunning and right along the river. Best OF ALL, it had an onsen right on site. We’d seen a hundred different onsens as we drove across Japan, but few of them allow young children. We finally found one that we could visit from the comfort of our own campsite with the family. To top it off, we were the only ones at our campsite so we had it all to ourselves.
Onsens are very common across Japan due to its high volcanic activity. Many of them are fully nude and there’s some basic etiquette involved when going to many of them, such as showering beforehand, not going in with a towel, and following whatever rules they have posted on site.
Day 12: The Day We Blew Up Our Plans! ❄️
Where we stayed: ?!
What we did:
Our plan for our 12th day was to do a waterfall hike in the National Park. But even in late April, most of the national park was closed from snow! We did not expect this at all! We couldn’t make it to any trailheads to hike. This was a major bummer, but we knew the kids wouldn’t like hiking in the cold snow and we didn’t have the right gear with us, so we decided to take a major pivot and get back to warmer weather.
While the kids napped, we hightailed it back toward Tokyo for redemption.
The kids did great with so many adult activities during our time in Japan, so we parked the RV back at Disney Sea for round two of Disney. This time around, the weather was sunny and perfect and there were no crowds at all. We walked onto every ride and the kids had a great time.
Day 13: Disneyland!
Where we stayed: Resort parking just outside Disneyland. You can walk (there’s a walkway over the highway) from the lot to the parks or walk to the Ambassador Hotel and grab their shuttle to the parks. It’s not too far of a walk.
What we did:
For our last day in Japan, we ended on a high note with Disneyland. If we could do it all over again, we would’ve driven into Osaka during our trip to visit Universal Studios Japan, but we were worried about driving and parking the van in cities—which ended up being easier than we thought it would be!
Quick Stats and Costs: Japan by Van
We all had an amazing time touring Japan by campervan!
All in all, our trip covered 1,647 kilometers across Japan (1023.4 miles).
Our average nightly campsite price was $36 or 5,000 yen.
The cost of our RV rental for 11 nights was $1,779.24 USD (roughly $161.72 per night).
And we paid $204 for the many tolls that we crossed through during our trip. Basically every road is a toll road, so this was less than I would’ve expected!
Tips Before You Go
There were a few things we did during this trip that made our lives significantly easier.
Printed out all reservation confirmations in advance. Because we don’t speak Japanese and to eliminate any confusion upon arriving at our destinations, printing out our confirmations was a huge peace of mind. Plus, they were in Japanese which made it even easier for our host. When we rolled into our nightly campsites I could simply hand them our confirmation print out and it made the process very smooth.
Downloaded Google Maps for offline use in Japan. I wasn’t sure how well our cellular signal would be across Japan, so before our trip, I downloaded Google Maps. As it turns out, we had solid cell signals almost everywhere we went and this was a nonissue. El Monte (and I’m assuming other rental companies) will have hot spots you can rent with your RV rental.
Pre-purchased our sim card from Japan Wireless. There’s a handful of companies you can pre-purchase a Japan sim card from. We bought ours through Japan Wireless, picked it up right at the airport in Tokyo, and had no problems throughout our entire trip.
Adding cookware and bedding onto our rental because many of these items did not come with the base rental.
There are probably more items to mention, but these were some of the top ones that come to mind.
Driving this RV across Japan was truly a dream come true for us. We’ll be planning more international campervan adventures, so if you want to see more videos like this — it would mean the world if you could subscribe to our channel and stay in touch. You can watch our entire Japan series here for all the details of our experiences in this country.
And if there are any more questions you have about driving an RV across Japan, please drop a comment we’d be happy to answer any of them!
Support CleanTechnica’s work through a Substack subscription or on Stripe.
Or support our Kickstarter campaign!
Last year we bought a combination washer and heat pump dryer and have been pretty impressed. Not only does the machine offer significant convenience where you put a load of clothes in and literally two hours later it is both washed and dried, it also uses a small amount of energy. Like, under one kWh-worth of energy. It feels like heat pump clothes drying technology has now fully arrived; the most innovative and easy to use technology is also the most energy efficient.
Our Journey To The Combo Washer + Heat Pump Dryer
Hang drying laundry
In my house, we’ve been on a journey to make our clothes washing and drying as efficient as possible for a long time. After living in Italy as an exchange student, I fell in love with the simple and practical beauty of hang drying laundry, which is common around the world but unfortunately a lost art on this continent. Hang drying works especially well in the summer when it’s easy to dry your clothes quickly and have them smell amazing.
Clothes smell better when dried outdoors. Hang drying our daughter’s diapers outside in Italy.
First heat pump dryer — 2022
Heat pump dryers joined other heat pumps in our house in 2022.
But, hang drying is not for everyone or every season, and our family wanted to get an efficient dryer to use in the winter. In 2022, we researched and then bought an Insignia (Best Buy’s Brand) heat pump dryer for our main house, replacing the ancient, 20-year old, energy hogging dryer that had come with our house when we bought it. After doing a lot of research (and writing an article about it), we saw that in 2022, nearly all heat pump dryers were “compact.” This means they had smaller drums, around 4 cubic feet of capacity (“typical” American dryers have around 7 feet of capacity). Three years ago, the Insignia cost $800 (today it costs $700), more than standard, energy hogging, electric dryers that cost $400-600 on average. But buying a compact heat pump dryer was still an upgrade for us. For one, we got to patch the hole in our house and remove the lint-filled dryer vent (heat pump dryers don’t need one). Say goodbye to cleaning vents and fire hazards! It also allowed us to use the dryer pretty guilt-free because it is so darn efficient, using only 300 to 400 watts of energy an hour and half a kilowatt hour per load (a standard electric dryer will use 3-4 kWh). The only negative parts about this dryer, which we still have and use, are that we have to divide big loads into two (because it has a smaller drum) and that it can sometimes take a long time to dry, between 75 and 120 minutes depending on the size of the load.
Our first compact heat pump dryer
Enter The Combination Washer + Heat Pump Dryer
In 2023, the year after we bought our compact heat pump dryer, GE came out with a front loading washer combined with a heat pump dryer to form an all-in-one laundry machine to rule them all. This combo washer/heat pump dryer uses both air circulation techniques and a heat pump to dry clothes with very little energy and it removes the need to switch a load of laundry from a washing machine to a drying one. There had been many combo washer dryers before, we had one in our small accessory dwelling unit (ADU) apartment next door, but they were largely all compact and used the same energy-intensive, electric resistance technology. This was the first combo washer + heat pump dryer.
GE’s unit saw strong sales and two other manufacturers, LG and Samsung, quickly came out with products.
The three combo washer/heat pump dryers on the market made by GE, Samsung and LG.
Many of us who geek out on energy efficient appliances saw these combo washer and heat pump dryers as a Holy Grail of sorts, where doing the right thing (using the least amount of energy) is also doing the most convenient thing. But in our house we thought, could this be real? Does it really work well and are there any drawbacks?
Since we’d recently bought a heat pump dryer for our main house, we didn’t think we’d be trying a combo washer-dryer soon. But recently, the 13-year-old small electric resistance-powered washer/dryer in our attached ADU broke and we needed to get a new replacement quickly.
Heavy and taller, but easy installation
We looked online and found a nearly new GE available on Facebook marketplace for $1,600 that someone had bought for their elderly mother (who had decided she didn’t want it because it was too different from what she was used to). We went to buy and pick it up in a borrowed truck but found that the machine was very heavy — around 300 pounds, which was impossible for us to lift. So, we hired some movers who picked up the washer/dryer for us for an extra $150 and brought it into our ADU.
The other thing to note about this combo washer and dryer is that it is around 6” taller than a standard single washer and dryer (the GE one is 47 inches tall). It is large, but the overall laundry footprint is smaller because you only need one machine rather than two.
The installation is quite easy. Put it in place, plug it into a standard outlet and hook up water pipes and drain tubes. The combo washer/heat pump dryer doesn’t need 240-volts of electricity or an outdoor dryer vent. It can just plug into a normal outlet, which offers another clue of how efficiently these products use energy.
Operating a combo washer/dryer
Operating the washer/dryer is pretty straightforward. You put your clothes in, choose the cycle you want and voilá — your clothes are completely clean and dry in two hours. All the manufacturers have apps that allow you to track your energy usage too.
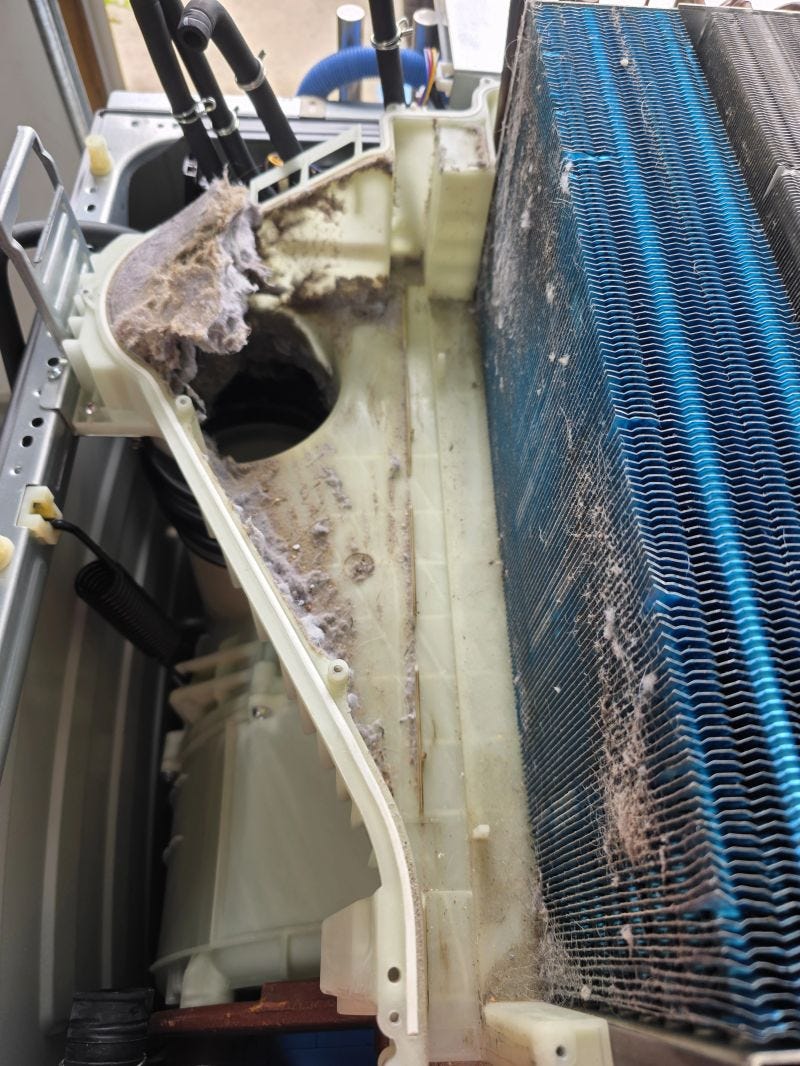
Lint
All the combo washer/dryers have serious filters to help keep lint at bay. The lint filter must be cleaned after every load. Yet, there are some questions as to whether these lint filters remove all the lint. A technical friend, Edward Louie, took apart his 1.5-year-old GE and found a decent amount of lint build-up in the machine. He says the “GE combo washer heat pump dryer has a bypass in the back of the filter slot to allow some air to bypass the filter to keep the unit from failing if the user fails to clean the lint filter. That was a mistake in my opinion, as it lets lint bypass the filter and thus lint gets into the evaporator.”
Samsung’s and LG’s heat pump dryers don’t have this design challenge according to Edward, and additionally the two brands have coil wash nozzles that run during a self-clean cycle to wash lint out of the heat exchanger should some make it past the lint filter. The current GE unit doesn’t have a coil wash.
Keeping the lint filter removed from the filter slot when the machine is not in use allows the plastic to dry/air out which seems to slow the rate at which lint sticks to surfaces. Purchasing an aftermarket dryer/appliance lint cleaning brushes and a long flexible vacuum cleaner crevice tool attachment helps greatly with removing lint that’s visible in the filter slot that didn’t make it into the lint filter.
Lint buildup in Edward’s GE combo washer/ heat pump dryer after 1.5 years of use.
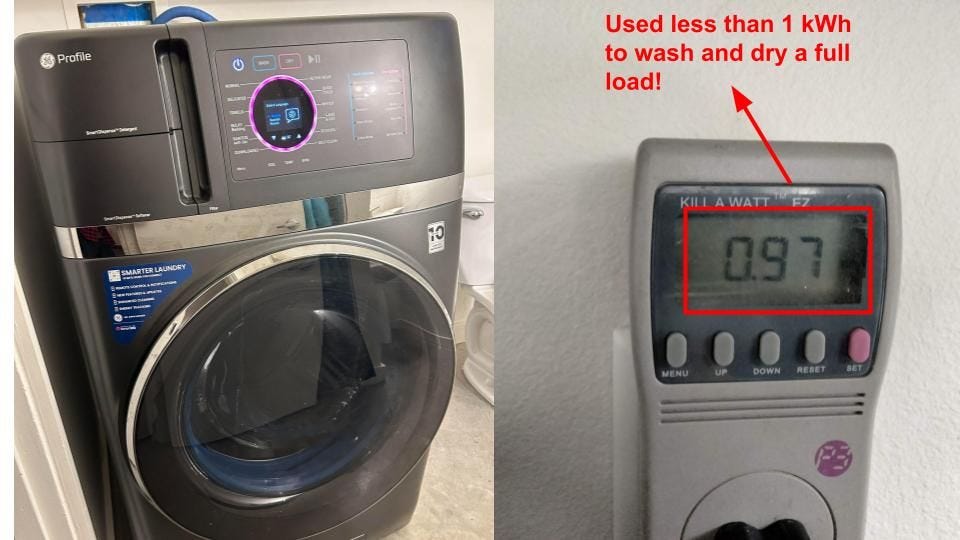
Energy Usage
I wanted to see just how little energy my combo washer/dryer used and so put my old Kill A Watt energy reader on the outlet it was connected to. I was expecting low energy usage, but have to admit being really excited when a full wash and dry load came in under one kWh of energy. Typically, electric resistance dryers use 2.5 to 4 kWh per load, according to Silicon Valley Power. This means a typical home could save something like 450 kWh per year, or around $80.
One other benefit we’ve noticed is that unlike other front loading washers where you have to regularly clean the rubber door lining which gets full of water and can get moldy, the lining of the combo washer/dryer stays dry and doesn’t have this problem.
Energy efficiency in a laundry machine that does both washing and drying is a powerful concept. It means a household can do good for the environment, save money on utility bills and have a more convenient, space-saving appliance.
PS – at Electrify Now, we are volunteers who like to write about innovative technology and don’t receive any funding or free products from any manufacturers in the process.
Check out a webinar we’re doing on combo washer/ heat pump dryers and let us know your experience with them.
Support CleanTechnica via Kickstarter
Sign up for CleanTechnica’s Weekly Substack for Zach and Scott’s in-depth analyses and high level summaries, sign up for our daily newsletter, and follow us on Google News!
Advertisement
Have a tip for CleanTechnica? Want to advertise? Want to suggest a guest for our CleanTech Talk podcast? Contact us here.
Sign up for our daily newsletter for 15 new cleantech stories a day. Or sign up for our weekly one on top stories of the week if daily is too frequent.
CleanTechnica uses affiliate links. See our policy here.
Volkswagen celebrates the Golf GTI with a potent Edition 50 model. The optional Performance Package lives up to its name and turns this GTI into a true agility monster. The price for this combination, however, is correspondingly steep.
Corners, smooth tarmac and rain. For a front-wheel-drive car, this is the worst-case scenario. Add semi-slick tyres and straight-line understeer during direction changes seems inevitable. A corner is approaching fast. We are at the wheel of a Golf GTI Edition 50 with the Performance Package. “All well and good, but …” flashes through our minds. Then the circuit layout and survival instinct take over. Hard braking. The red-painted calipers and pads bite decisively. The seatbelt tightens across our chest as the car loads the front axle. Turn in. We brace for the classic fate of a front-wheel-drive car: running wide into the gravel beyond the left-hander. Yet our eyes remain fixed on the apex. And then it happens. As if drawn with a compass, the Golf follows the steering input precisely and heads straight for the middle of the corner.
The rear axle joins in. Not rebelliously, but supportively, the tail rotates gently. Full throttle. The top-spec GTI takes this in its stride too. No twitching, no scrabbling at the front wheels. “You ask, I deliver,” seems to be the car’s attitude. “Clean,” we note. There is no time for more. The light-footed way in which the Golf slices through corners is impressive. “With the Performance Package, we reached into the top shelf of the MQB toolbox,” explains Florian Umbach, Head of Vehicle Dynamics. That was necessary, because the chassis of the Golf GTI Edition 50 is identical to that of the Clubsport. With the Performance Package, VW’s engineers wanted to raise the bar once more. Mission accomplished. This GTI makes it easy to drive fast. Very fast.
It starts with classic tuning measures. The 235-section tyres sit on 19-inch forged wheels, and the exhaust gases flow through the titanium performance exhaust system from the Golf R. The result is a weight saving of around 25 kilograms. At the press of a button, this GTI sounds like a predatory animal. At the MacPherson front axle, the increased negative camber of minus two degrees is immediately noticeable, compared with minus 1.33 degrees on the standard Edition 50. More negative camber increases the usable contact patch of the outside front wheel in corners. The tyre works more evenly across its tread, improving cornering speed and turn-in precision. “The additional front-end grip is the foundation for high cornering speeds, reduced understeer and neutral handling,” says Umbach. The key word is foundation. On its own, this measure would achieve little.
To make it effective, a full agility package comes into play. At the front, stiffer top mounts and a stiffer rear wishbone bushing are fitted. In combination with the electronically controlled mechanical limited-slip differential, this creates a subtle self-steering effect towards the inside of the corner under acceleration. The differential pulls the inner wheel more strongly, while the reduced compliance of the wishbone bushing keeps the geometry stable. The result is the opposite of classic front-wheel-drive push.
At the multi-link rear axle, the changes are less extensive but still meaningful. In the standard setup, the track rod is only mounted on one side. With the Performance Package, it gains a dual-sided mounting, significantly increasing lateral stiffness. This allows the rear axle to support the front axle’s steering inputs more precisely. Stiffer springs and damper mounts are also fitted, raising the natural frequency to match the front axle and reducing roll and pitch. “Manthey would charge several tens of thousands of euros for something like this,” Umbach smiles. Volkswagen asks €4,200 for the Performance Package, on top of the €54,540 base price of the Edition 50. That is serious money for a Golf GTI, and just €1,000 less than a Golf R. But the fun factor more than compensates. The comparison with the Nürburgring specialists is no coincidence: test driver Benjamin Leuchter set a time of 7:46.125 minutes on the Nordschleife, the fastest lap ever recorded by a road-legal Volkswagen.
Back on public roads, the sports suspension lowers the body by five millimetres compared with the standard Edition 50. In total, that makes a 20-millimetre drop. That is significant. Thanks to the standard adaptive dampers, the sharpened GTI remains comfortable on country roads and in urban traffic. We mostly drove in Comfort mode, which proved genuinely relaxed. This GTI is no limousine, but long journeys are no problem, helped by the excellent sports seats with classic tartan upholstery. Inside, the GTI feels slightly old-school. The touchscreen has a thick bezel, the head-up display is modest in size, and the graphics still carry traces of VW’s troubled in-house infotainment era. But if any car is allowed to be a little anachronistic, it is a Golf GTI. This one in particular.
Especially since, in any driving mode, be it Eco, Comfort or Sport, it delivers serious driving pleasure. With 239 kW and 325 PS, plus 420 Nm of torque, it accelerates from zero to 100 km/h in 5.3 seconds and reaches up to 270 km/h. Exactly on par with a Golf R. VW quotes a combined consumption of 7.74 litres per 100 kilometres. We recorded 8.3 litres according to the onboard computer. One final treat awaits in Sport mode: press and hold the menu tile and the Nürburgring Nordschleife appears, allowing you to activate a dedicated setting. In this mode, the seven-speed dual-clutch gearbox holds gears longer through corners to maximise drive on exit. So if you are overtaken on a country road by a Golf GTI Edition 50 with Performance Package and hear the driver shout “Pflanzgarten”, you will know exactly which mode is engaged.
A decade is a long time to dedicate to anything. So much can change in ten years that it takes a truly driven individual, or group of individuals to repeatedly devote both their time and energy year after year to a free event.
The Toronto chapter of the Majestics Car Club is a perfect example of a group that does what it can to support its lane of the automotive lifestyle. For ten years they’ve been giving back and showing love to not only Toronto Area ‘riders, but Ottawa, Montreal and Beyond.
Now, technically, 2022 would have marked the twelfth anniversary but Covid saw fit to tweak the numbers a bit. Making this the tenth event that took place twelve years after the first. Two plus two equals 6 here but it’s fine.
Miraculously I’ve been able to attend most of them along the way. They’re a favourite event of my son’s, so I don’t see that trend anytime soon either.
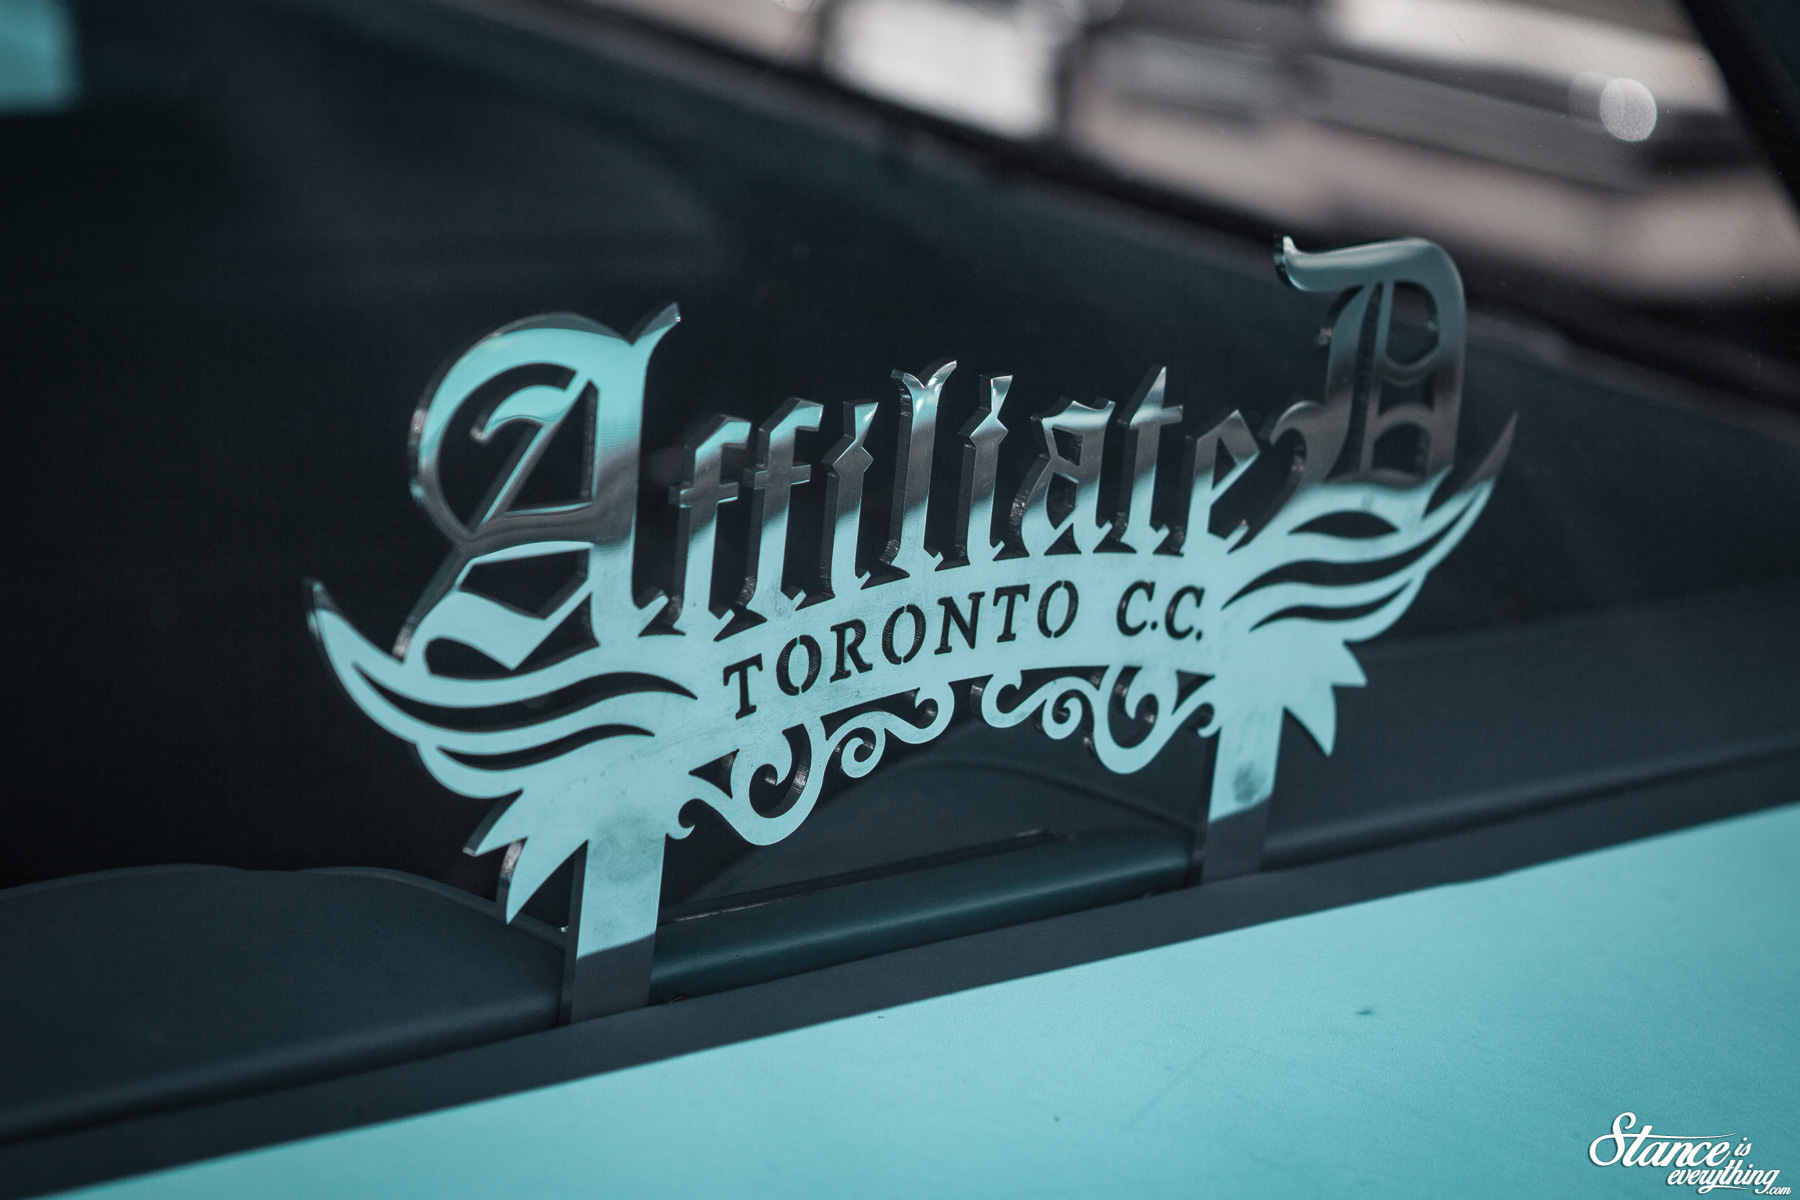
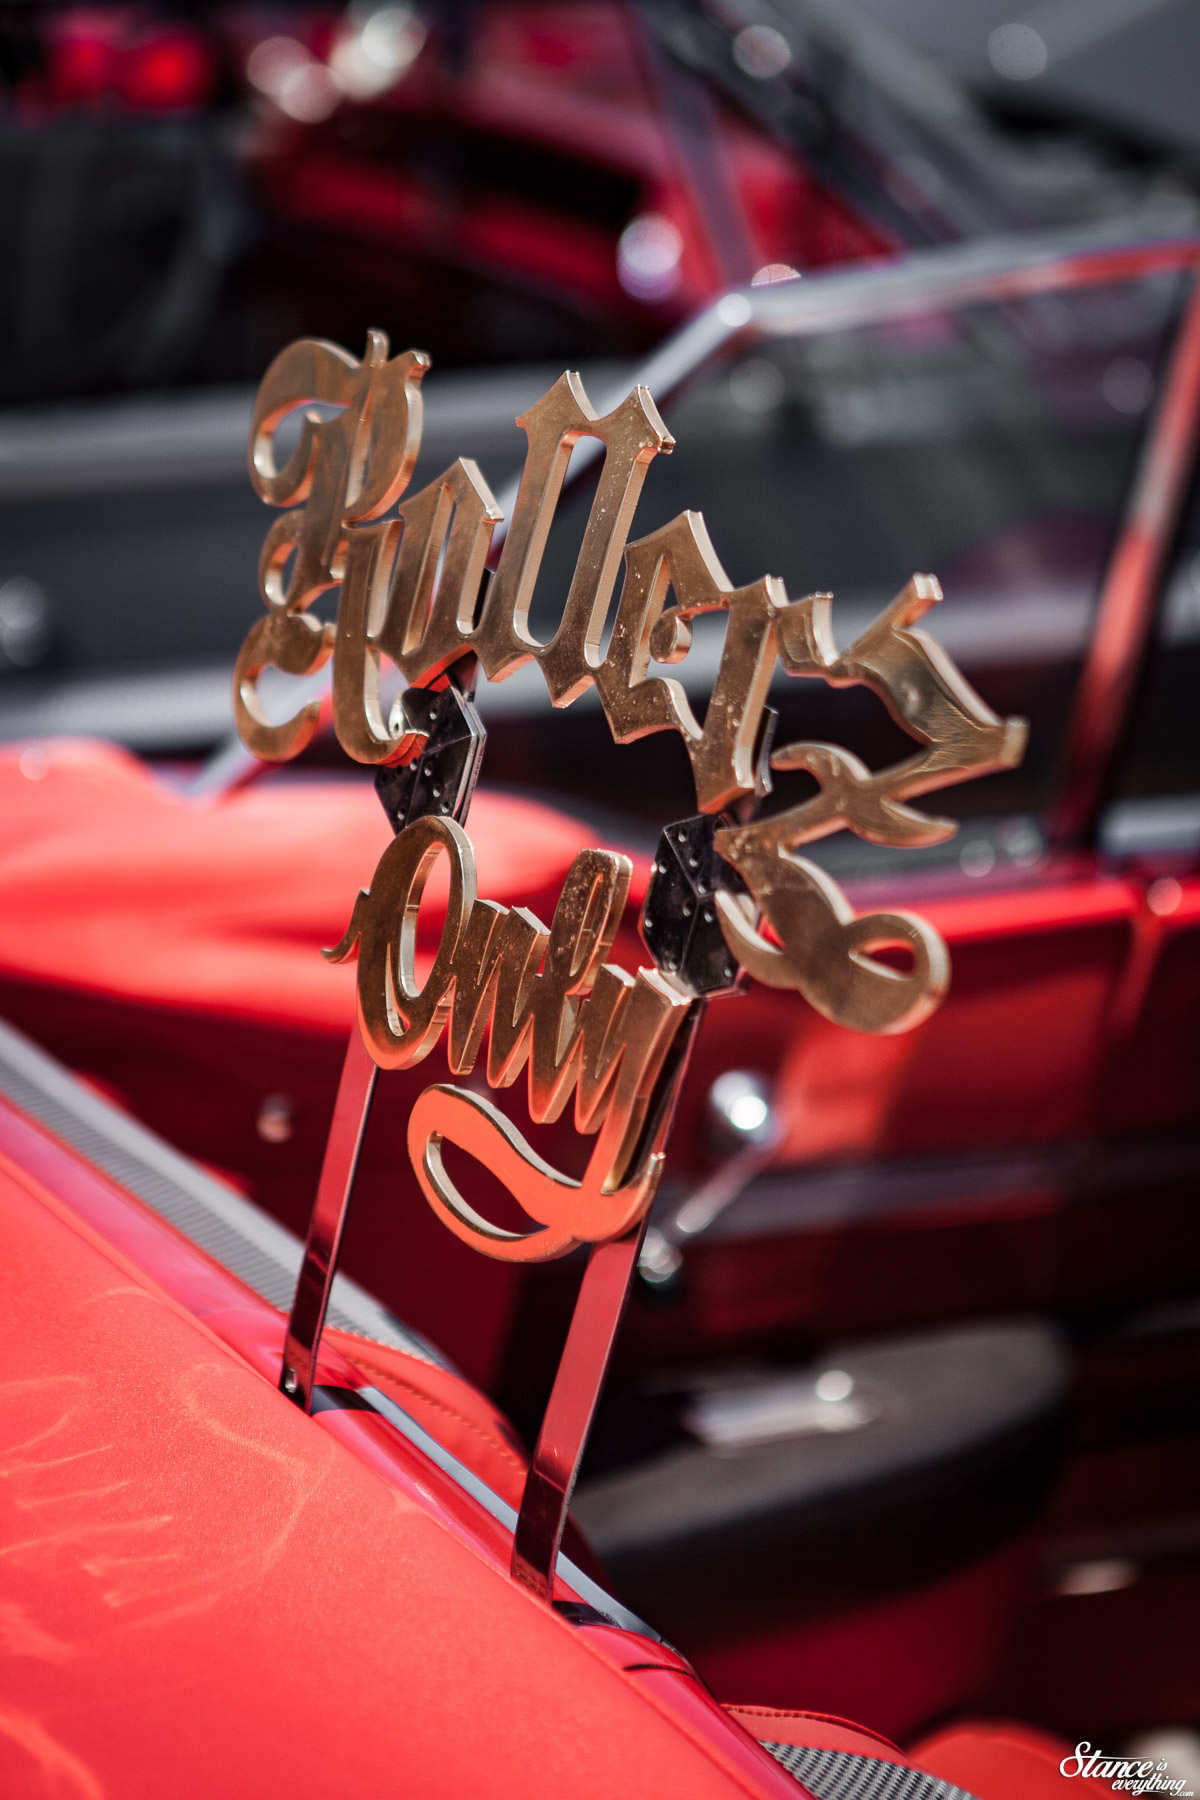
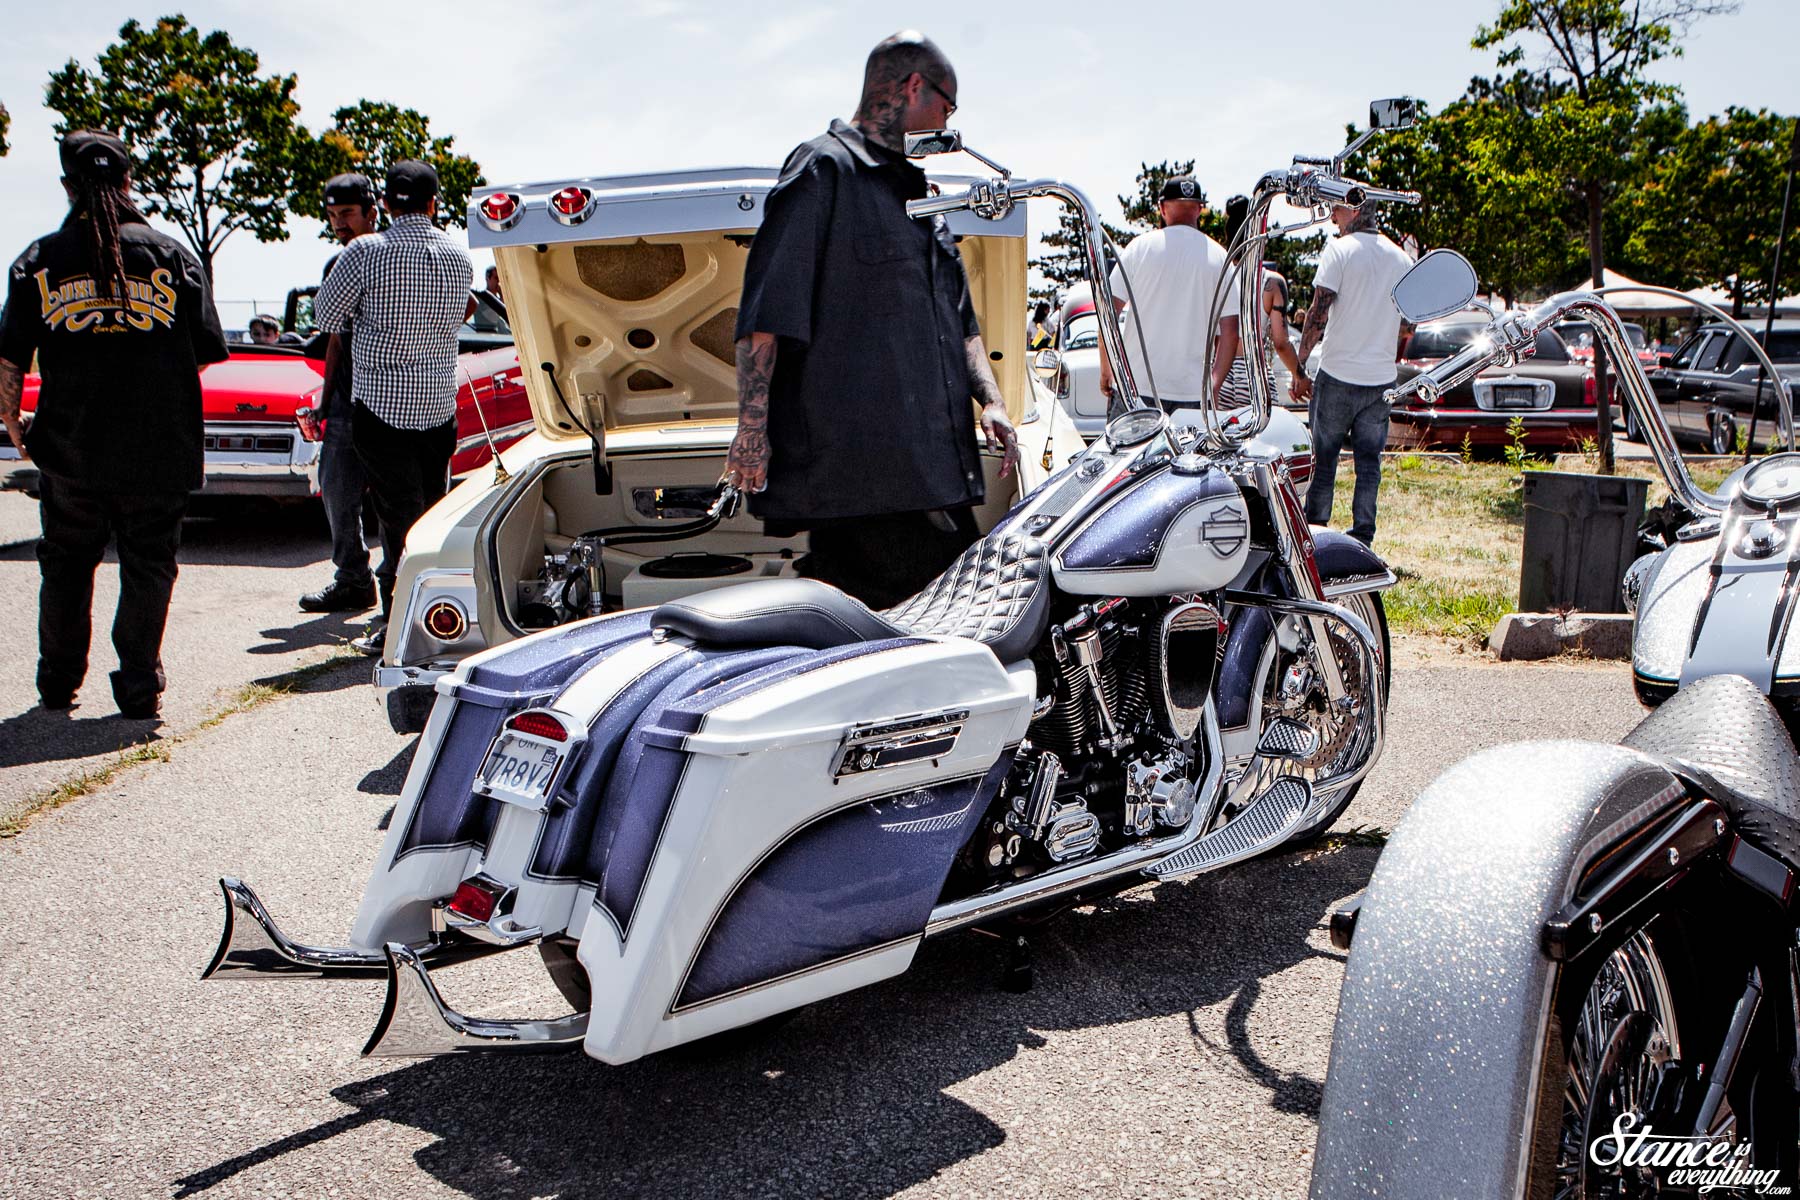
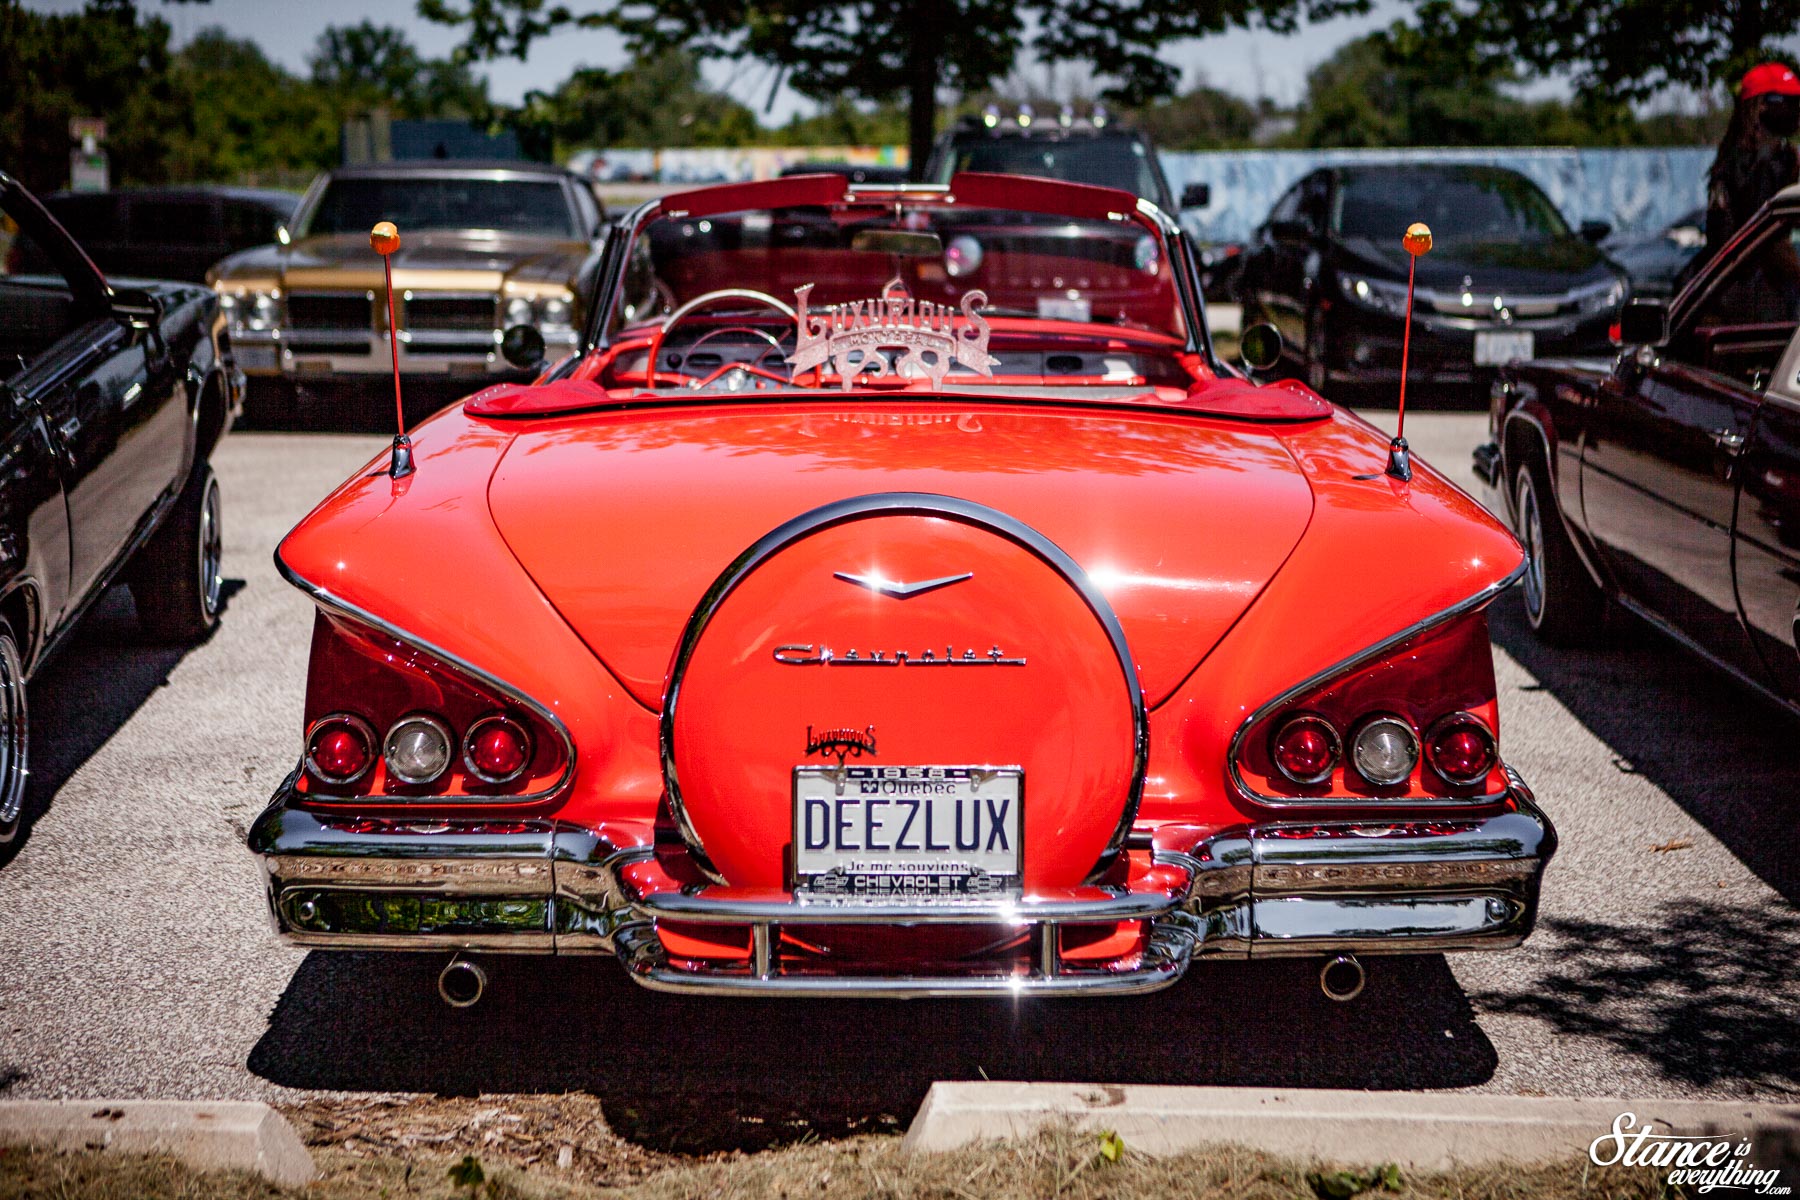
As always the BBQ was held at a park down by the Lakeshore, west of the City of Toronto. The Majestics were present, of course, alongside other notable local crews such as Luxurious, Rollerz Only and Affiliated.
There was also a great presence from Oldies, and Aftermath a club that was established fairly recently.
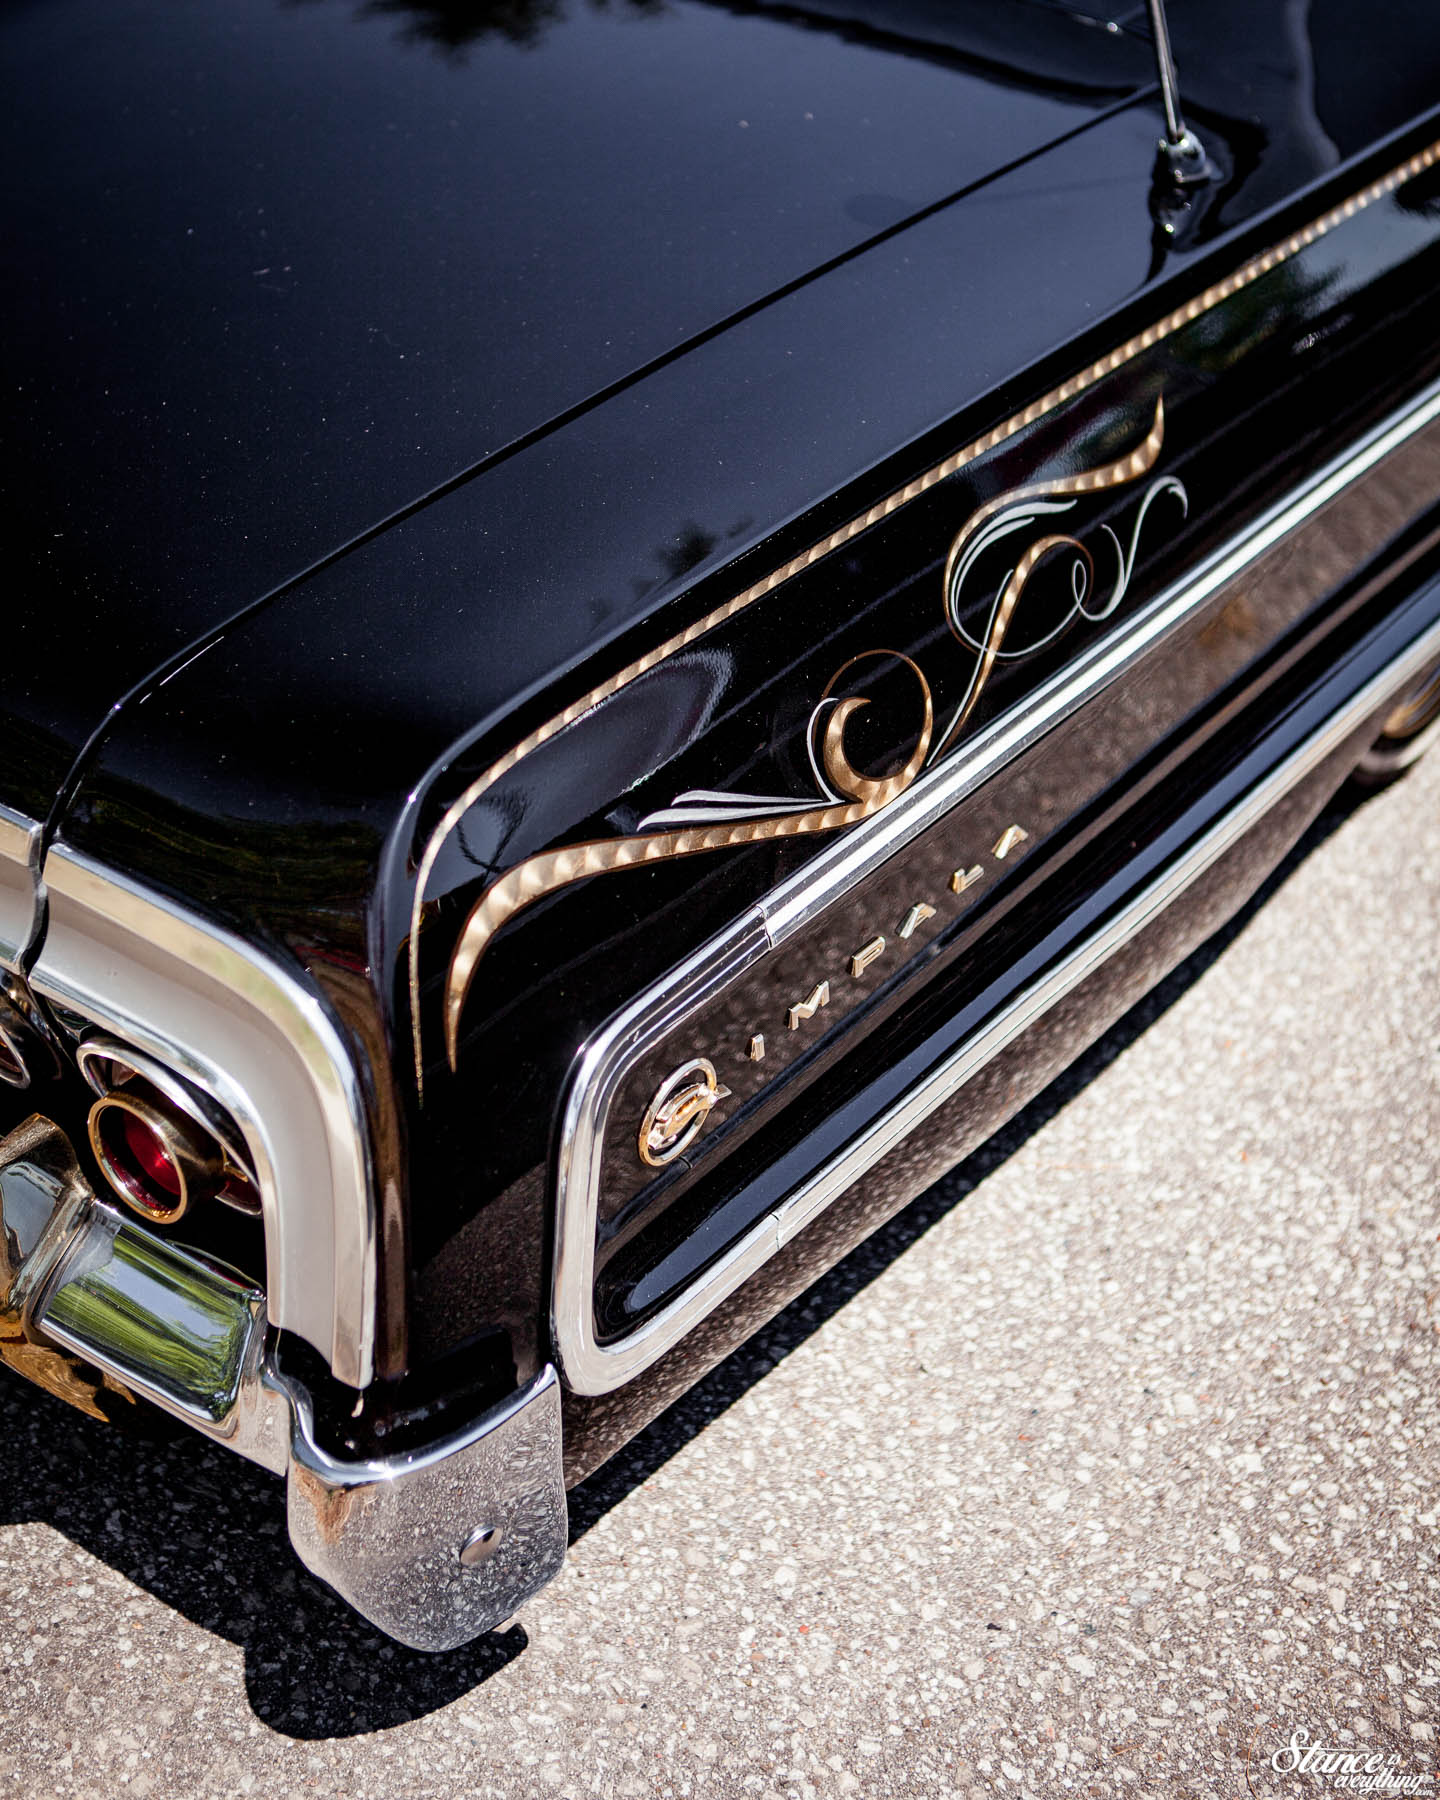
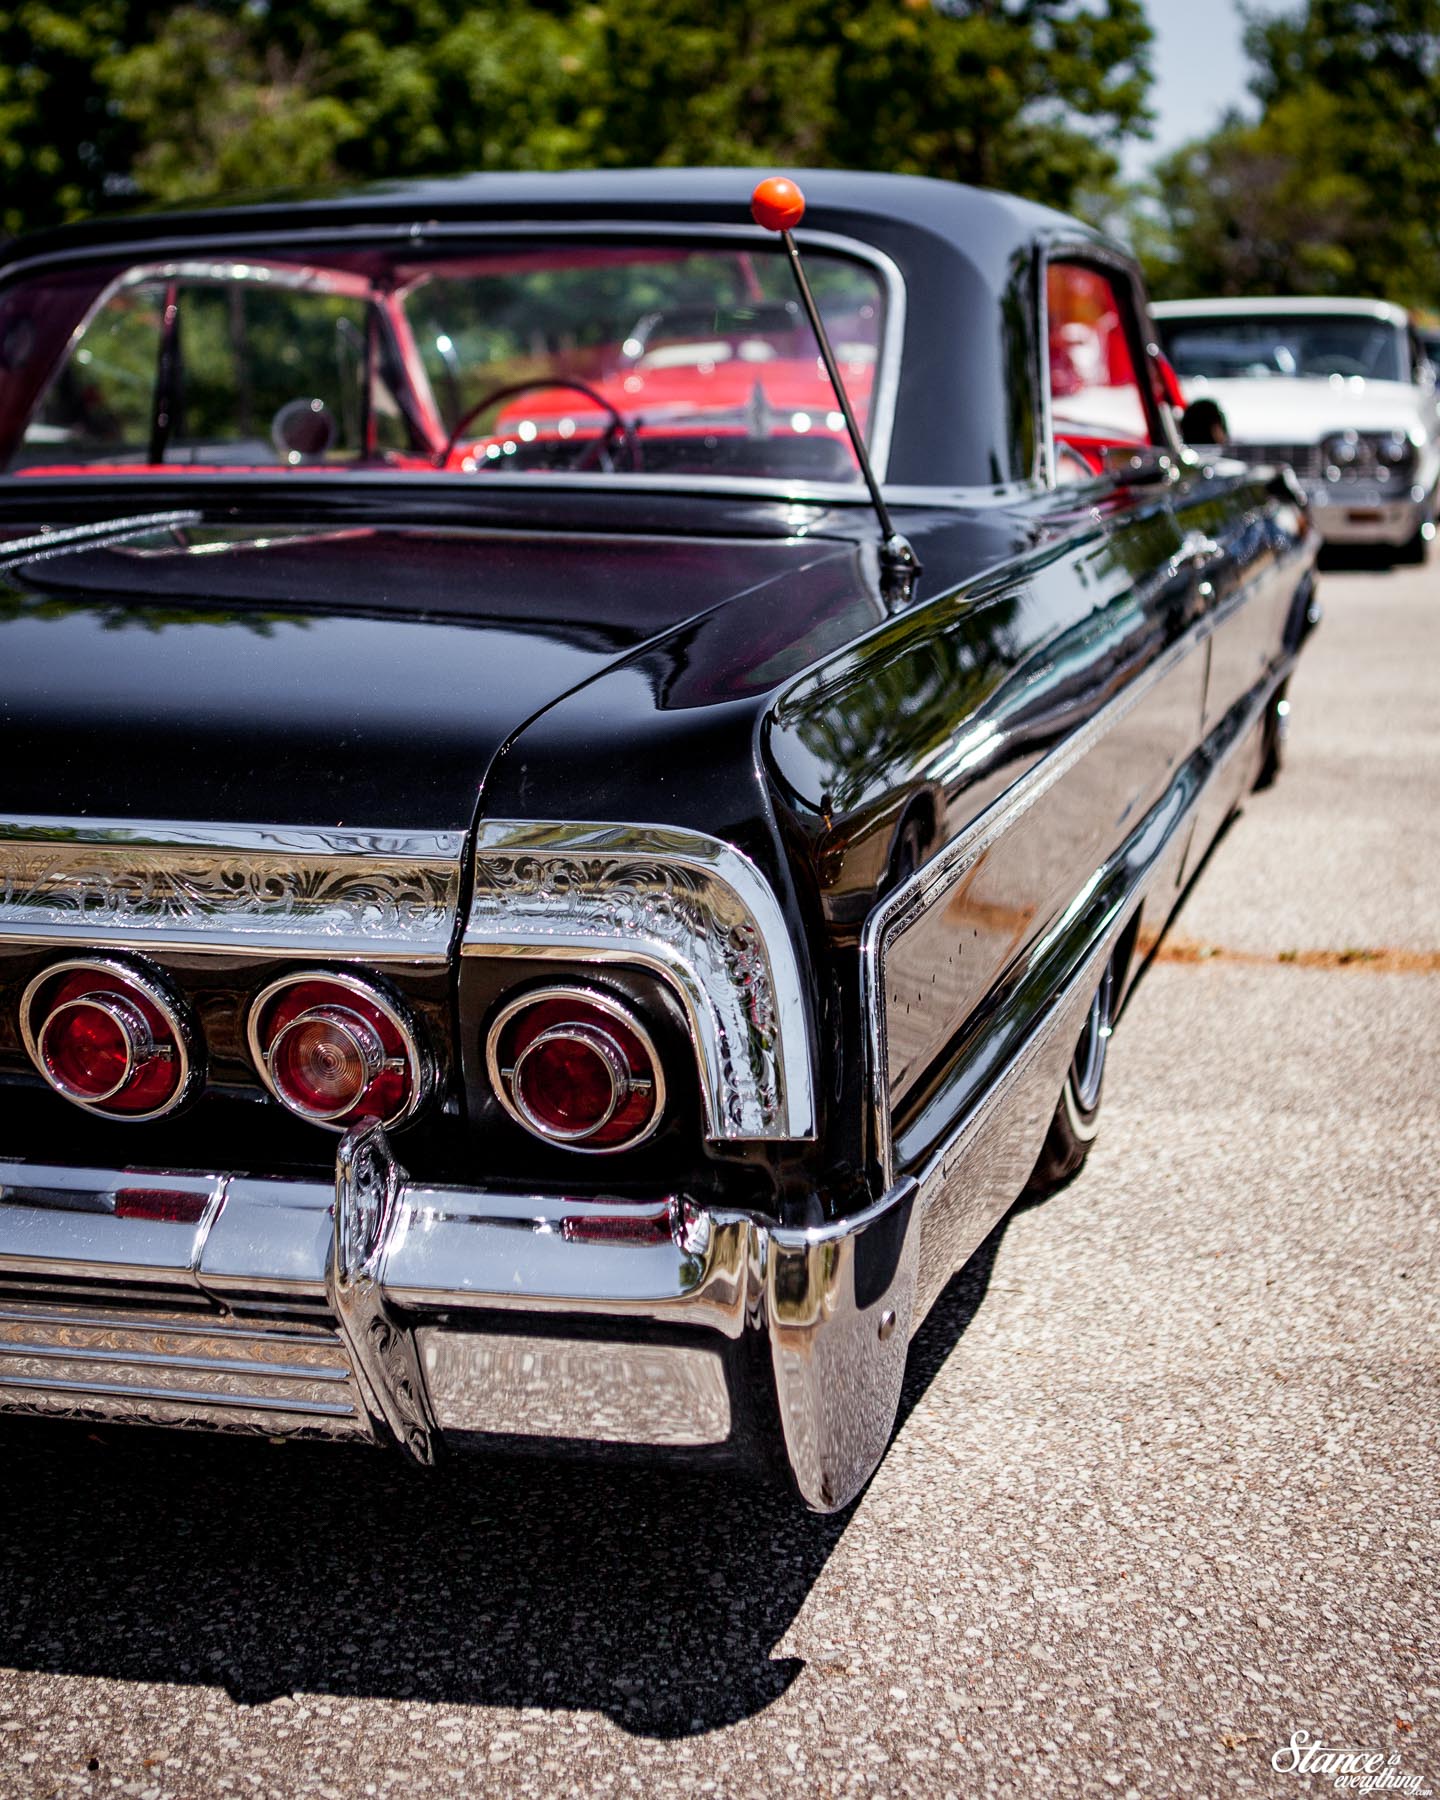
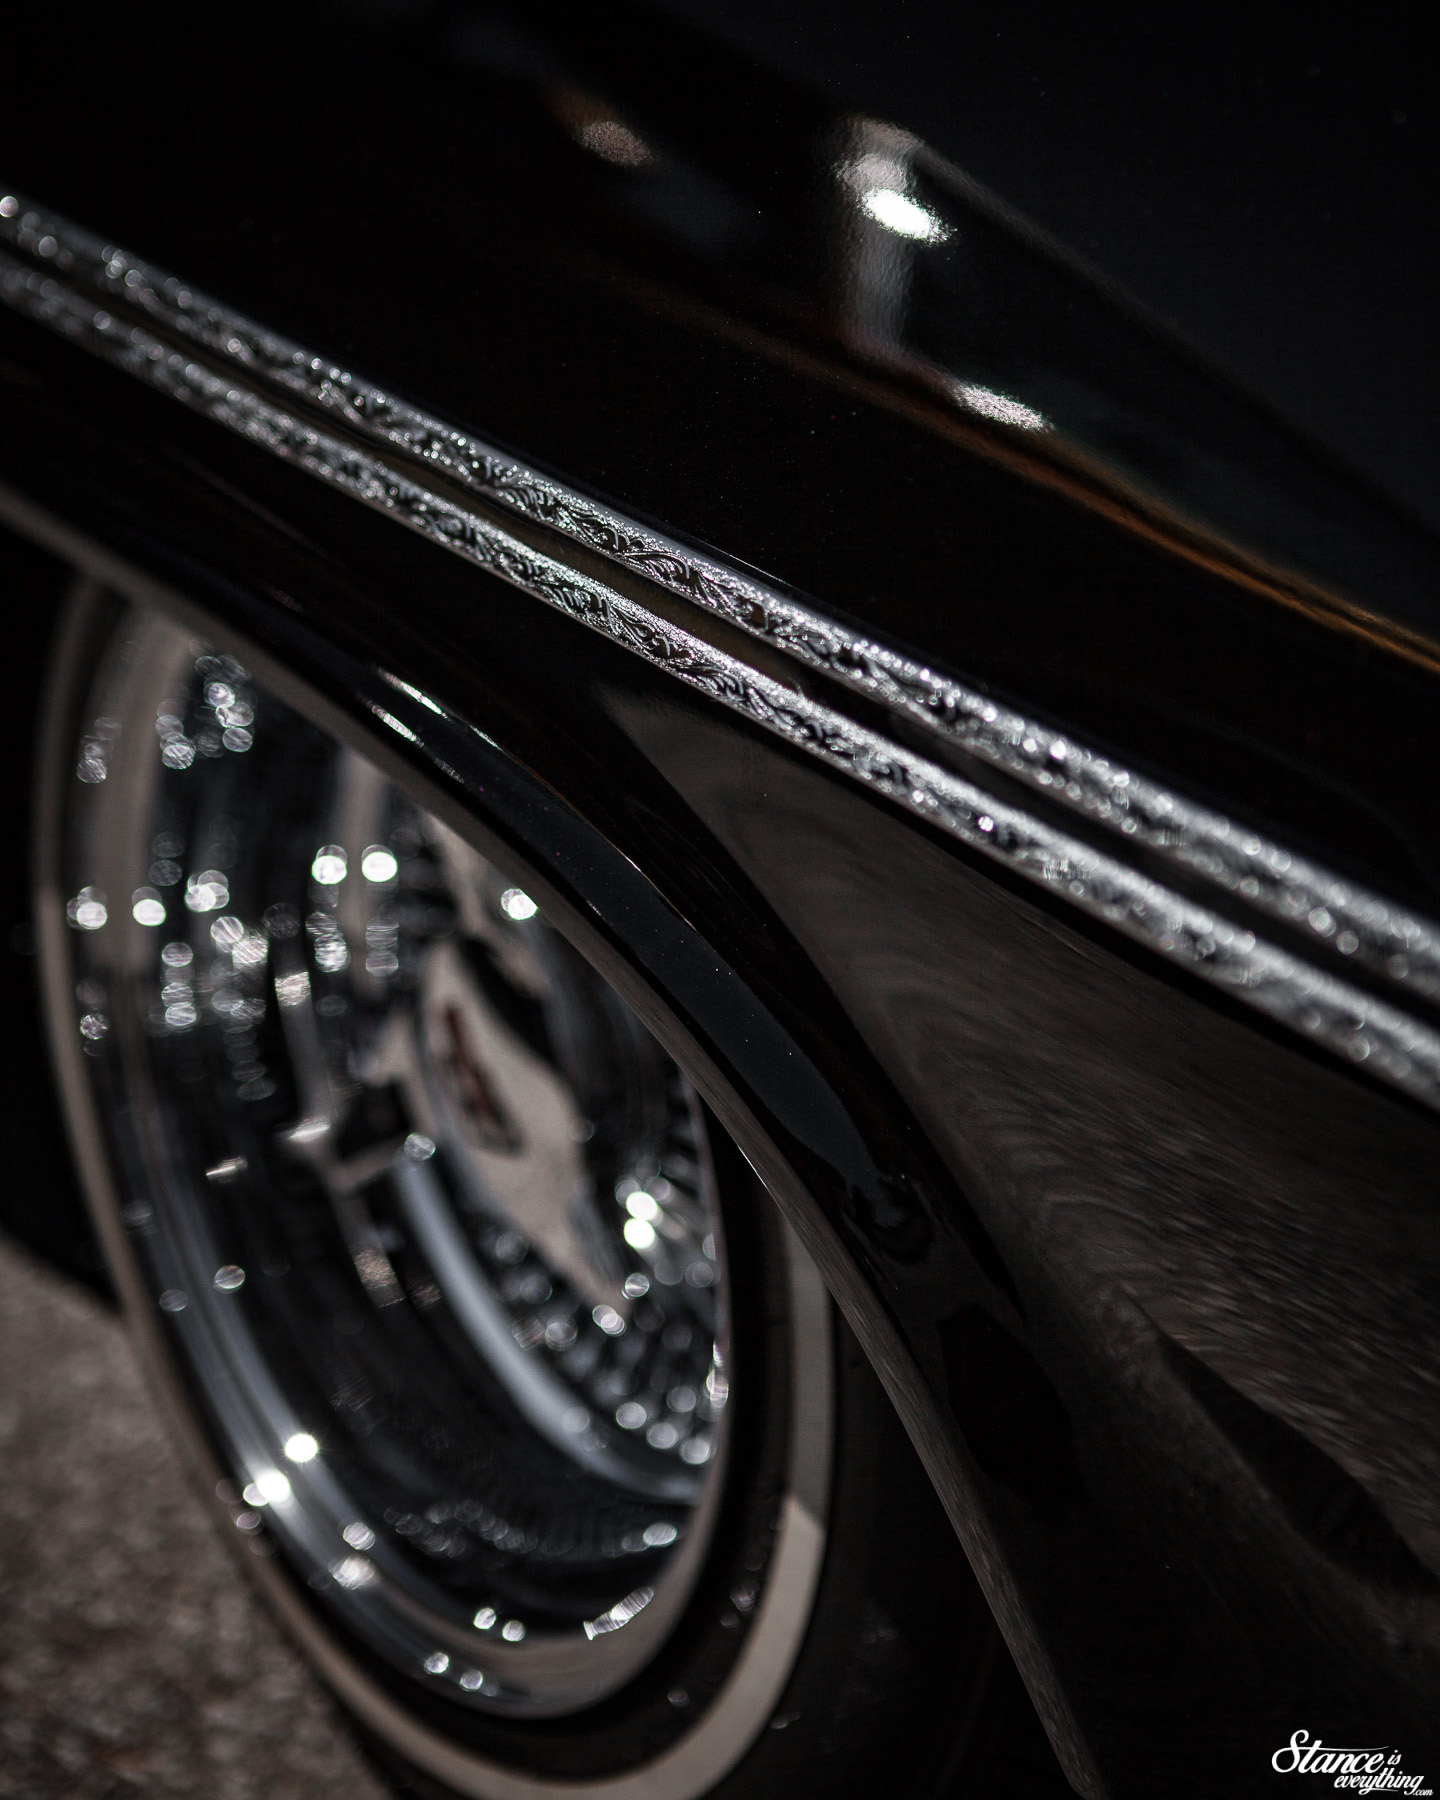
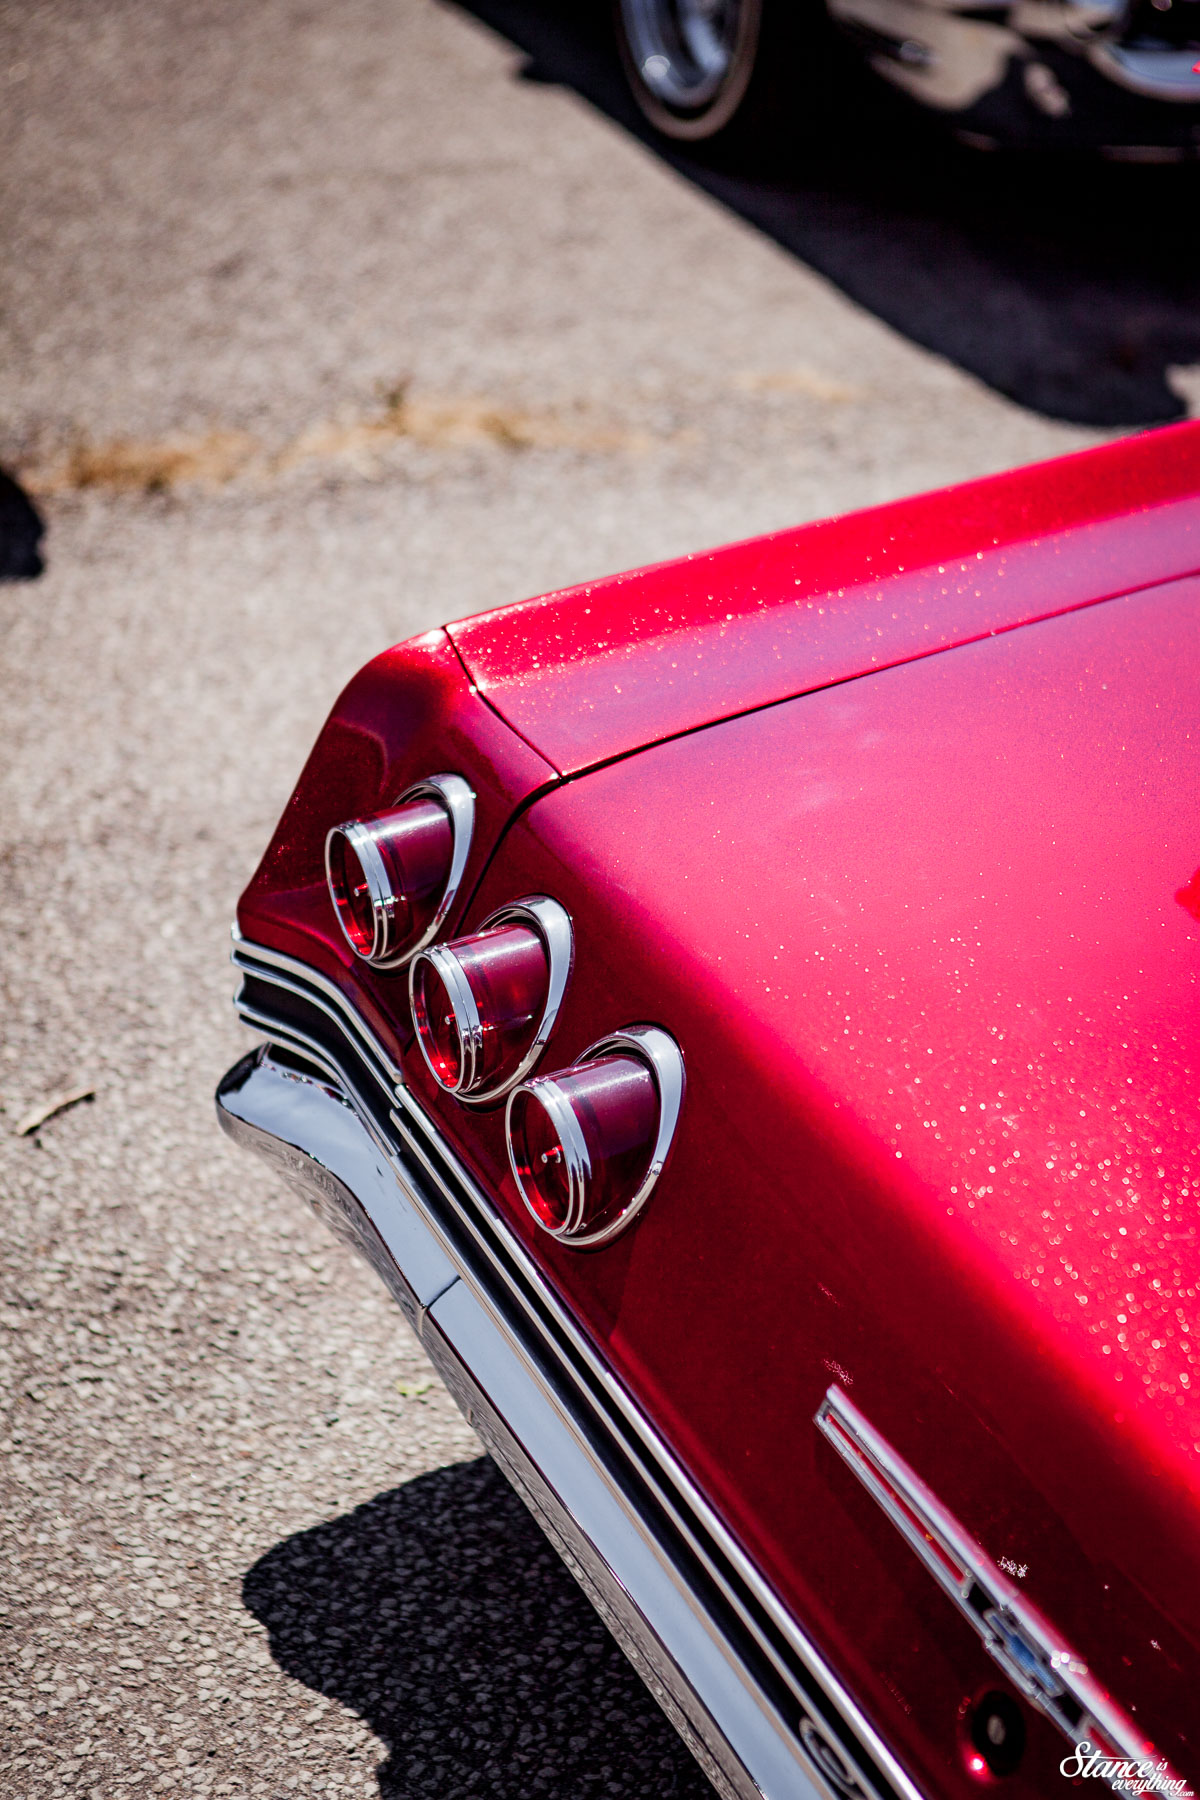
Many of the cars from Aftermath are fairly familiar. I’ve probably taken a very similar photo of this car every year I’ve seen it. It’s hard to resist though. Look up lowrider Impala in the dictionary and this car ticks off all the boxes. Chrome, wires, hydraulics, stereo. Done exquisitely.
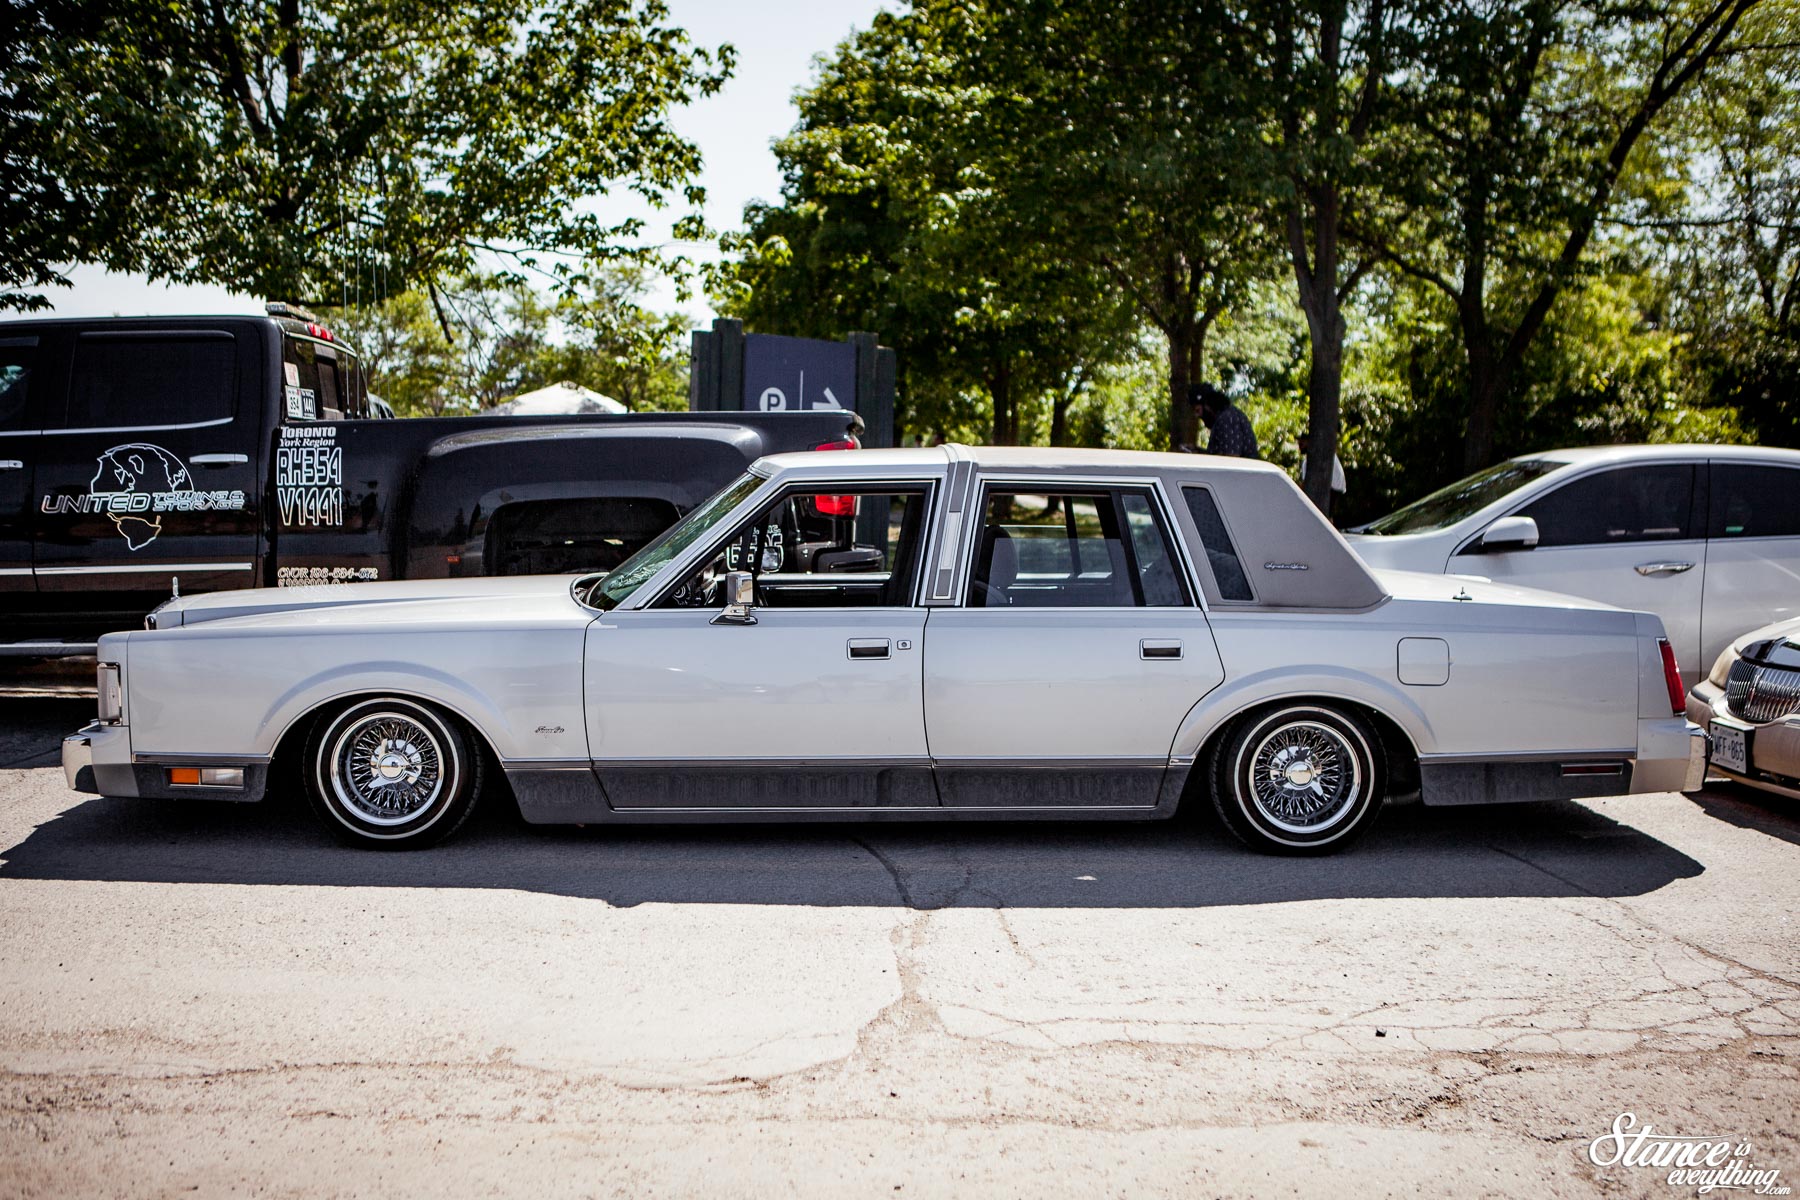
On the other side of the lot “Oldies” parked something a little different alongside a few of their classic Bombs. Trackers in general are rare birds here in Ontario. Seeing them outside of an event is pretty much something that never happens.
I have no idea where they managed to find one so darn clean. As the plates stated; nothing too crazy was done to this one, they just kept it G. Maybe for the next event, they’ll bring out a green Foxbody drop on gold wires?
I can hear Computer Love playing now.
As I turned away from the Geo I was shocked to see just how many cars had filled the venue. It seemed like the roll-in of vehicles was non-stop throughout the day.
The group has never used this parking lot before and may have already outgrown it.
Many returning events have suffered from the after-effects of Covid with attendance numbers on the decline. This BBQ didn’t have this issue, far from it really. They actually had to start parking cars on the street in an attempt to keep everyone at least in the same vicinity.
I don’t have exact numbers, but I wouldn’t be surprised if the Majestics said it was one of the largest they’ve held thus far.
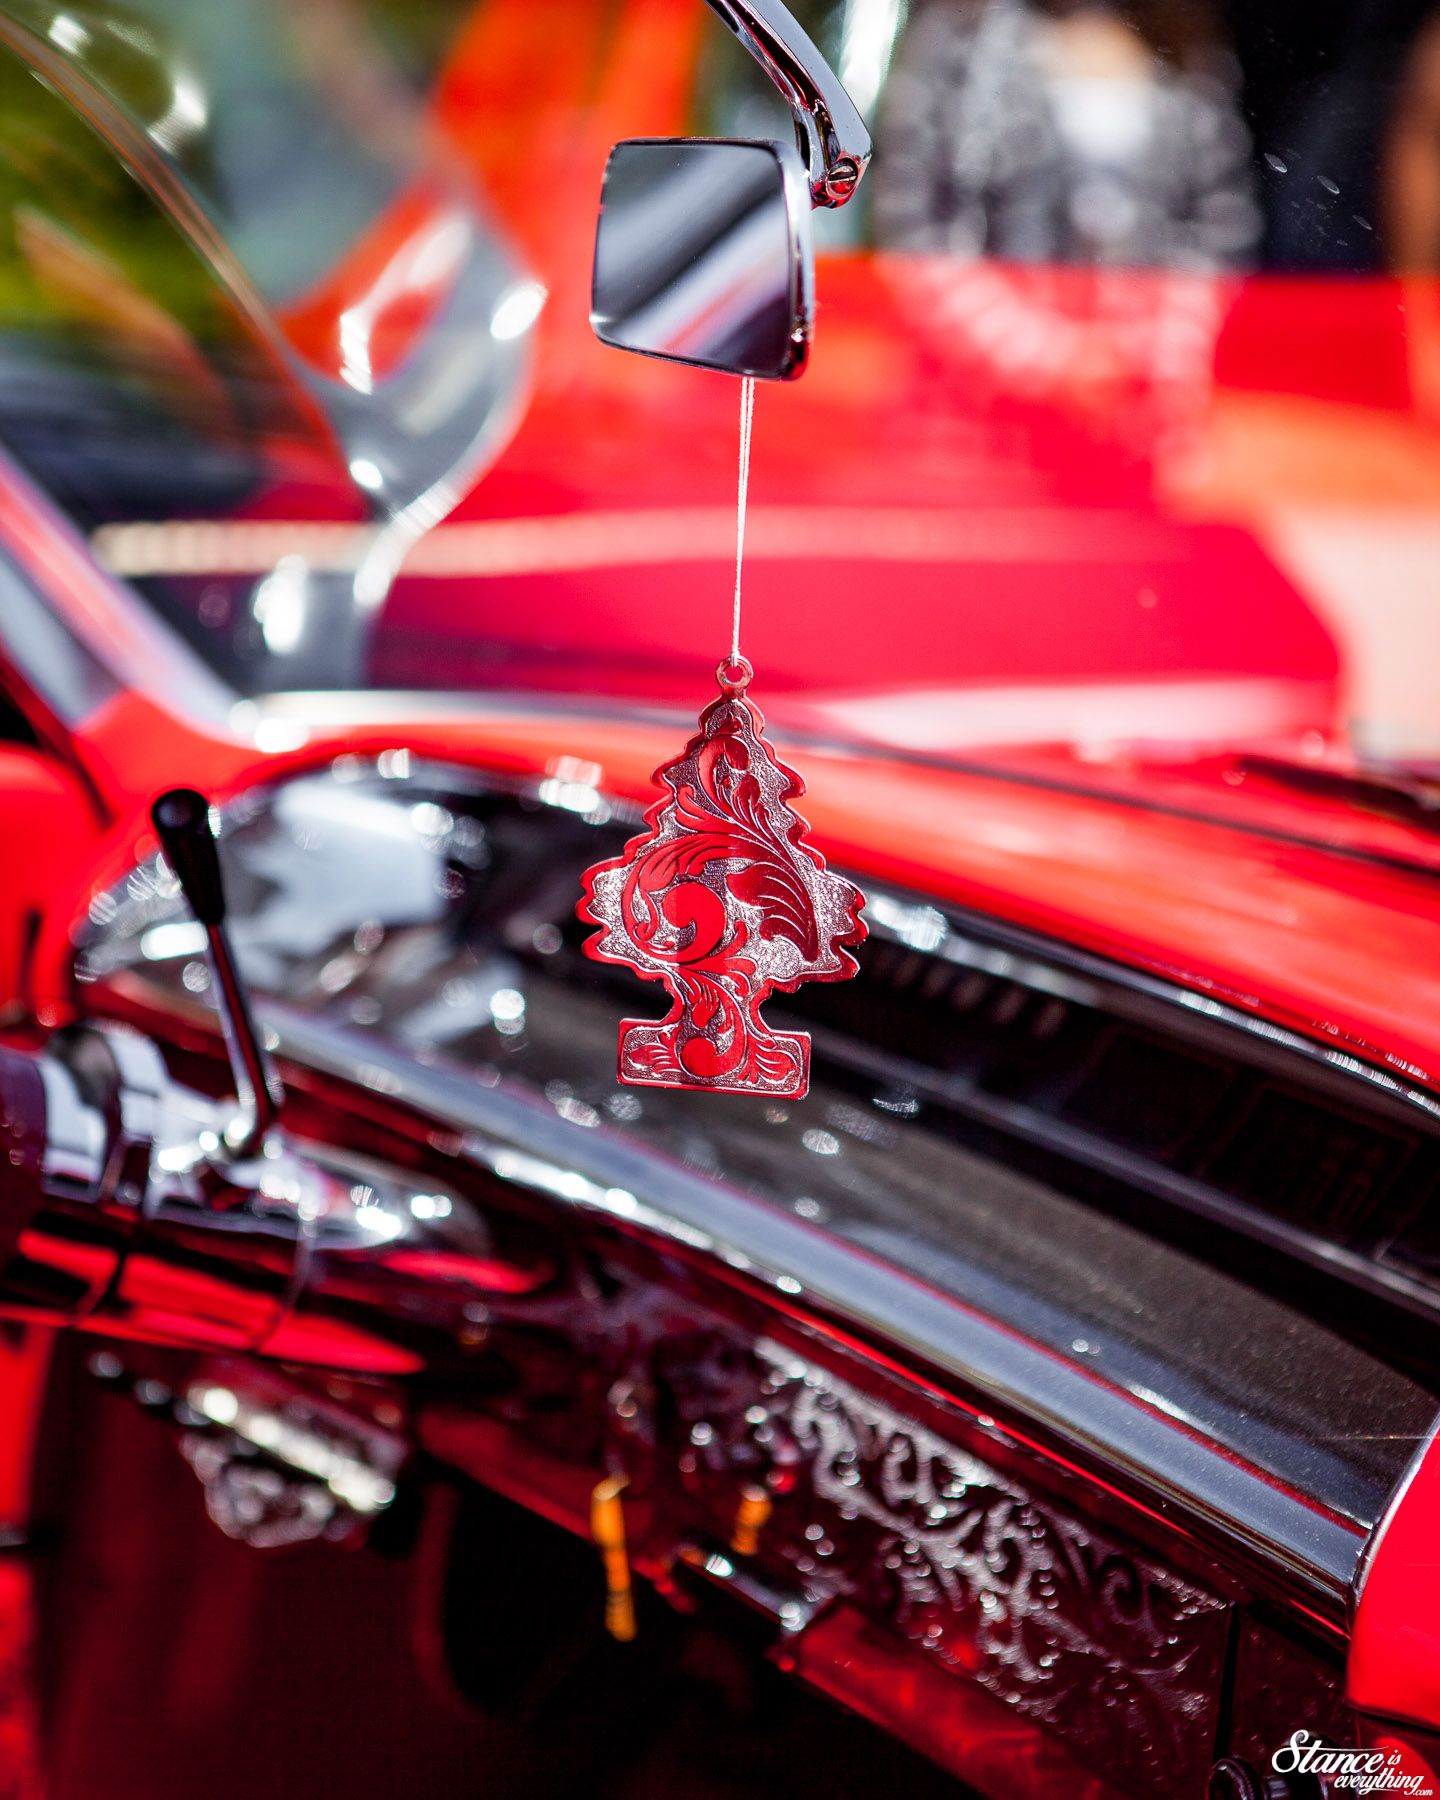
As a photographer and clear fan of lowriders, more cars mean more opportunities to capture the wealth of details owners pore into these cars. If anything I had a bit of an issue hyper-focusing on some cars at the sacrifice of bringing a broader coverage.
So if I did miss your car my bad, no intended slight, I’m just easily distracted by shiny things.
As you can see, there was an endless supply of shiny things.
Impalas and wires abound, which is more than ok by me.
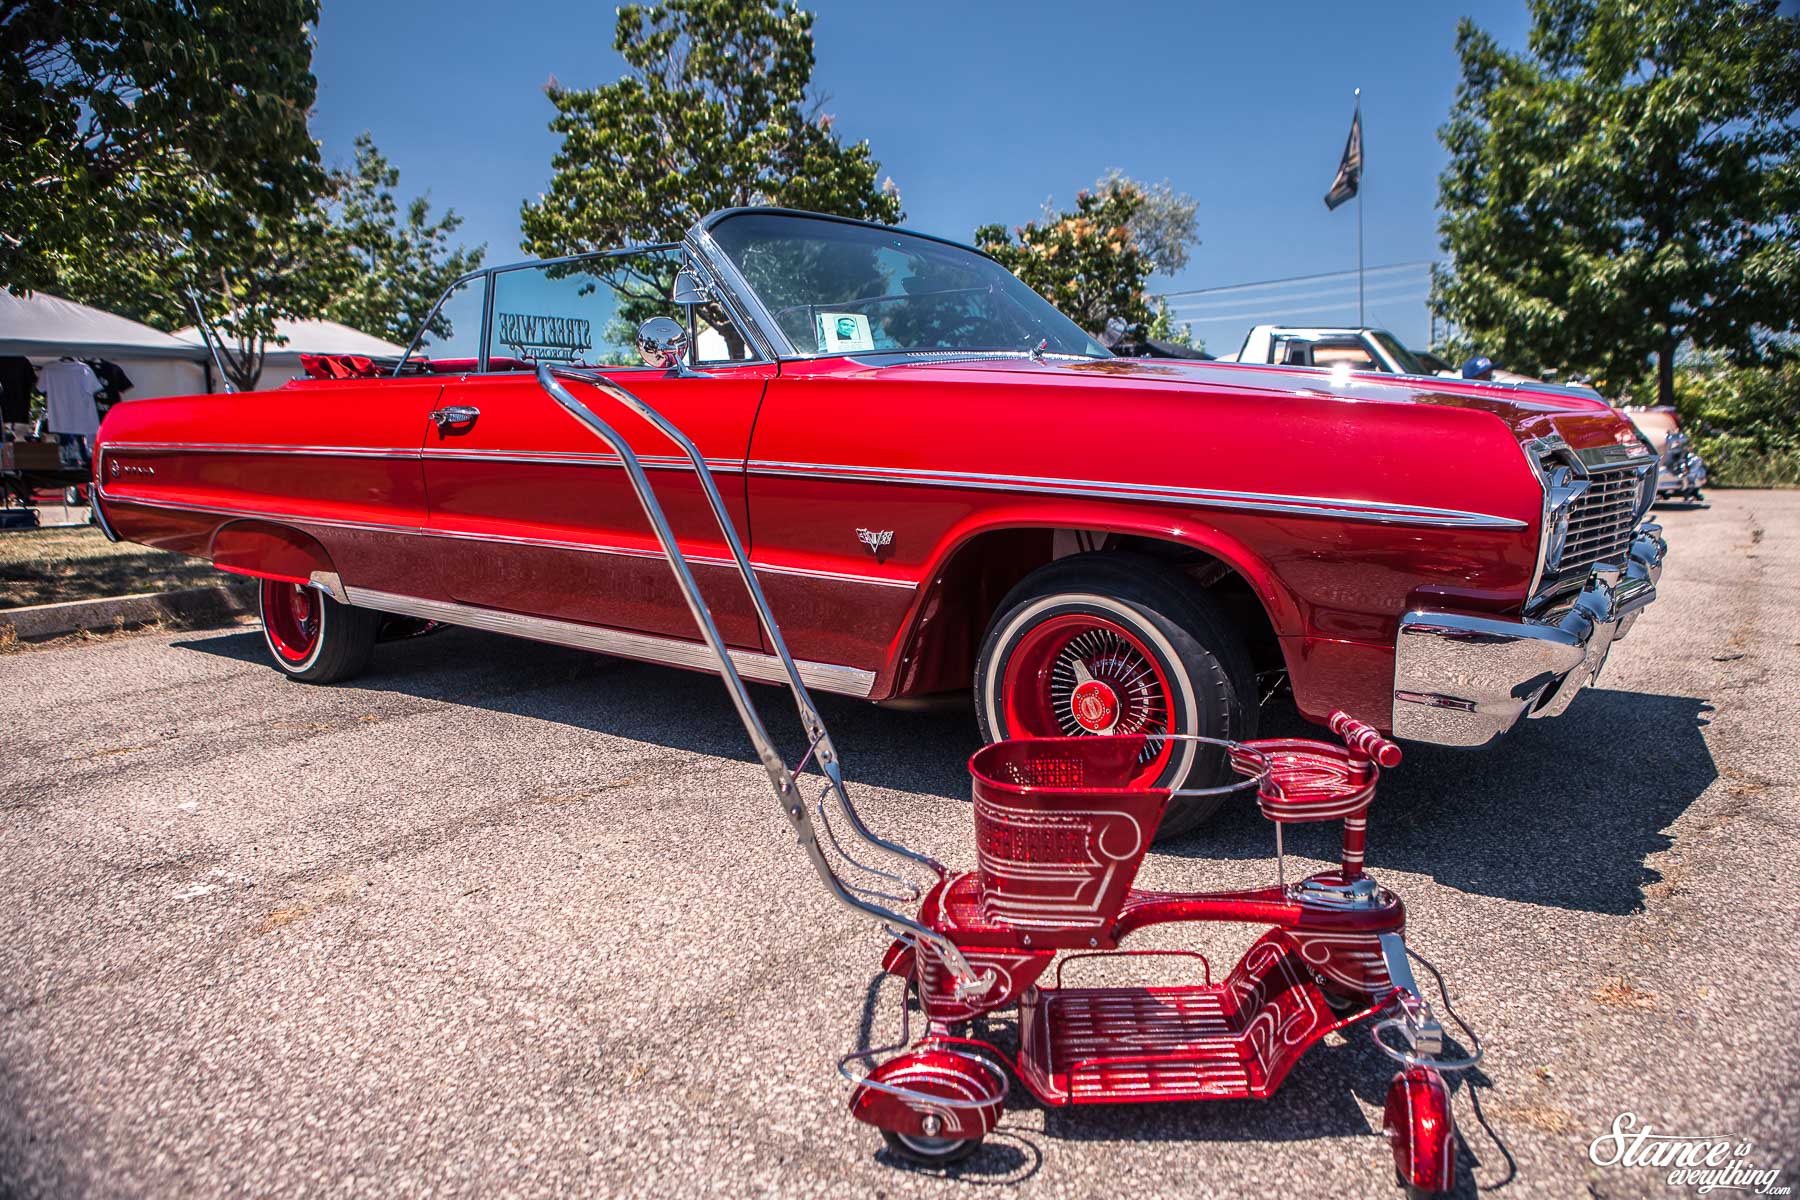
This stroller was pretty rad too. I’ve wanted to build something cool for my son to go with my project, but let’s be honest by the time I finish I’m going to just have to build him a car.
You may have noticed that this post is fairly light on specifics pertaining to each car because quite honestly, I’ve broken down the science of these cars before, and it’s really not required.
With these cars, it’s just easier to let the photos do the talking and give those of you unable to attend the opportunity to take it all in.
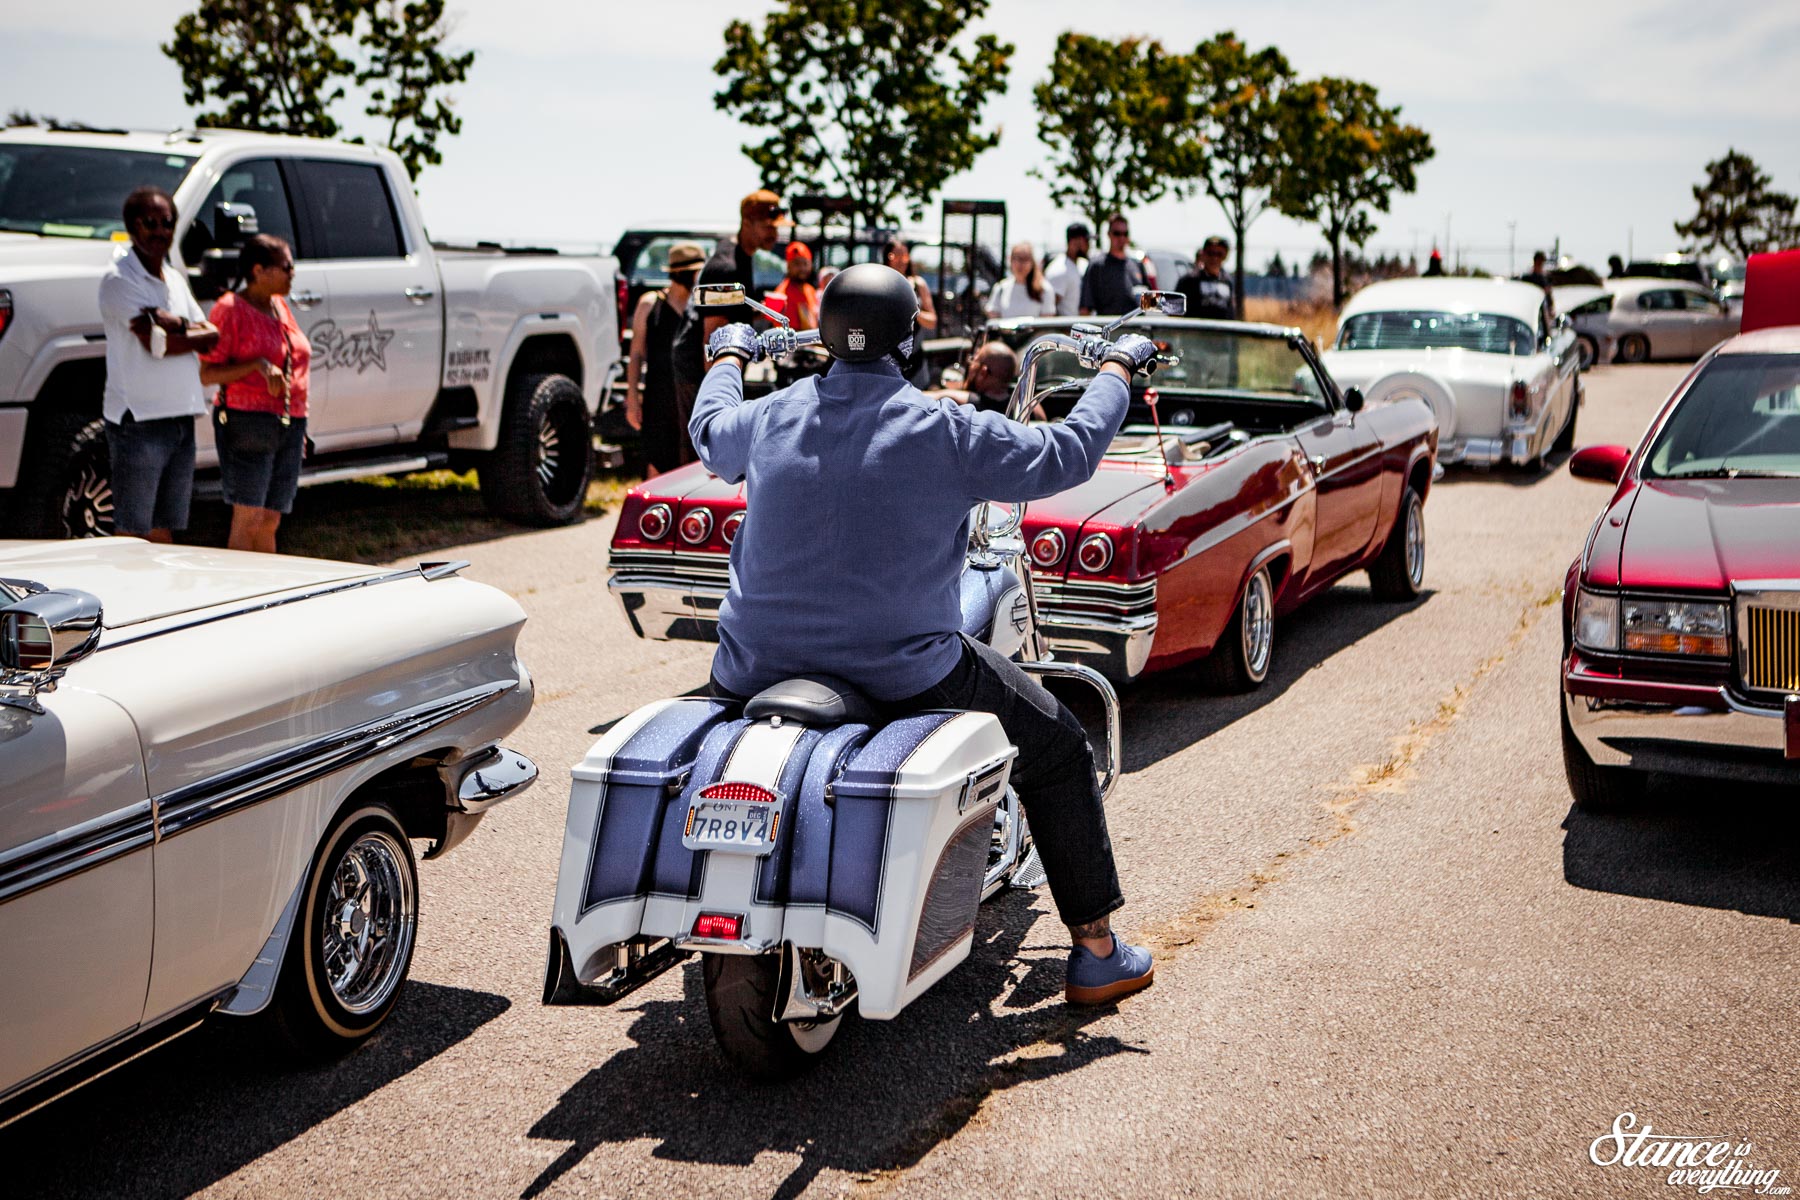
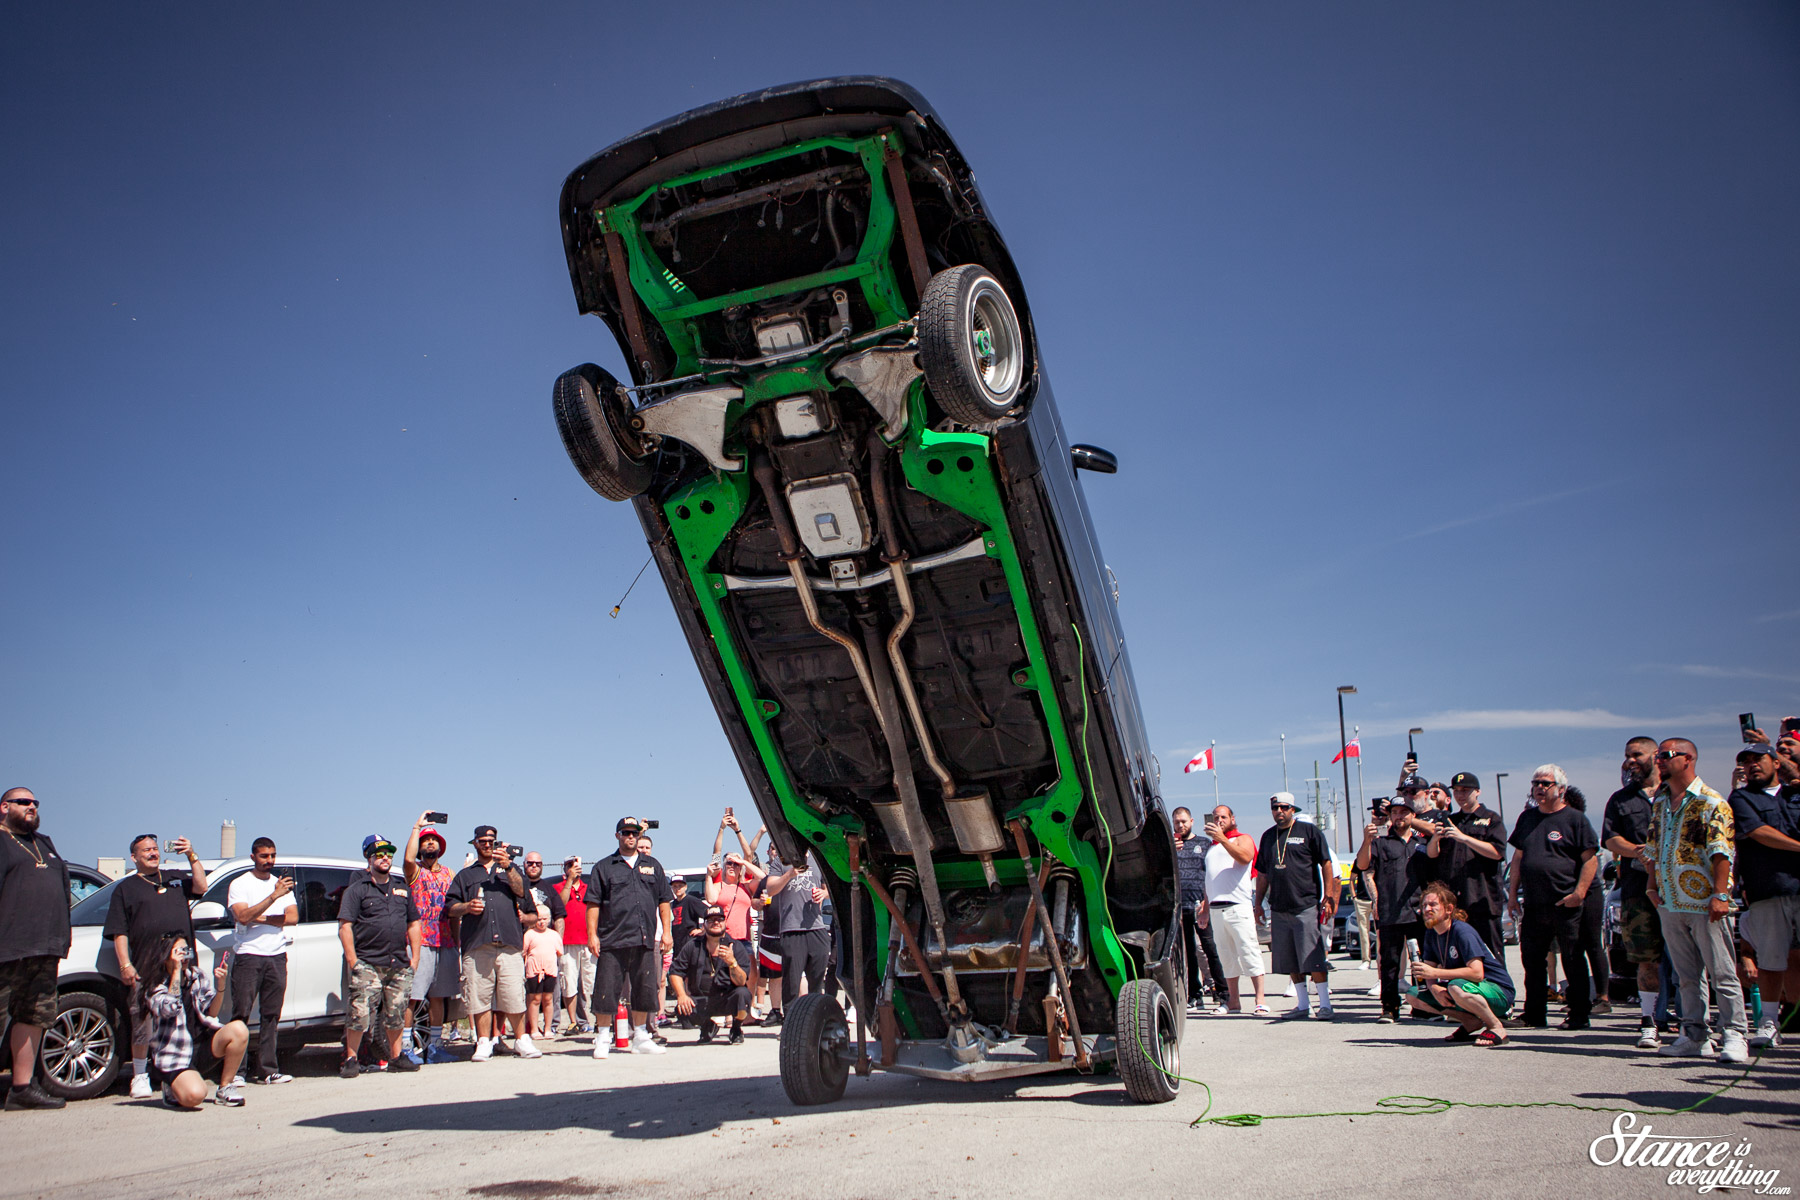
Yes, taking it all in includes the fan favourite hopping. Hopping is one of those things that you either get you you don’t.
To me it’s like drifting, these cars are built for a purpose that’s a little different than their factory intended purpose.
From a functional and practical standpoint, it might not make a whole lot of sense, but it’s incredibly cool all the same. Life’s too short not to do what you love, even if some people will never get it.
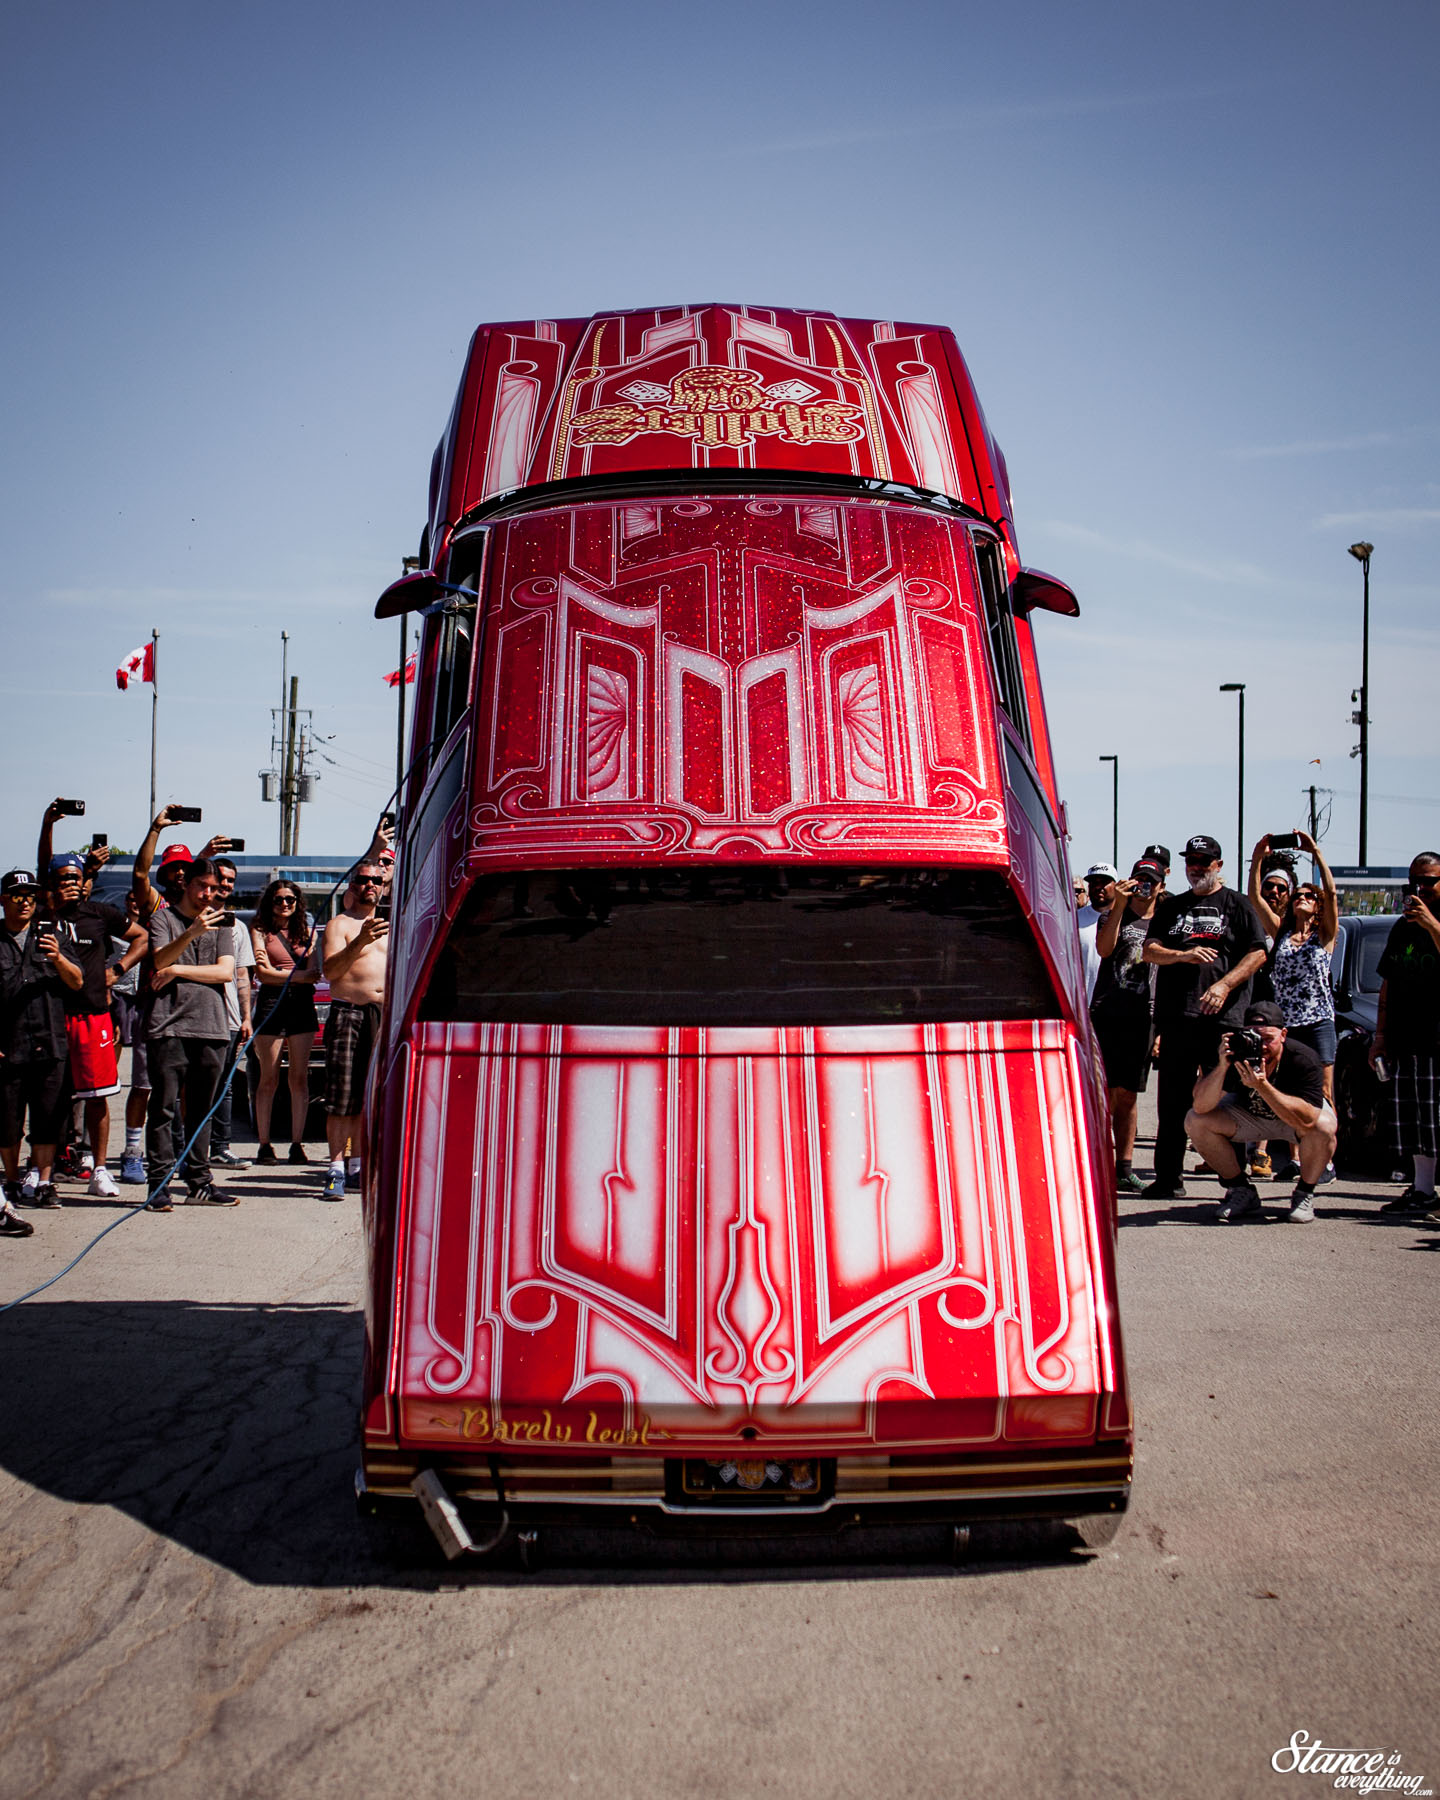
There’s also a serious amount of time and dedication put into these cars to make them do what they do so well. As someone that appreciates fabrication, I love seeing cars hit bumper.
If you ever have a chance to see it first hand I suggest it.
So as always, my hats are tipped to the local lowrider community for their welcome and hospitality. See you at the next one.
A remarkable 80% of car owners report substantially reduced exterior damage after using paint protection film (PPF).
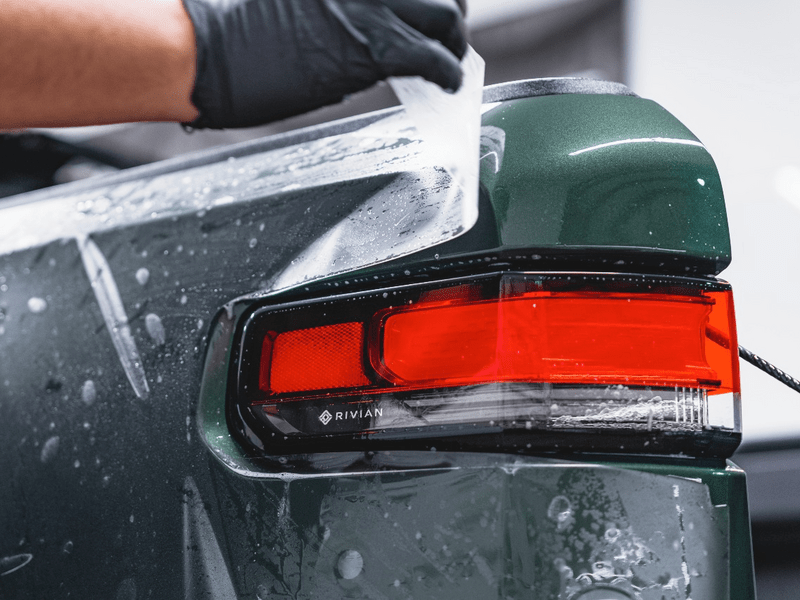
Paint protection film installation has revolutionized how vehicle owners keep their rides looking fresh. Your car gets an invisible shield that acts as a physical barrier. This barrier stops stone chips, minor scratches and road debris from ruining the paint job. PPF works like a superhero cape for your car–you can’t see it, but it packs serious protective powers!
This piece breaks down everything about car paint protection film–from selection to application techniques. You’ll learn about DIY installation savings and professional service value. Let’s take a closer look at the details!
The Dual Role of PPF: Style and Shield
Paint protection film does way beyond just safeguarding your vehicle. PPF serves a double purpose that makes it worth every penny you invest.
How PPF Boosts Appearance
Paint protection film’s magic lies in knowing how to improve your car’s looks. Modern PPF products add a glossy, polished finish that makes your vehicle look freshly detailed all the time. High-quality PPF keeps light transmittance above 90%, which preserves your car’s original paint color’s vibrancy and depth.
Most car owners don’t know that PPF can reshape their vehicle’s entire aesthetic. Premium films create a smooth, uniform finish that brings out your car’s contours and lines. Unlike wax or ceramic coatings, PPF merges with your vehicle’s surface and mimics the original paint texture while adding visual appeal.
PPF doesn’t just preserve your car’s existing look. Today’s advanced options let you customize your style:
Gloss finish – Boosts your car’s color depth and clarity with a high-end, lustrous sheen
Satin/matte finish – Gives glossy paint a trendy, sophisticated matte appearance that diffuses light reflection
Colored PPF – Provides OEM-inspired colors with smooth surfaces in gloss, satin, and metallic finishes
On top of that, modern PPFs’ self-healing properties keep that “just detailed” look without frequent polishing or waxing. Minor swirl marks and light scratches vanish when exposed to heat from the sun or even your hand.
Xpel Srealth™ specialty films can turn a glossy painted surface into a refined matte finish. This feature adds impressive visual versatility to PPF beyond its protective qualities.
How It Protects Your Paint
PPF builds a strong shield against the daily road hazards your car faces. Its elastomeric polymer construction absorbs impacts from rocks, gravel and road debris that would typically damage paint. This invisible barrier, typically 6-8 mils thick, takes the hit to protect your original paint.
Think of PPF as body armor for your car. Chips and scratches hit a resilient sacrificial layer before reaching your paint. The film has multiple layers of material that block harmful contaminants. This layered protection makes road hazards bounce off instead of leaving permanent damage.
PPF also provides remarkable defense against:
UV radiation – Blocks up to 99% of harmful rays that cause paint fading and oxidation
Chemical exposure – Fights damage from bird droppings, tree sap and other corrosive substances
Environmental stains – Stops pollutants that would otherwise permanently mark your paint
The self-healing technology in advanced PPF might be its most impressive feature. These films use elastomeric polymers that react to heat, which lets the material reshape itself and remove minor scratches. After a light scratch appears, park in the sun or use a heat gun and watch the mark disappear within seconds.
Certain PPF options’ hydrophobic properties add another practical benefit. Water beads off instead of sticking to the surface, which makes washing easier and keeps dirt from building up. Your car keeps its showroom-fresh look between cleanings.
Modern car paint protection film becomes virtually invisible after professional installation. The transparent film guards vehicle surfaces against damage while staying nearly undetectable to untrained eyes. You get all the protection without changing your car’s appearance.
PPF’s combination of looks and superior protection makes it a smart investment for car owners who value both style and longevity. The original installation cost might seem high, but keeping your vehicle in pristine condition is worth the upfront expense.
Types of Paint Protection Films
Choosing the right protective layer for your vehicle is like picking the perfect outfit. Let’s look at the different PPF options you can use to dress your car in style.
Standard Urethane PPF
Standard urethane PPF forms the foundation of all car protection films. This clear, durable thermoplastic polyurethane (TPU) material creates an invisible barrier between your paint and road hazards. Standard PPF is about 6 mils (150 microns) thick and protects against rock chips, scratches and environmental damage.
Standard urethane PPF is the reliable workhorse of paint protection. It gives great value to everyday drivers who need simple defense without extra features. The film’s clear nature keeps your car’s original appearance with a high-gloss finish.
These standard films might not have all the fancy features of premium options, but they give excellent protection at a better price. This makes them a great choice for partial installations on high-impact areas like bumpers and hoods.
Self-Healing PPF
Self-healing PPF technology is where things get interesting. These advanced films use elastomeric polymers that bounce back to their original shape after getting scratched. Minor scratches vanish when exposed to heat, from sunlight, warm water,\ or a heat gun, as the film “flows” back into place.
The self-healing happens because these films have a special top coat that softens above 80 degrees Fahrenheit. Heat makes the microscopic polymer chains move and fill scratches before hardening again.
Different brands offer varying technology:
Soft self-healing coats fix damage quickly (often within minutes)
Hard self-healing coats need extra heat to work
Matte and Colored PPF
PPF now comes in options beyond just glossy, clear finish. Modern matte films can transform glossy paint into a sophisticated, non-reflective look. These matte finishes protect just as well as glossy ones while creating a unique style.
Colored PPF has changed the game completely. You can find solid colors, metallics and even liquid-metal effects that transform your car’s style and protect the paint without permanent changes.
Colored PPF options include:
Gloss finish for a shiny, polished look
Matte finish for a modern, sophisticated appearance
Satin finish that strikes a balance with subtle shine
Today’s car paint protection film options go beyond clear finishes. Many manufacturers now offer colored films designed to match luxury paint codes, making it possible to transform the look of your vehicle while still getting high-end protection. This means you can upgrade your style and protect your paint at the same time, without compromising on durability or finish quality.
Hydrophobic PPF
Water beads up and rolls right off hydrophobic PPF, which makes cleaning much easier. These films use water-repelling technology in their top coats to create surfaces that shed rain, mud and road grime.
Ceramic Pro’s hydrophobic PPF shows this technology at its best-contaminants just slide off. You’ll spend less time washing your car and keeping it clean.
The benefits go beyond water resistance. These films also fight stains from bird droppings, tree sap and road salt. This extra protection keeps your car cleaner between washes and helps the film last longer.
If you’d like to dive deeper, this car paint protection film guide breaks down the options in more detail to help you choose the right fit.
Factors like how you drive, your budget and the look you want all play a role in deciding what works best. We’ll walk through those considerations next so you can make a confident choice for your vehicle.
How to Choose the Right PPF for Your Car
Selecting the perfect paint protection film demands careful consideration of several factors. PPF is a long-term investment, not just a quick fix. Let’s look at what matters most when making your selection.
Consider Your Driving Habits
First and foremost, where and how you drive should guide your PPF choice. Daily commuters facing normal road conditions can typically opt for standard 6-8 mil thickness films. However, if your vehicle frequently encounters rough terrain or areas with abundant road debris, thicker films (8-10 mils) provide superior protection against scratches and chips.
Off-roaders and performance enthusiasts should consider specialized options. The “track pack” PPF configuration delivers enhanced protection specifically designed for high-speed and performance-focused use. This configuration shields areas most vulnerable to damage during aggressive driving.
Your typical driving environment plays a crucial role too:
City dwellers with well-maintained roads might need less extensive coverage
Highway commuters should prioritize front-end protection
Rural drivers facing gravel roads need more comprehensive coverage
Match Your Aesthetic Preferences
Beyond protection, your vehicle’s appearance matters too. Consequently, PPF comes in various finishes to complement your style preferences. Choosing between gloss or matte finishes depends on your desired outcome.
Gloss PPF enhances your car’s natural shine with a sleek, polished finish, perfect for amplifying vibrant colors or subtle metallic finishes. For those preferring a more understated look, matte PPF creates a smooth, satin finish that removes reflective shine for a sophisticated appearance.
Specialty finishes allow for even more customization. You can maintain a glossy, matte, satin or even custom look while securing top-notch protection. The right PPF doesn’t force you to choose between protection and style, it delivers both simultaneously.
High-end vehicles often benefit from premium films that preserve their distinctive appearance. After all, maintaining your car’s original aesthetic is just as important as protecting it from damage.
Balance Between Budget And Features
Finding equilibrium between cost and quality forms a critical part of the selection process. Premium PPF brands typically cost between $8-$10 USD per square foot and offer advanced features like superior clarity, remarkable self-healing properties and extended longevity.
In contrast, lower-quality options ($2-$5 USD per square foot) often lack critical features like self-healing capabilities.
Consider these factors when evaluating the price-value relationship:
Material quality – Higher-quality films generally cost more, but offer better protection and longevity, potentially more cost-effective over time
Longevity and warranty – Some premium films include warranties up to 12 years
Features vs. needs – Self-healing and hydrophobic properties add cost, but may be worth the investment depending on your priorities
For high-performance and luxury vehicles, investing in thicker PPF helps maintain value over time. Conversely, for older or less expensive vehicles, more affordable options might make better financial sense.
Professional advice can prove invaluable during this process. Experts can provide tailored recommendations based on your specific needs, driving habits and local environment.
They’ll help you determine if that premium hydrophobic coating is worth the extra cost for your situation.
For more information about car paint protection film, consult with certified professionals who can assess your specific requirements.
Conclusion
Paint protection film stands out as one of the smartest investments you can make for your vehicle. This piece shows how PPF acts as both a shield and a style upgrade for your prized ride. These benefits make it worth getting whatever type of vehicle you drive.
Modern PPF does much more than just guard against stone chips and scratches. Quality films reshape the scene with glossy, matte or even colored finishes while creating an invisible armor against environmental threats. The self-healing technology is amazing-maybe even the most impressive feature that lets minor scratches vanish with just a bit of heat.
Your driving habits, priorities and budget largely determine the right film choice. Standard urethane works great for simple protection, while premium options with hydrophobic properties give you next-level defense against water spots and staining. Your typical driving environment should guide your selection.
For decades, the BMW M3 has been a fixed point in the performance landscape. A benchmark not simply for speed, but for what driving enthusiasts prize most: feel. Steering weight, throttle response, and the sense of connection that defines an M car when everything is working in harmony. So when BMW confirmed that a fully electric M3 is on the way, it was never going to be just a change in propulsion. It is a test of whether the M3’s core values can survive a fundamental shift in how performance is delivered.
Quad Motors, Synthetic Gear Shifts and Rear Wheel Drive On-Demand
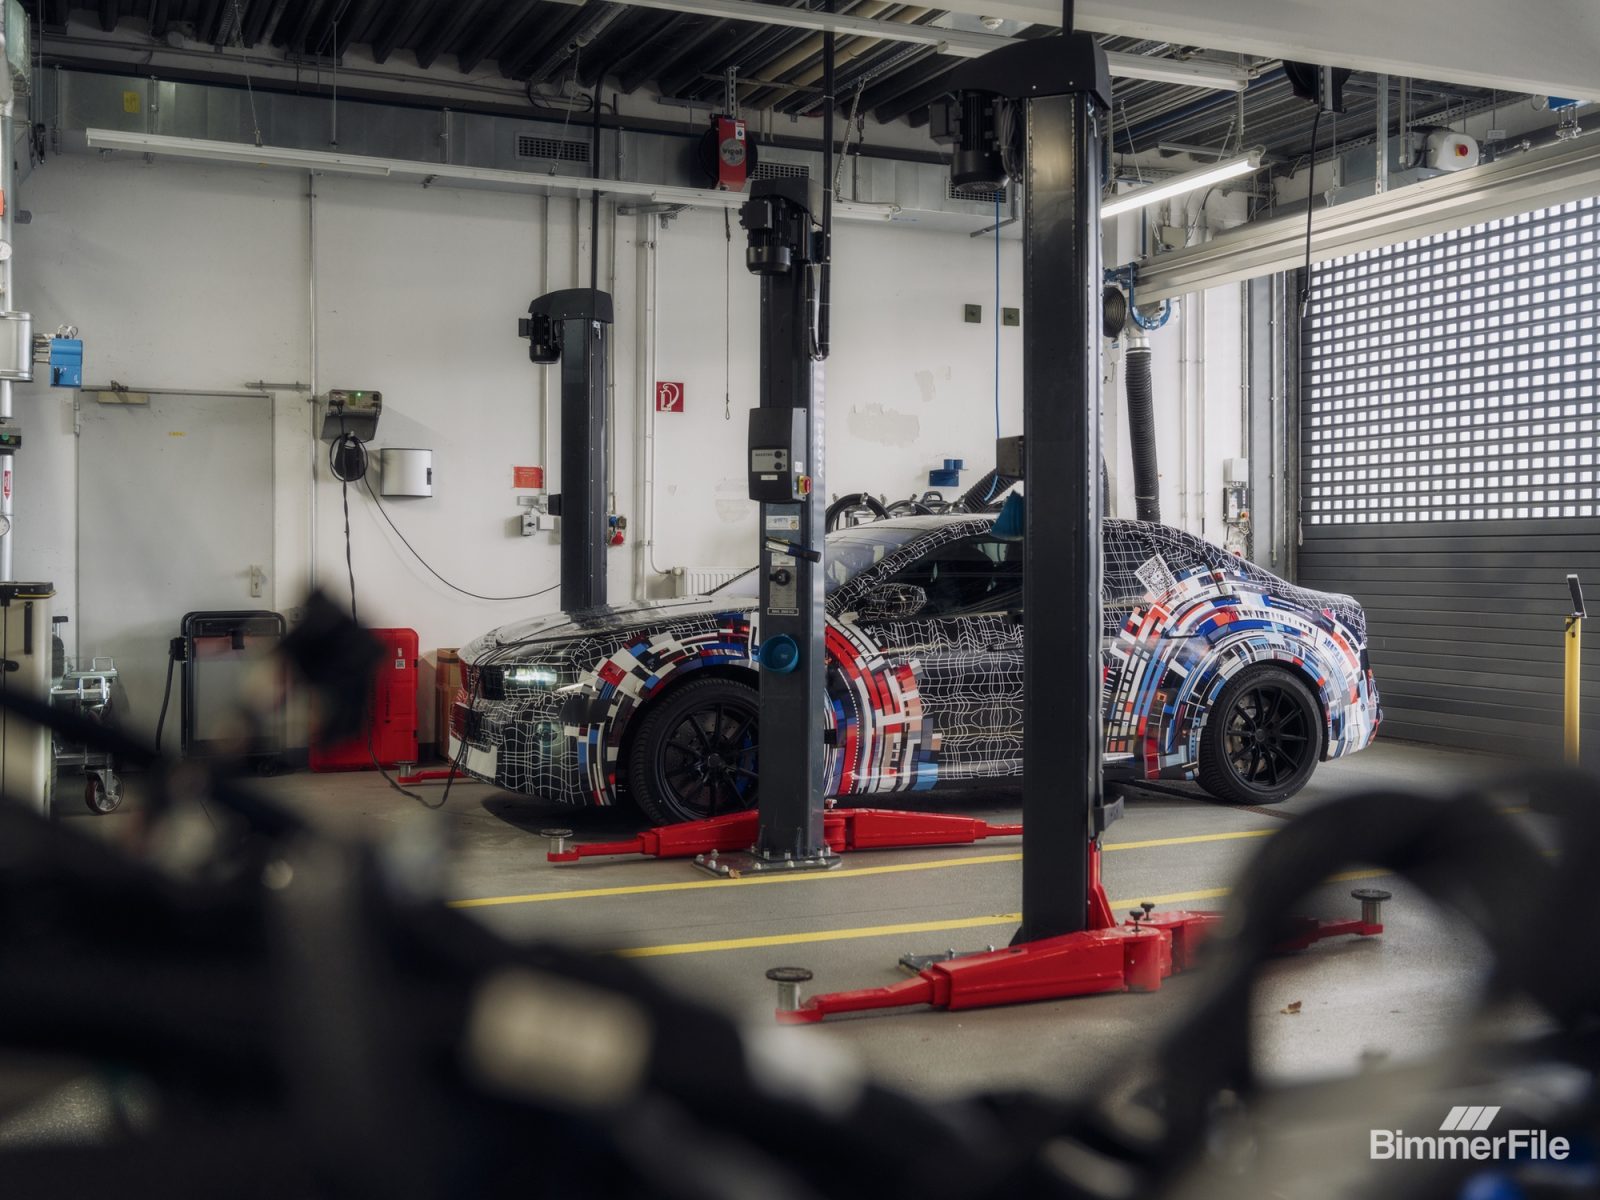
And BMW isn’t easing into that test. The electric M3 will arrive with a quad-motor layout, synthetic gearshifts, and digitally generated engine sound, three elements that go straight to the heart of what makes an M3 feel like an M3. This is BMW M choosing to confront the emotional and technical challenges of electrification head-on rather than quietly sidestepping them.
From a BimmerFile perspective, that openness matters. BMW isn’t pretending this is a silent, seamless evolution. It’s acknowledging that performance has always been about more than numbers, and that cadence, feedback, and controllability still matter even when combustion disappears. Naturally details will matter so we’ll withhold judgement until we experience it ourselves.
Beneath that continuity, however, the car represents a genuine first. This will be BMW M’s first fully electric production model, and it will sit on the brand’s Neue Klasse EV platform, an architecture designed from the outset around electrification, centralized computing, and next-generation vehicle dynamics. The electric M3 is not adapting to this platform. It is helping define it.
BMW M eDrive: The Technical Core of the Electric M3
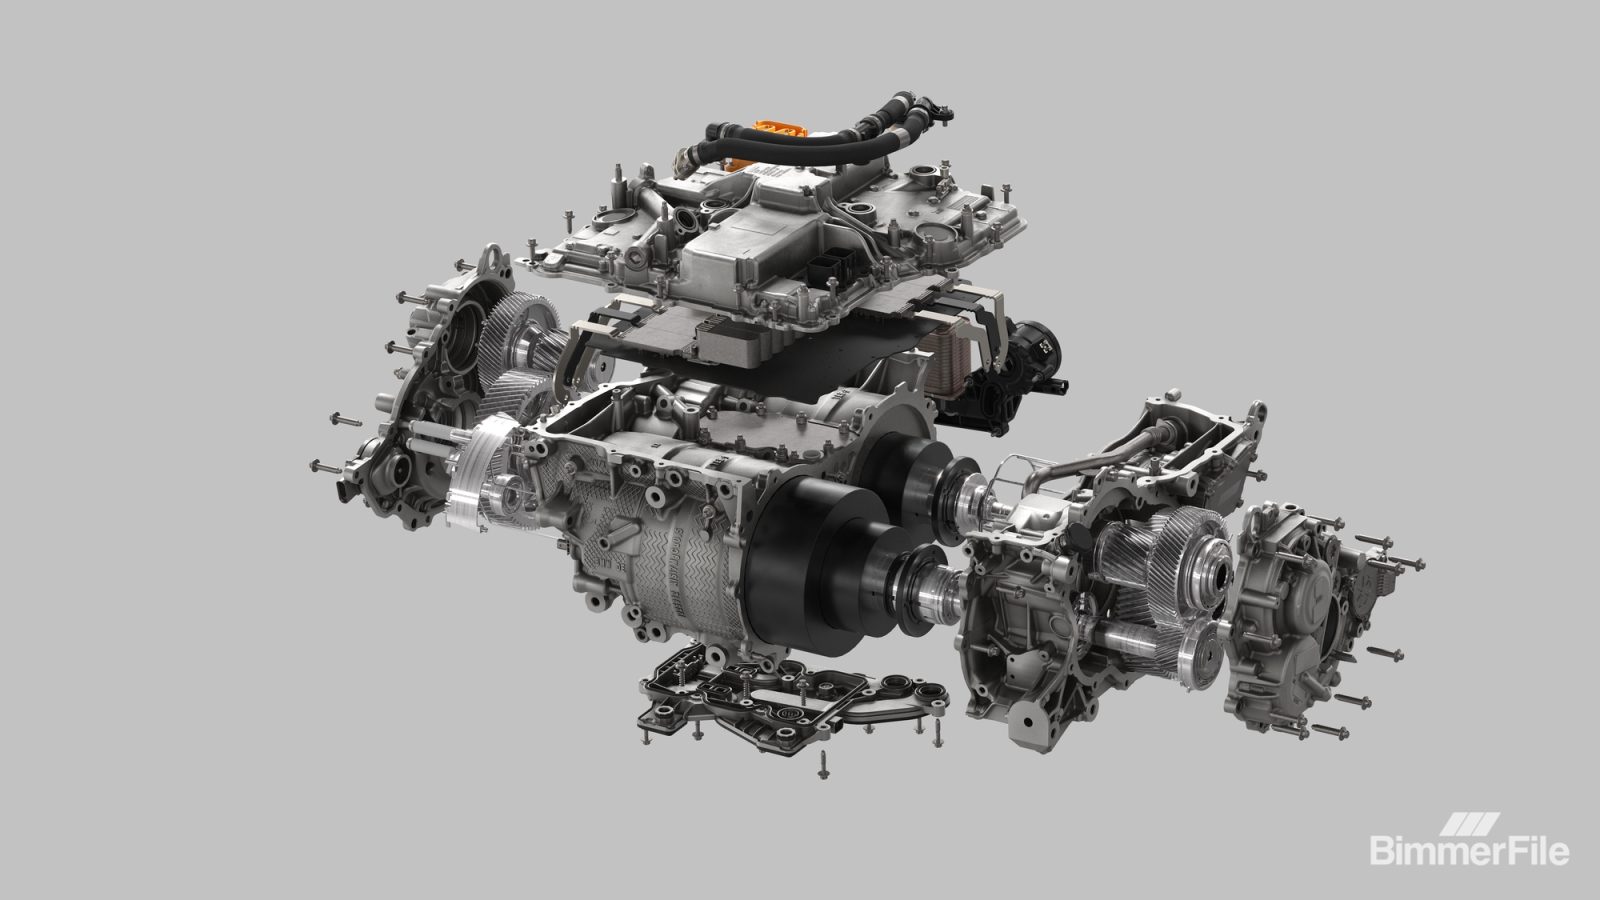
At the heart of the electric M3 is a drivetrain concept that represents the most comprehensive rethink of BMW M performance since the division’s founding. Known as BMW M eDrive, it is built on the Gen6 electric architecture of the Neue Klasse and developed from the ground up specifically for high-performance applications.
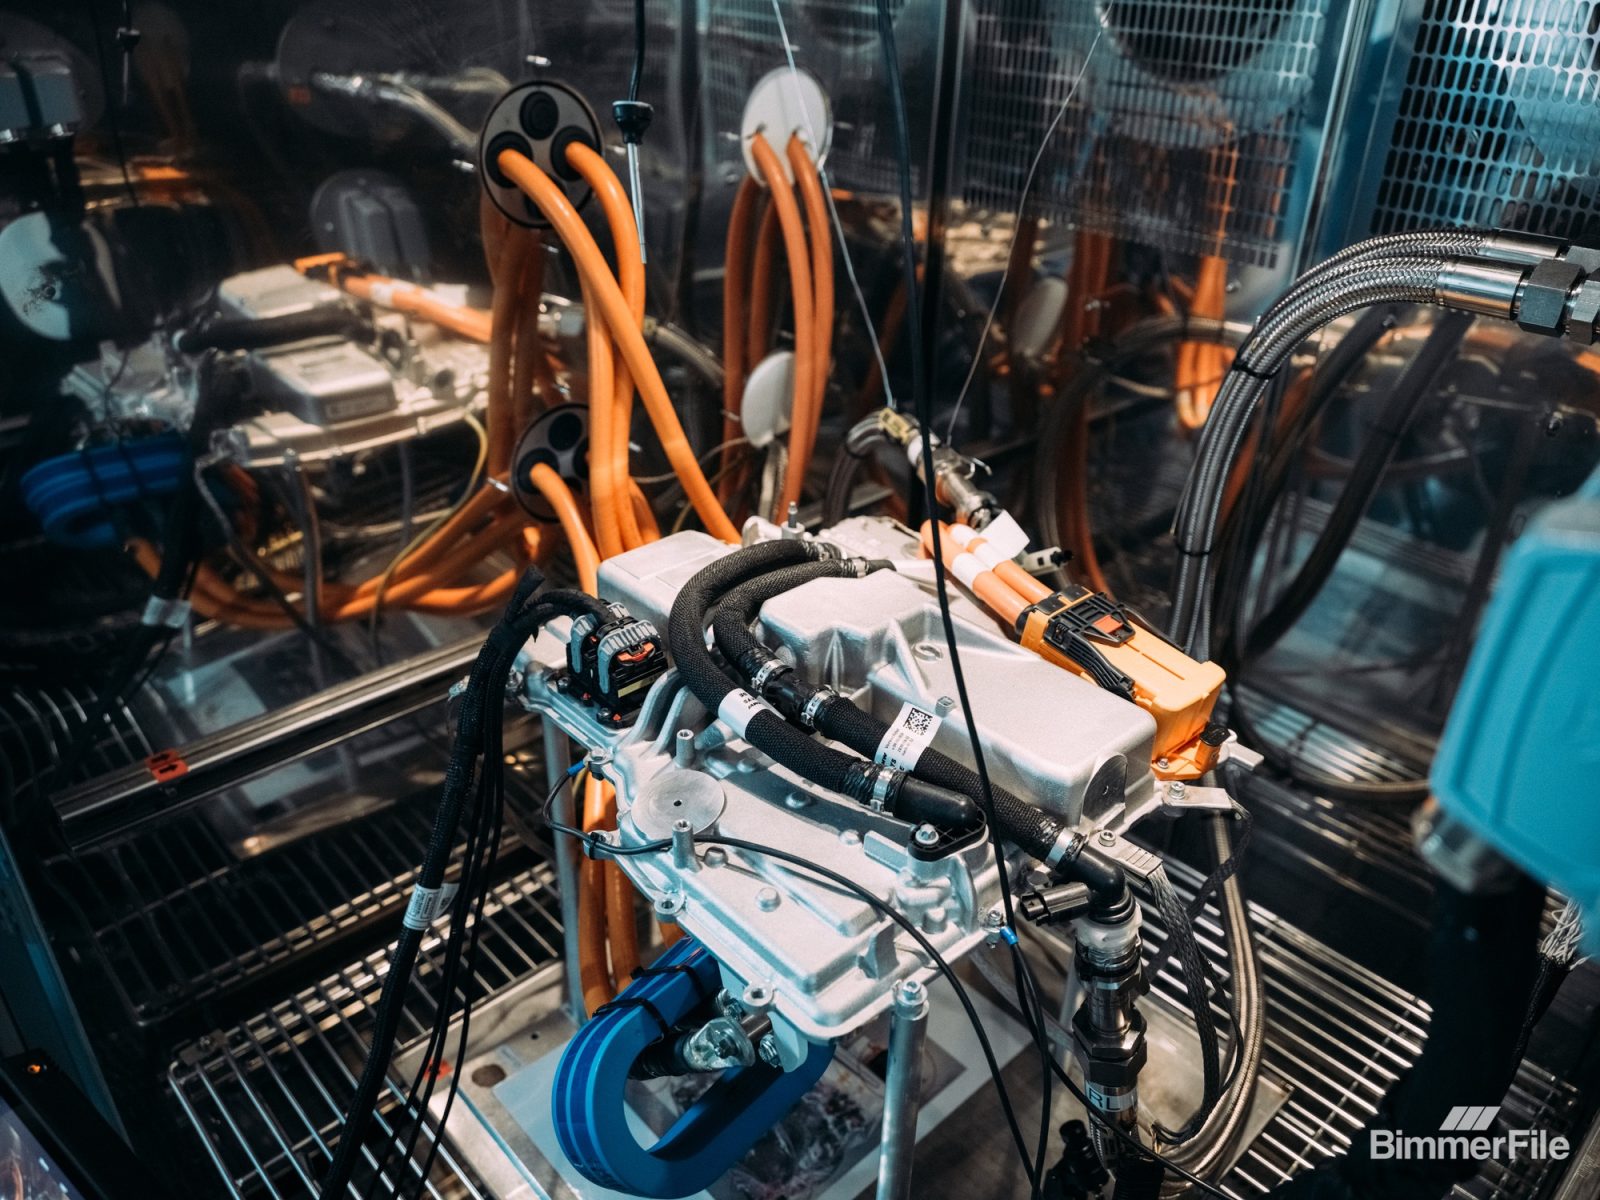
This is not a single motor solution scaled up for output. In the electric M3, each wheel is driven by its own electric motor, creating a true quad-motor layout. Two fully integrated drive units sit on the front and rear axles, with one motor per wheel. Each motor feeds its own reduction gearbox, while the inverter and oil supply are packaged directly within the drive unit itself. The result is extremely high power density and the most powerful electric drive system BMW M has ever deployed.
What makes this architecture transformative is not just output, but control. All four motors are managed by BMW M’s dedicated software layer running on the Heart of Joy central processing unit. Working in concert with what BMW calls M Dynamic Performance Control, the system continuously manages torque, traction, stability, braking, and energy recuperation at each individual wheel. This allows for levels of precision that simply were not possible with mechanical differentials or even previous electronically assisted systems.
The benefits are felt everywhere. Torque distribution can be adjusted instantaneously based on grip, steering angle, and driver input. Brake energy recuperation is blended seamlessly with the friction braking system right up to the limit. Traction remains consistent not through intervention, but through anticipation. BMW describes the result as a more direct response and increased stability under extreme loads, particularly in high-speed cornering and during repeated hard driving.
Crucially, this quad-motor layout allows the electric M3 to combine the advantages of both all-wheel drive and rear-wheel drive. The system can operate as a fully variable all-wheel-drive setup when maximum traction is required. But just as importantly for BMW M, the front axle can be completely decoupled. In those moments, the electric M3 behaves as a rear-wheel-drive car, preserving the dynamic character that has defined the M3 for decades. BMW also points to this decoupling as a way to increase efficiency and extend range during steady-state driving, particularly on longer motorway journeys.
To reinforce driver engagement, BMW M is layering in predefined driving modes, simulated gear shifts, and a newly developed soundscape. These elements are not there to disguise the electric powertrain, but to give drivers structure, rhythm, and feedback under hard driving. They are part of BMW M’s broader effort to ensure the car remains intuitive and emotionally engaging, particularly on track.
Supporting all of this is a newly developed high-voltage battery with more than 100 kWh of usable energy, engineered specifically for M applications. Using a performance-optimized version of BMW’s Gen6 cylindrical cells, the battery has been designed under a “Design to Power” philosophy. Cooling systems and the Energy Master control unit have been upgraded to support sustained high power output, rapid recuperation, and faster charging without thermal degradation.
The battery housing itself plays a structural role, connecting directly to the front and rear axles. This increases overall chassis stiffness, which in turn improves steering precision and body control. Within the Neue Klasse range, BMW says these M models will also achieve the highest levels of energy recuperation, further enhancing both performance consistency and efficiency.
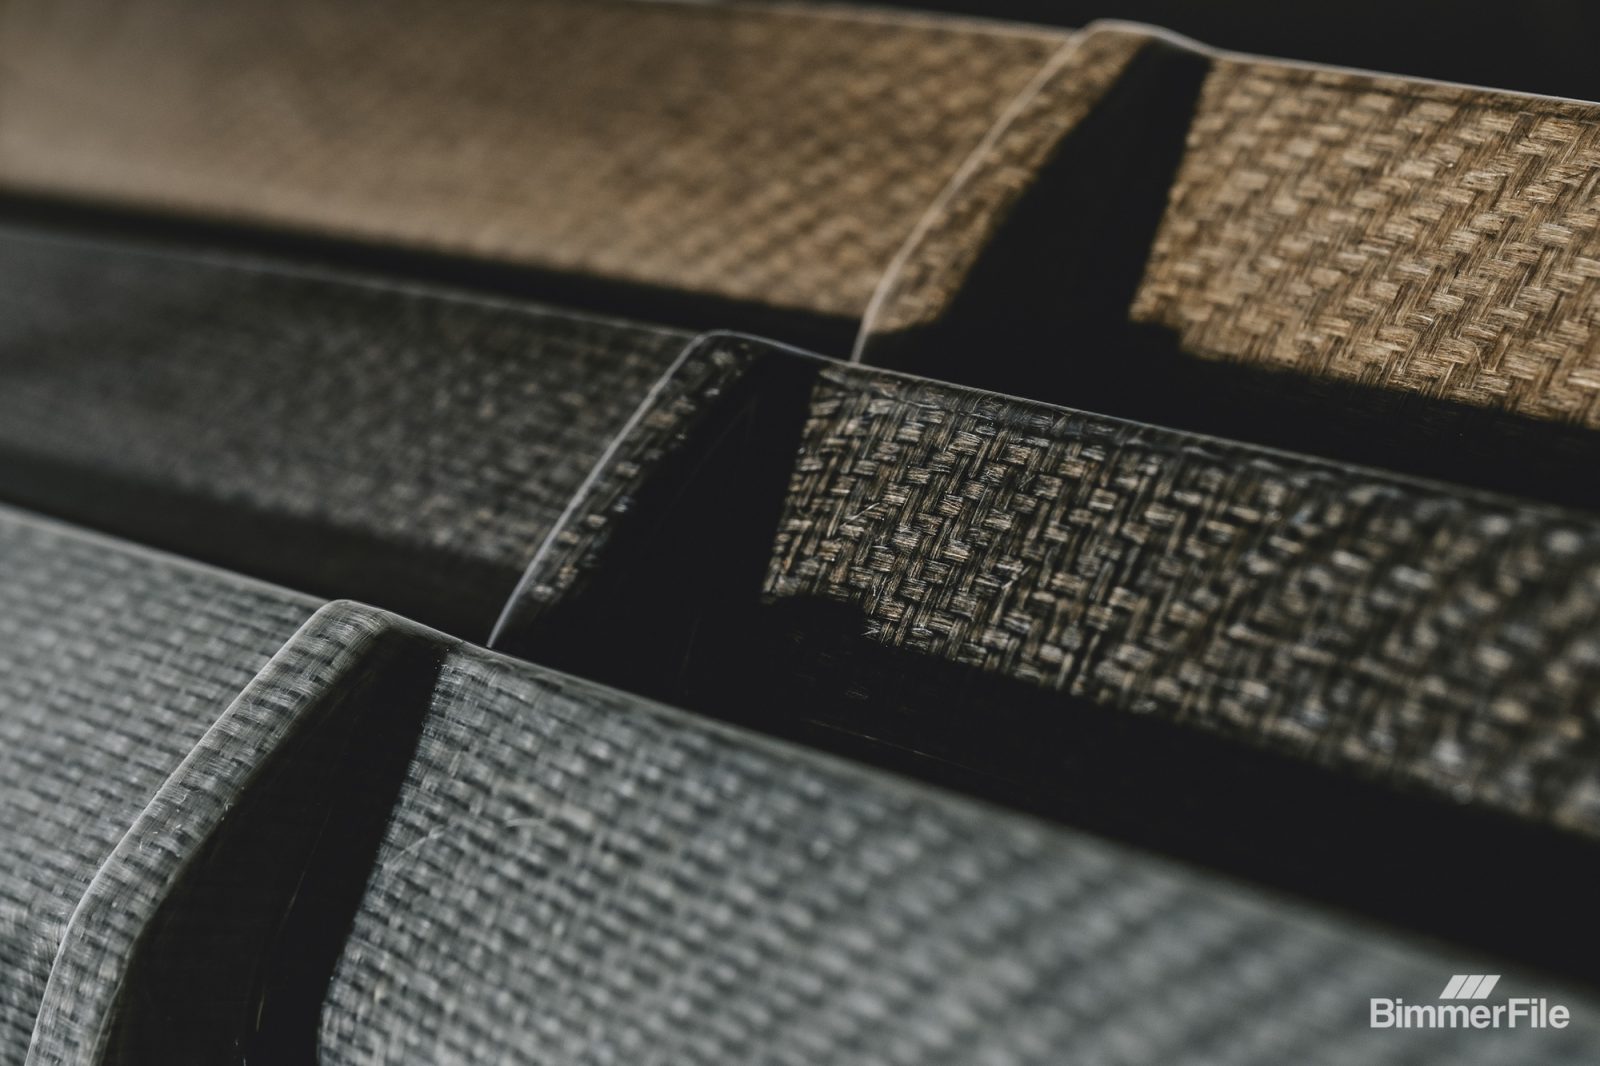
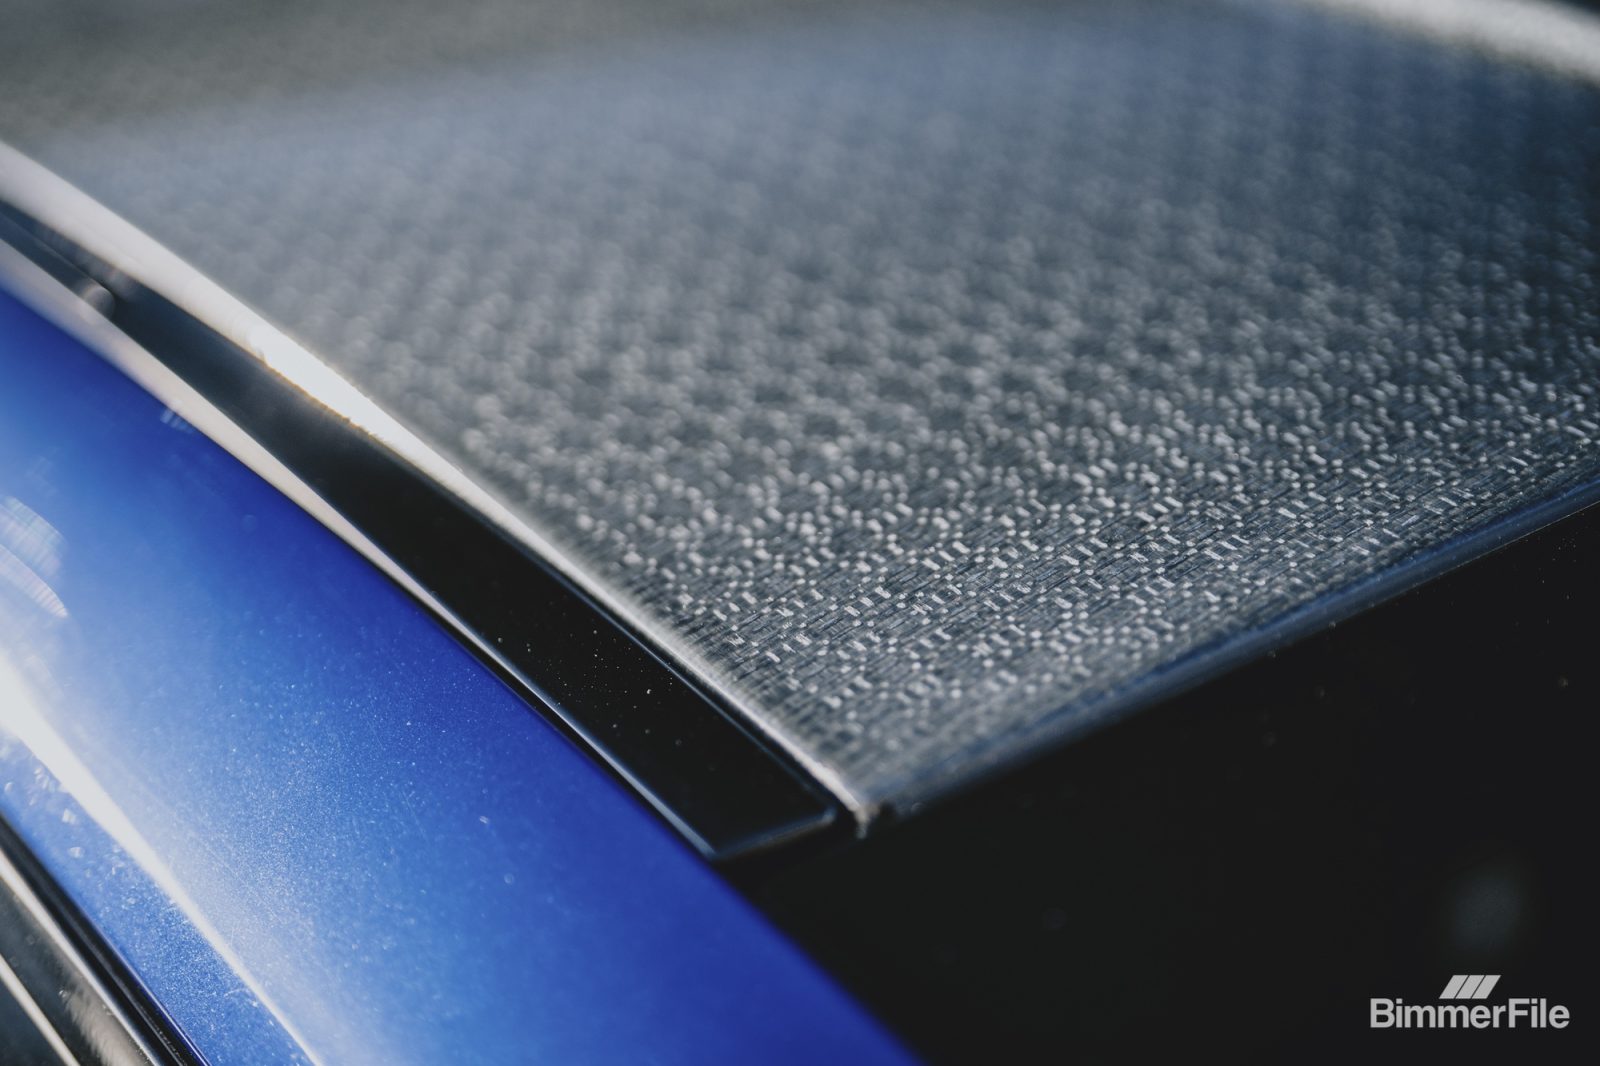
Finally, BMW M is applying its motorsport experience beyond the drivetrain. For the first time, natural fibre composite elements will be used in a BMW M production vehicle. Developed through years of racing use, the material offers mechanical properties similar to carbon fibre while reducing CO₂e emissions by roughly 40 percent. It is a reminder that lightweight construction remains central to BMW M’s philosophy, even as materials and propulsion methods evolve.
Taken together, BMW M eDrive is not a single innovation but a tightly integrated system. Motors, software, battery, structure, and materials are all working toward the same goal: delivering a level of control, repeatability, and driver confidence that BMW believes defines the next era of M.
Timing is also closer than many expect. Current indications point to a debut as early as late 2027, placing the electric M3 at the front edge of BMW’s performance transition rather than as a distant follow-up.
Technically, this is where the electric M3 begins to separate itself from both its predecessors and its peers. Each wheel will be driven by its own motor, inverter, and reduction gearbox, all managed by a single central control unit. This enables fully independent torque vectoring at each corner, operating continuously and in real time.
That architecture unlocks something no previous M3 could offer. The ability to seamlessly switch between four-wheel drive and rear-wheel drive. For track driving or drifting, the electric M3 can send power exclusively to the rear axle. For everyday driving and efficiency, BMW is also planning a rear-wheel-drive range-extending mode, allowing the car to reduce energy consumption without dulling its responses.
All of this is coordinated quietly by BMW’s new centralized vehicle computing architecture, often referred to internally as the Heart of Joy. In the M3, its role is to reduce latency between driver input and vehicle response, ensuring that the car feels immediate and predictable rather than digital or detached.
BMW is clearly aware that sound and structure still matter to drivers. The synthesized shifts and artificial engine noises are not intended to mimic combustion outright, but to provide rhythm and reference points under hard driving. Whether they enhance or detract from the experience will ultimately be decided behind the wheel, not in a press release.
From everything BimmerFile has tracked, the electric M3 is expected to launch alongside a combustion-powered counterpart, giving enthusiasts choice rather than forcing a single path forward. That parallel approach suggests confidence. BMW isn’t asking buyers to take this on faith.
The electric M3 will be controversial. Every M3 has been. What matters is that BMW appears to understand exactly why. The tools have changed. The formula has not.
Article and photos by Bill Wagenblatt ([email protected])
The second Velocity Invitational event was held October 14 to 16 at Weathertech Raceway Laguna Seca, Monterey, California. Jeff O’Neill and his team once again showed the historic racing community that there is more than one way to hold an event.
Velocity Invitational’s mix of exciting cars, family entertainment, attractive location, manufacture support, and a well-curated display results in an incredible 3-day experience. When O’Neill first started Velocity Invitational, his vision was to present the cars in a more spectator-friendly environment.
Instead of the usual vehicles and transporters spread out in the paddock, the Velocity Invitational team erected large tents, where cars are staged by race groups.
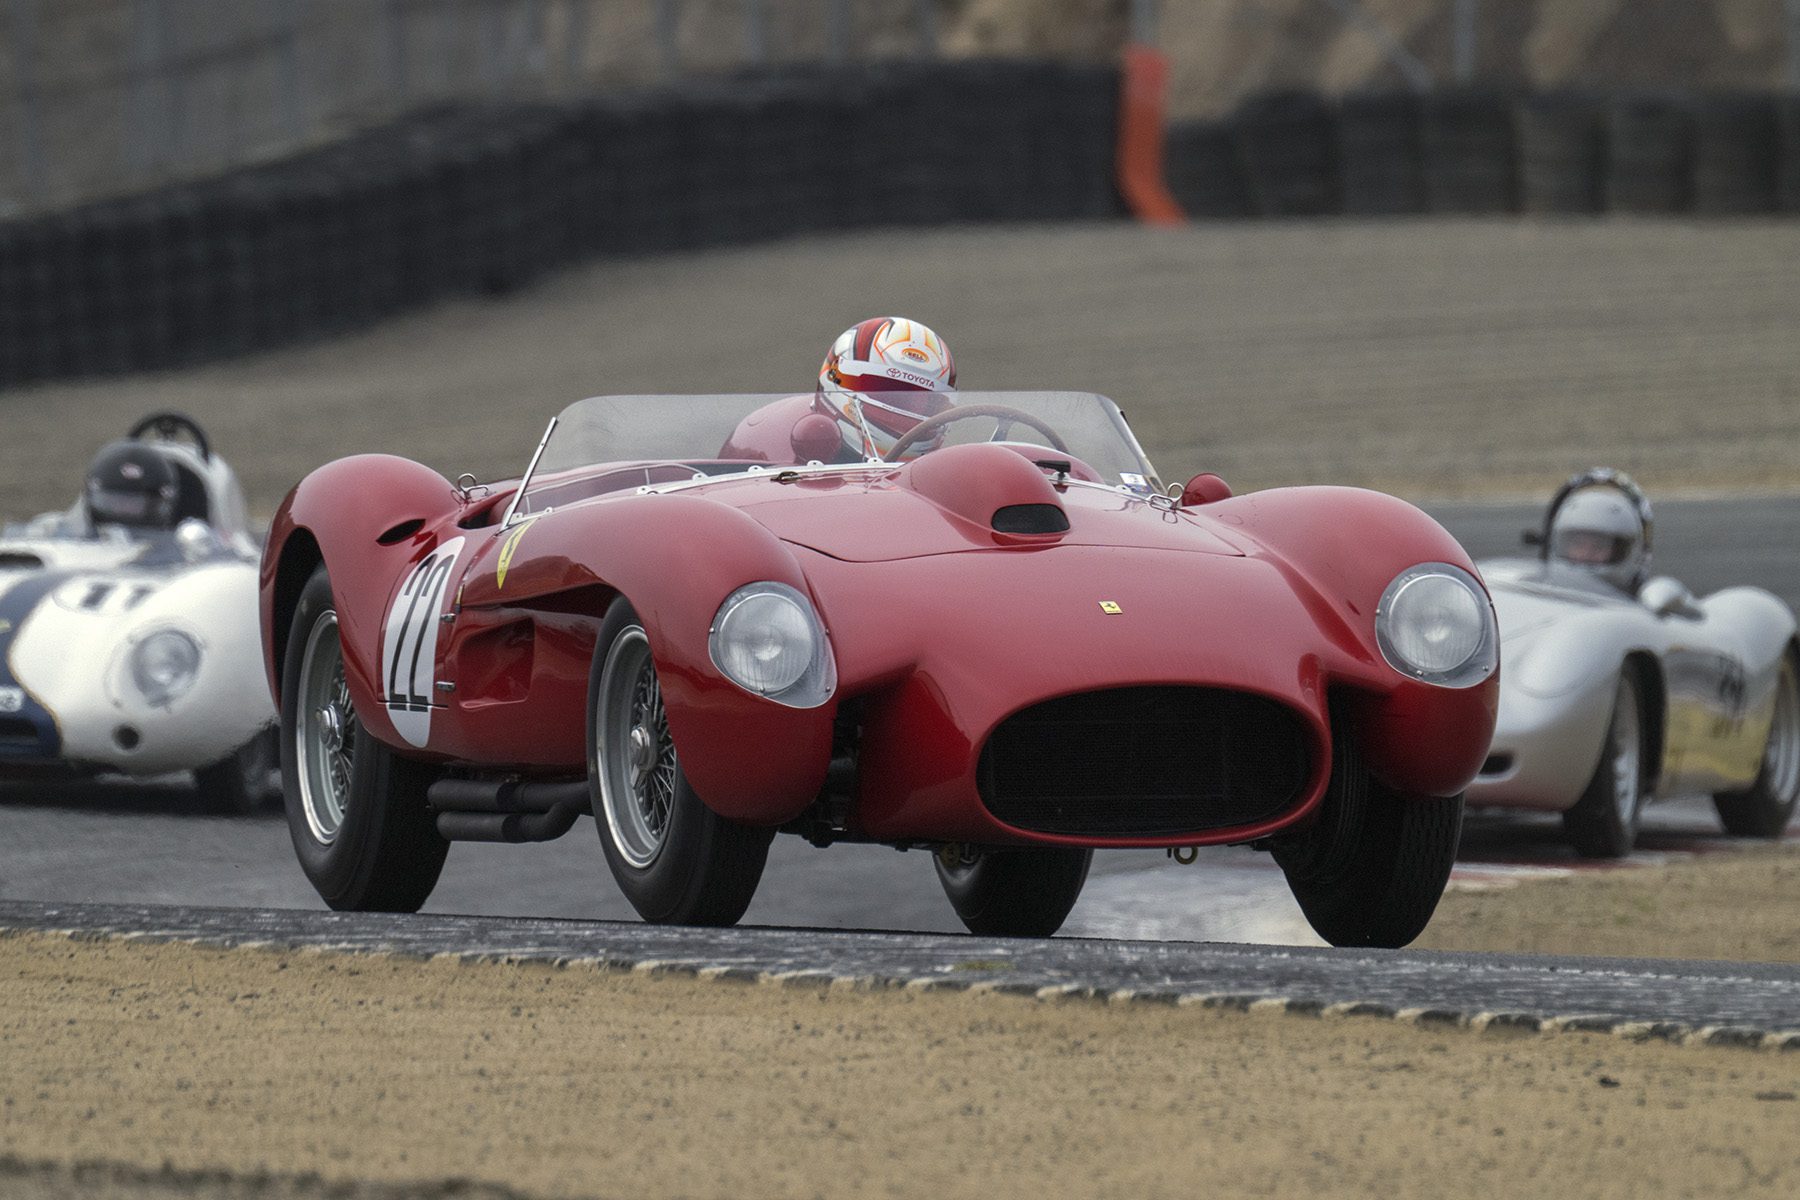
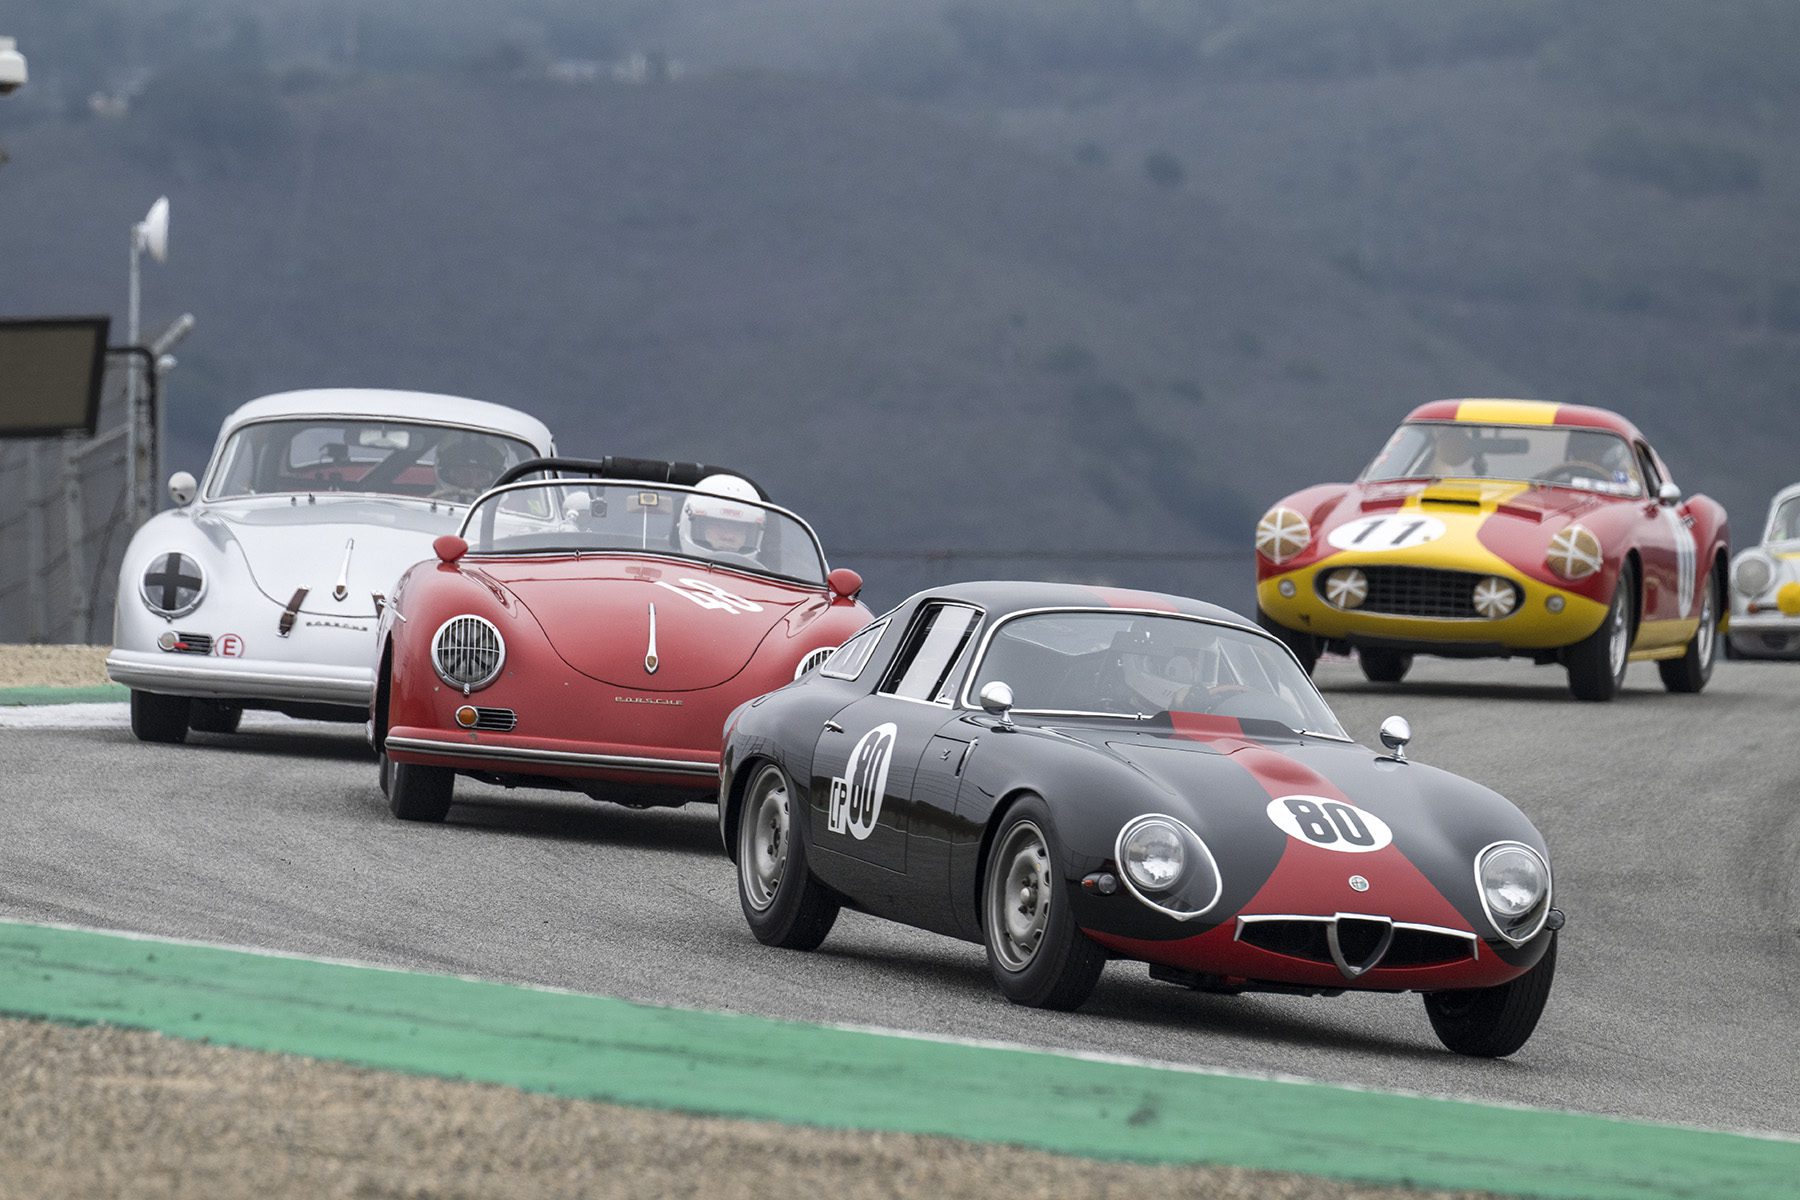
The entry is capped at a little over two hundred cars, and the format proves that quality over quantity works. Take Group 4, for example, a Ferrari 250 GTO, a pair of 250 GT SWBs, 4 Alfa Romeo GTZ, and a Ferrari 250 TDF for good measure – more than enough to excite any historic car enthusiast.
Charles Wegner/1959 Ferrari 250 GT TDF (left), Jeff O’Neill/1963 Ferrari 250 GTO and Rob Walton/1961 Ferrari 250 GT SWB Berlinetta approaching Turn 9
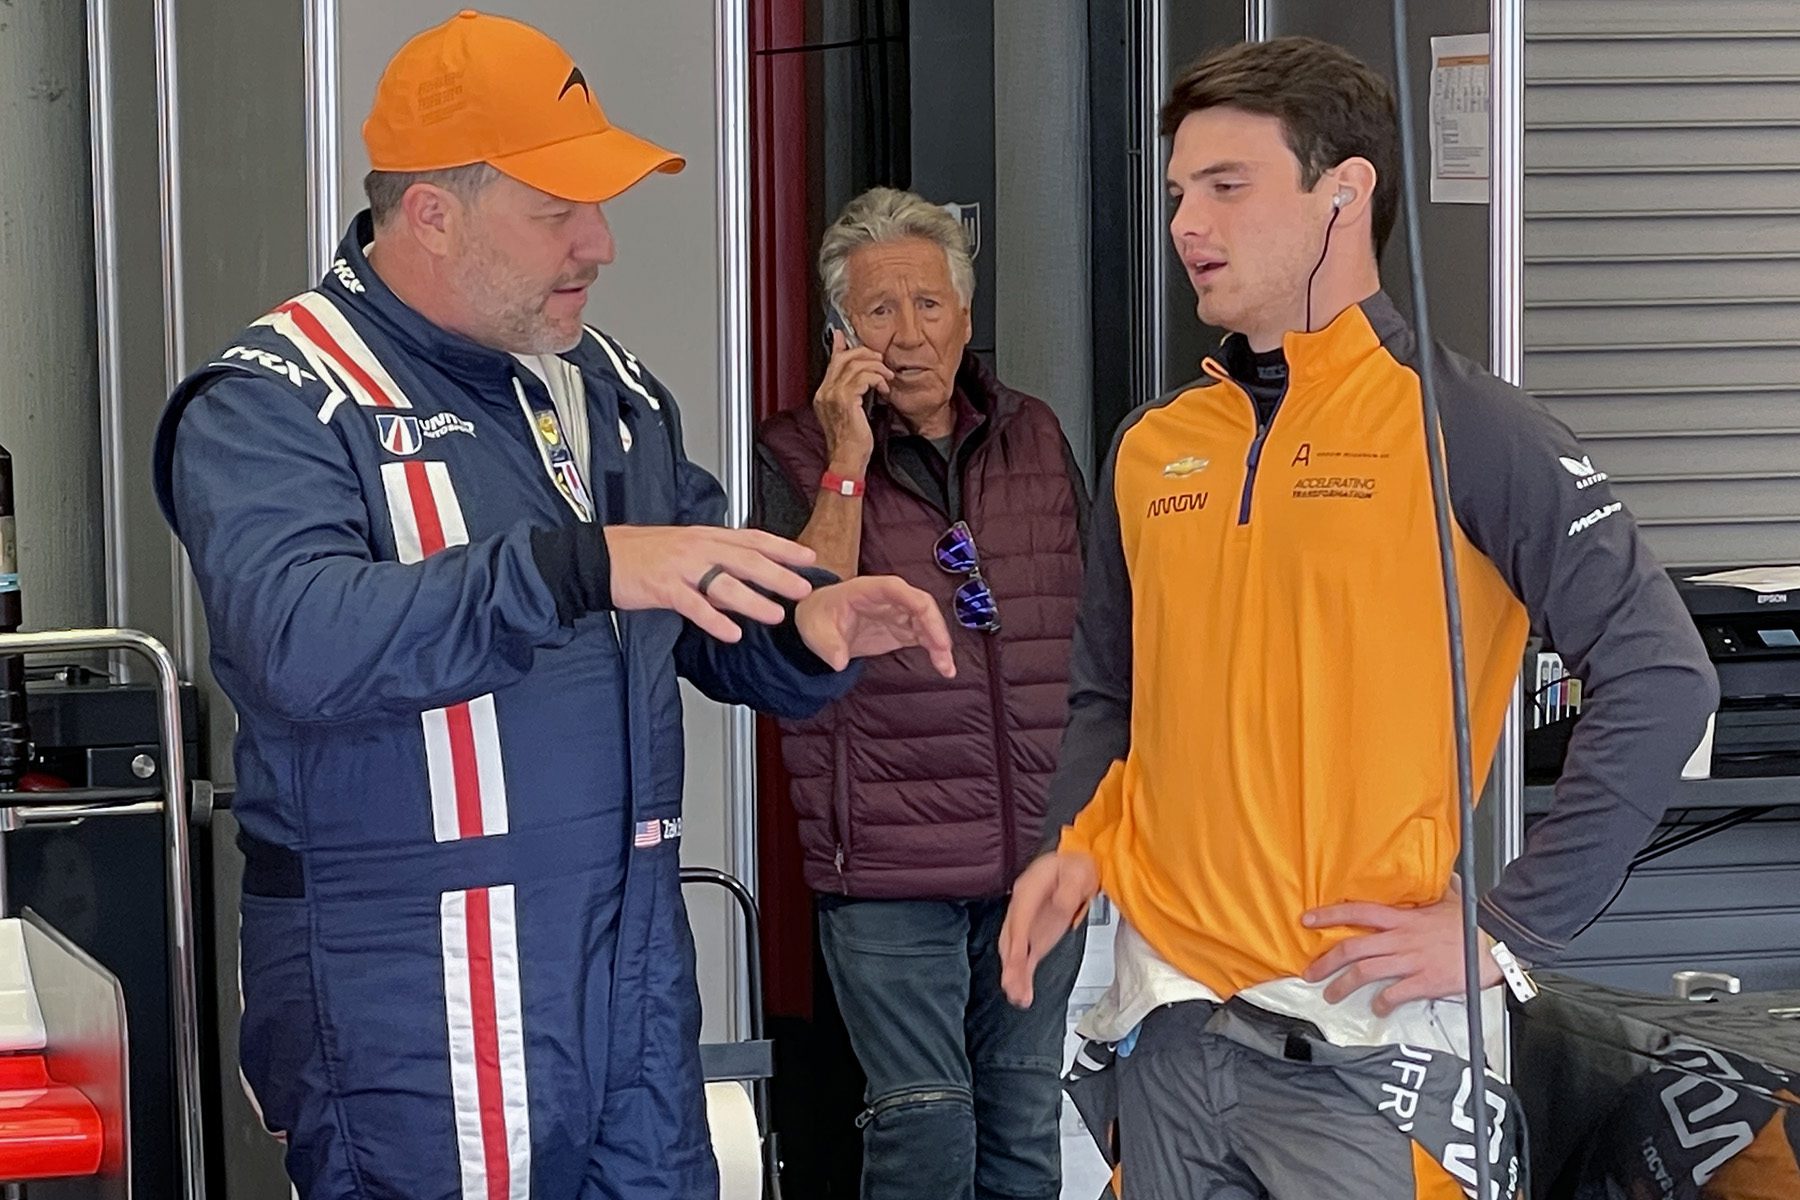
McLaren Automotive is a big supporter of the event. In addition to the paddock and on-track demonstrations, CEO Zak Brown provided a 2013 McLaren MP4/28A for Mario Andretti to try. The 1978 World Driving Champion had driving a contemporary formula 1 car on his bucket list, and thanks to McLaren, that has been ticked off. In addition to Mario, two-time world champion Mika Häkkinen demonstrated the TAG/Porsche powered MP4/2C, and Pato O’Ward, the ex-Senna MP4/5B.
Zak Brown (left) watches ae mechanics gets Pato O’Ward ready for demonstration laps in the es-Senna McLaren MP4/5B
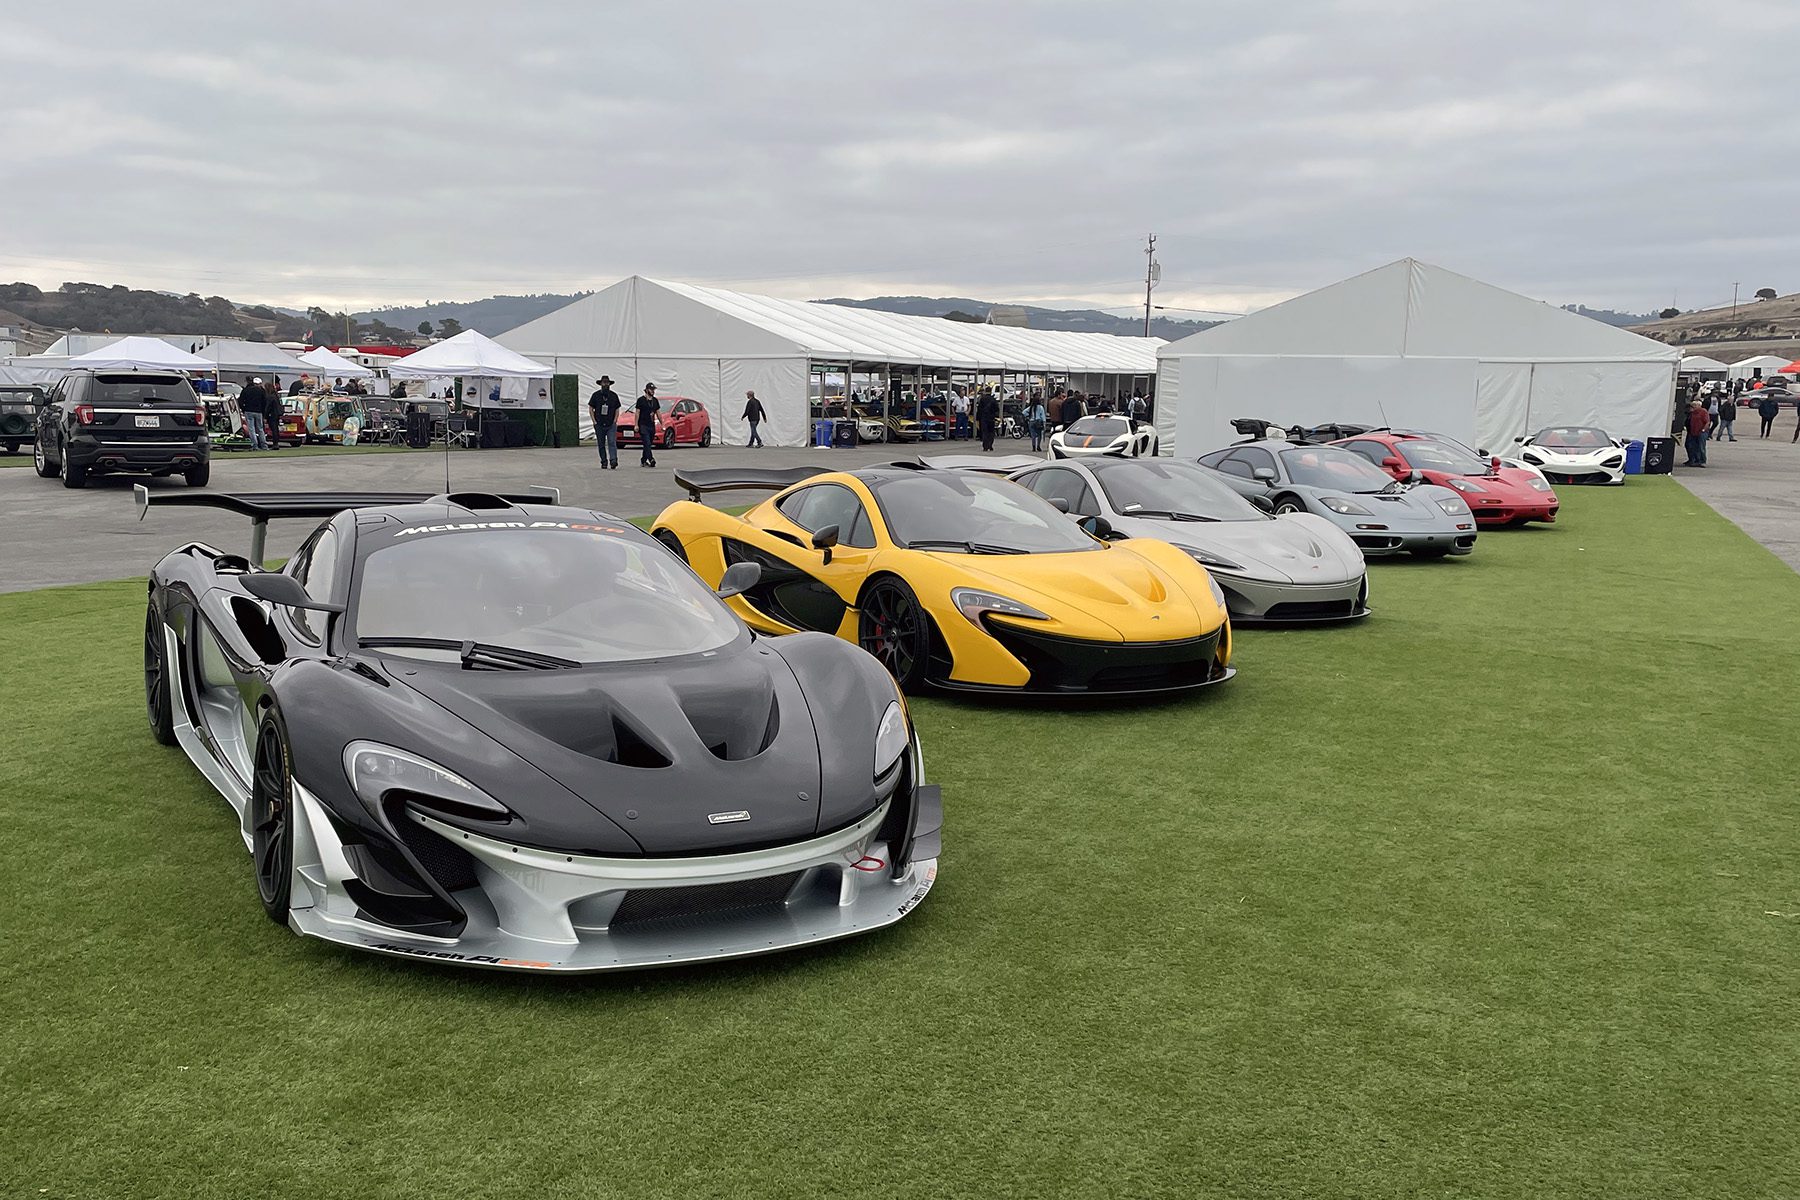
As spectators wander the paddock, there are small displays scattered throughout. In addition to the McLaren road cars, Hypercar manufacturers, Czinger, Guntherwerks, Hennessey, and Zenvo, were displayed. Throughout the weekend, track demonstrations were interspersed with the race groups. The Ragtime Racers and display of Miller cars provided a nice contrast to the hypercars.
McLaren road car displayMiller Indy car displayThe Peterson Museum had the Juan Gonzalez Collection of Formula 1 cars on the display in the paddock.
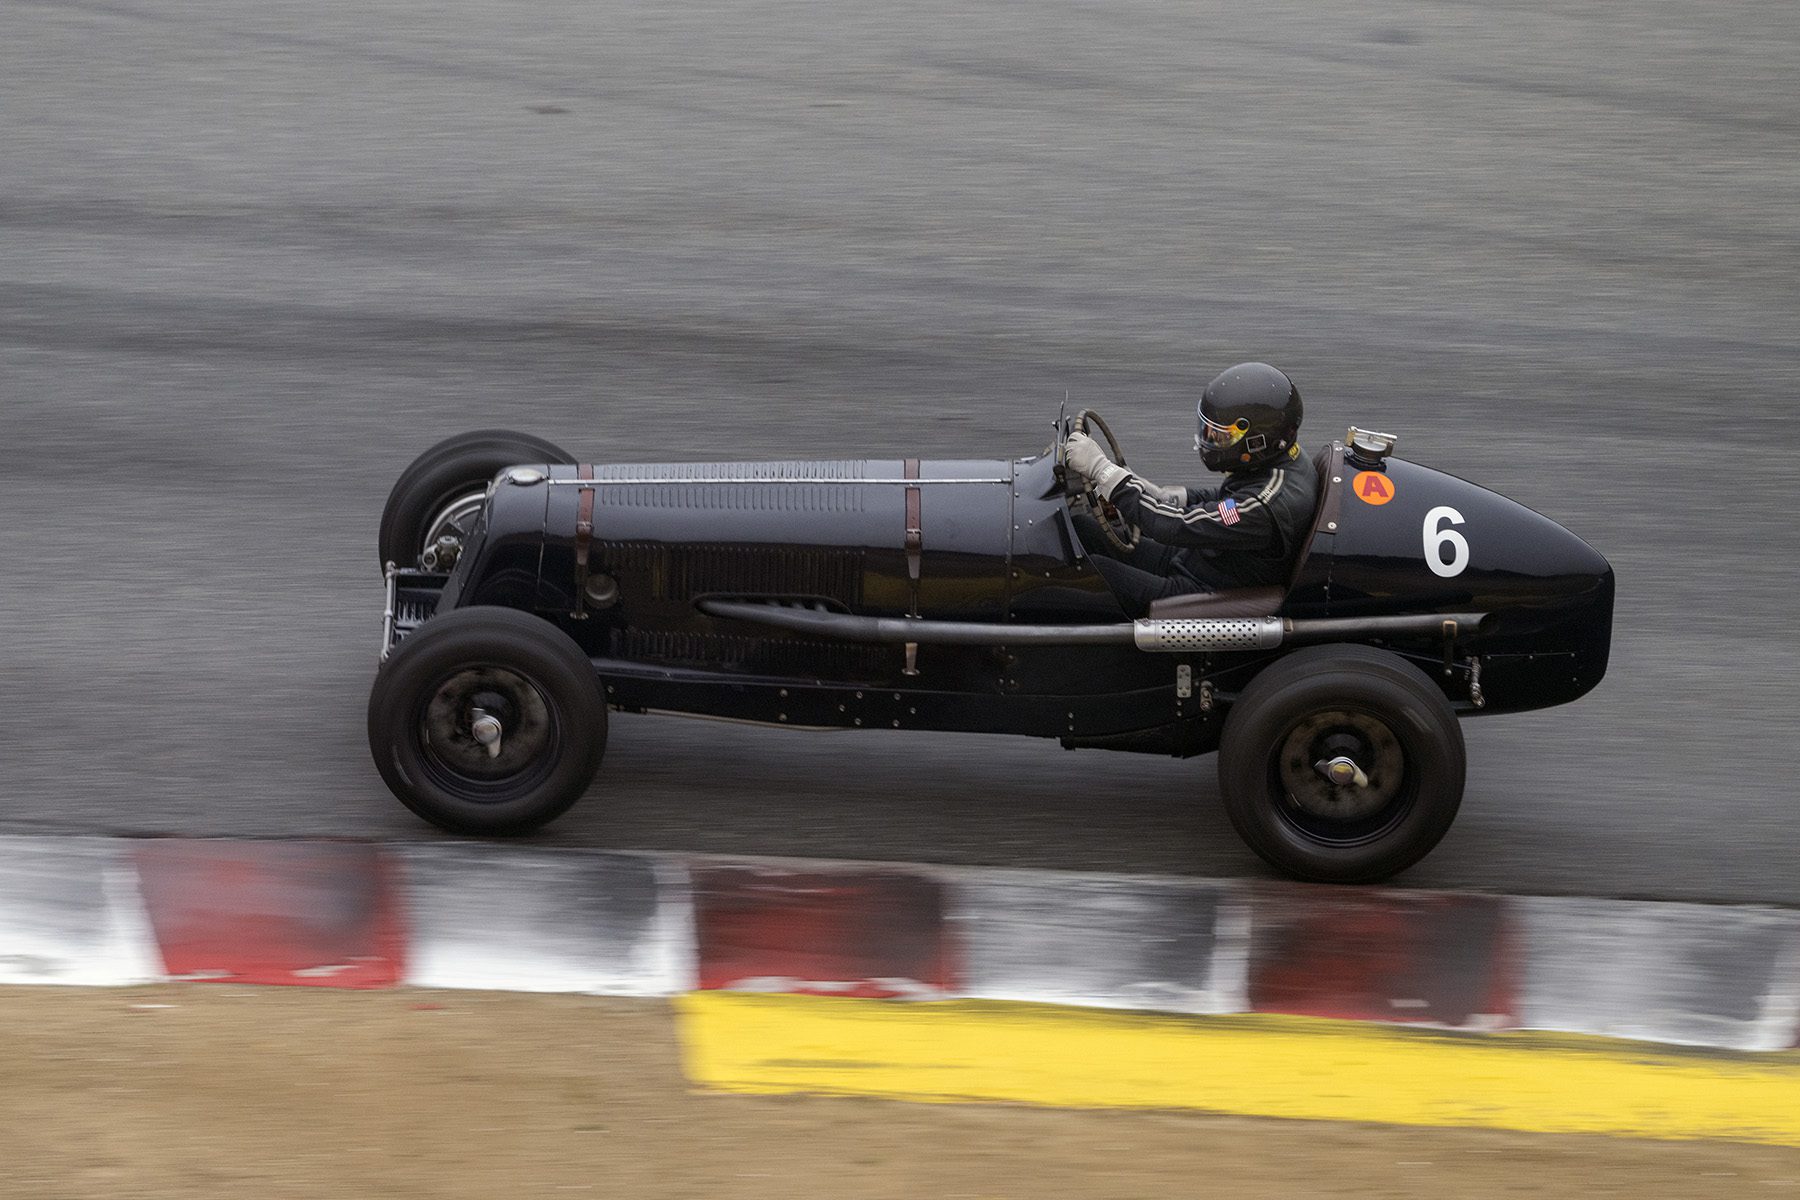
The early 1930 Bugattis bookended the nine race groups to 2012 Porsche 911 Club Cars in Group 9. Each day ended with the Mini vs. Mustang race. This is the second year of the matchup and is a takeoff of the sixties-era racing. WeatherTech Raceway Laguna Seca was an excellent track for the race, with the Mustangs’ power out of the turn and on the straights balanced by the Minis’ handling in the corners.
After starting at Sonoma Raceway in 2019 and the last two years at WeatherTech Raceway Laguna Seca, let’s hope that the Velocity Invitational stays on the calendar. If you haven’t experienced the event or west coast historic racing, add the event to your bucket list.
Jeff O’Neil giving a thumbs up capturing the success of the 2022 Velocity Invitational
2022 Velocity Invitational Photo Gallery
Chris MacAllister/1955 Jaguar D-Type exits Turn 6 on his way to first place in Group 2
Ben McGraw hustles his 1974 Porsche 911 IMSA trough Turn 2
Start of the Sunday afternoon Mini vs Mustang race
Michael Leven heads a group into Turn 2 during the Mini vs Mustand race.
Zak Brown (left) discusses the lines around WeatherTech Raceway Laguna Seca with Pato O’Ward as Mario Andretti is occupied in the background.
Pato O’Ward prior to taking to the track for the McLaren Formula 1 demonstration laps in the ex-Senna McLaren MP4/5B
It’s not unusual for early morning sessions to be run in foggy conditions – here John Mote/1950 Allard K2 is being followed by Tim Barnes/1951 Jaguar XK 120 through Turn 2
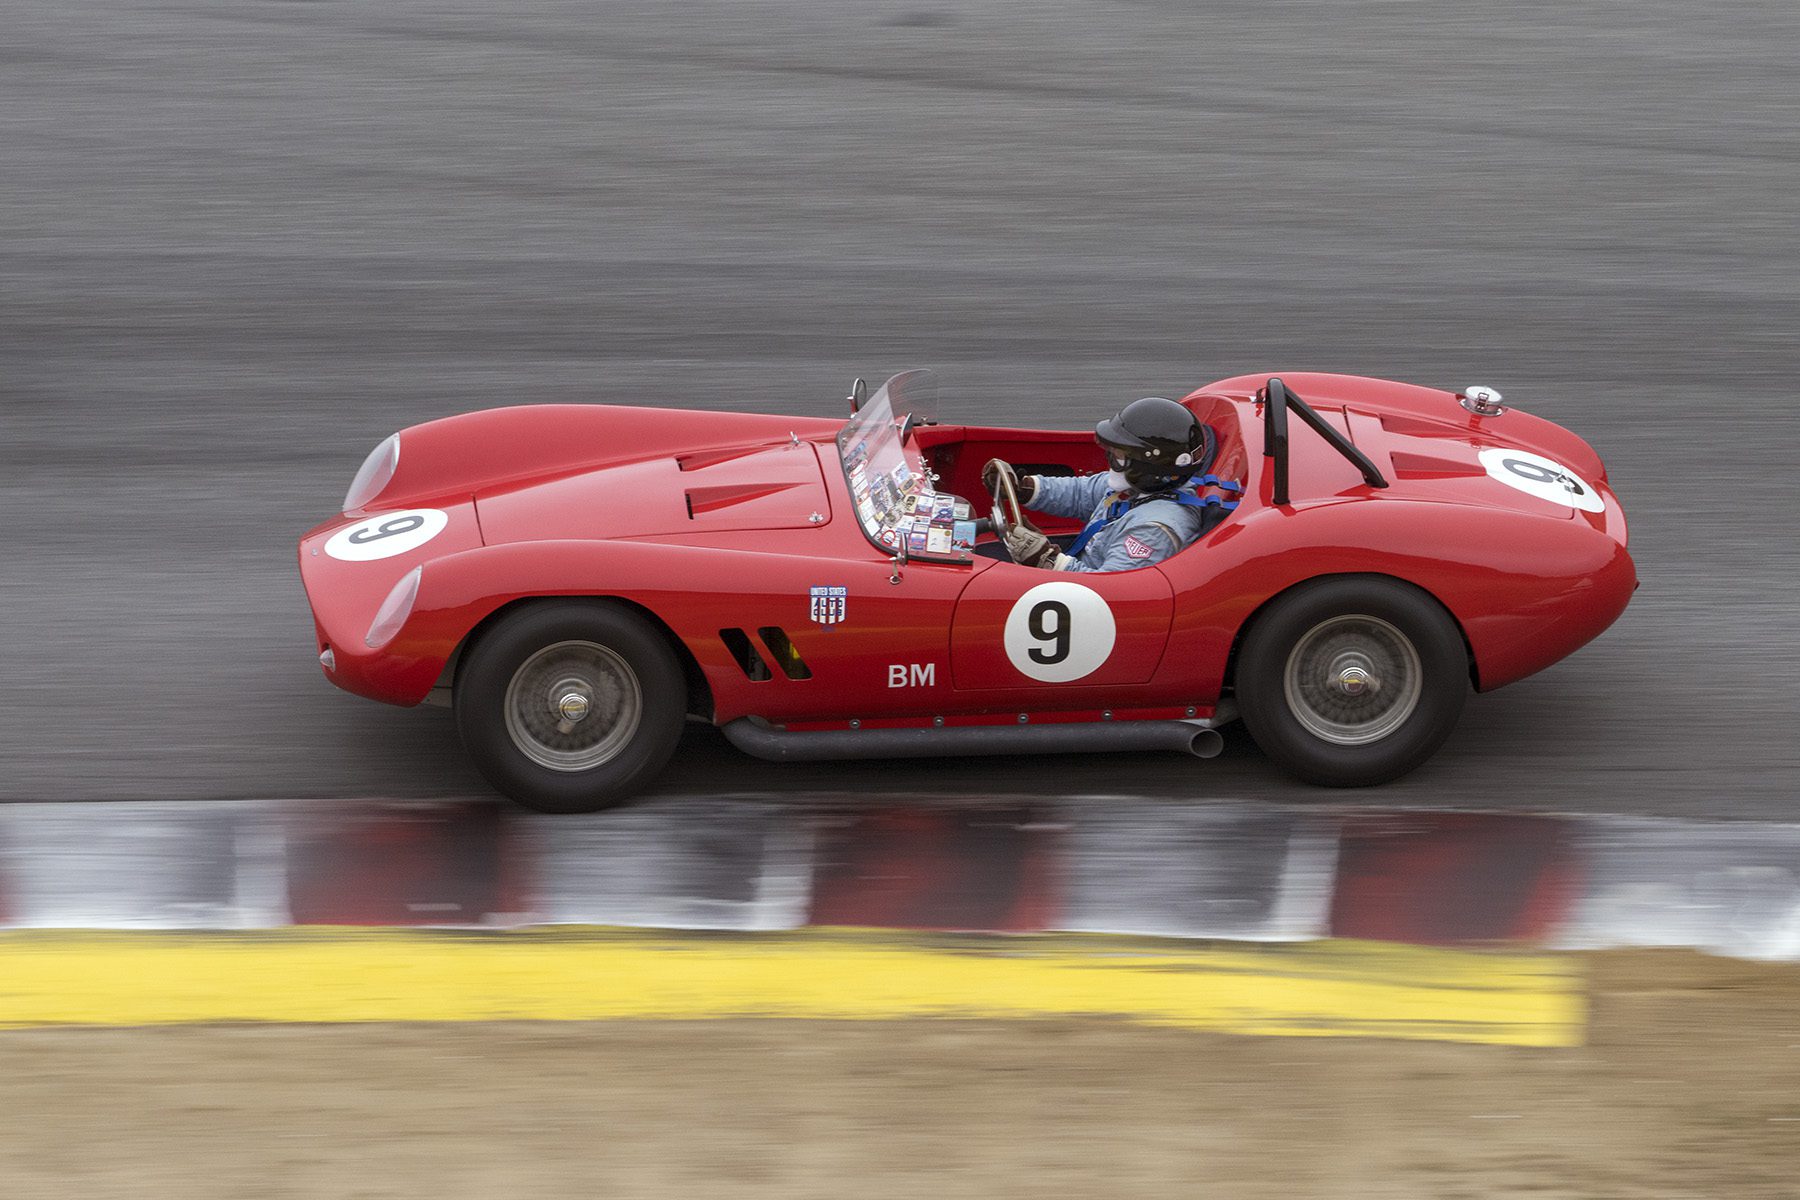
Chase Johnson/1958 Ferrari 250 Testa Rossa in Turn 2
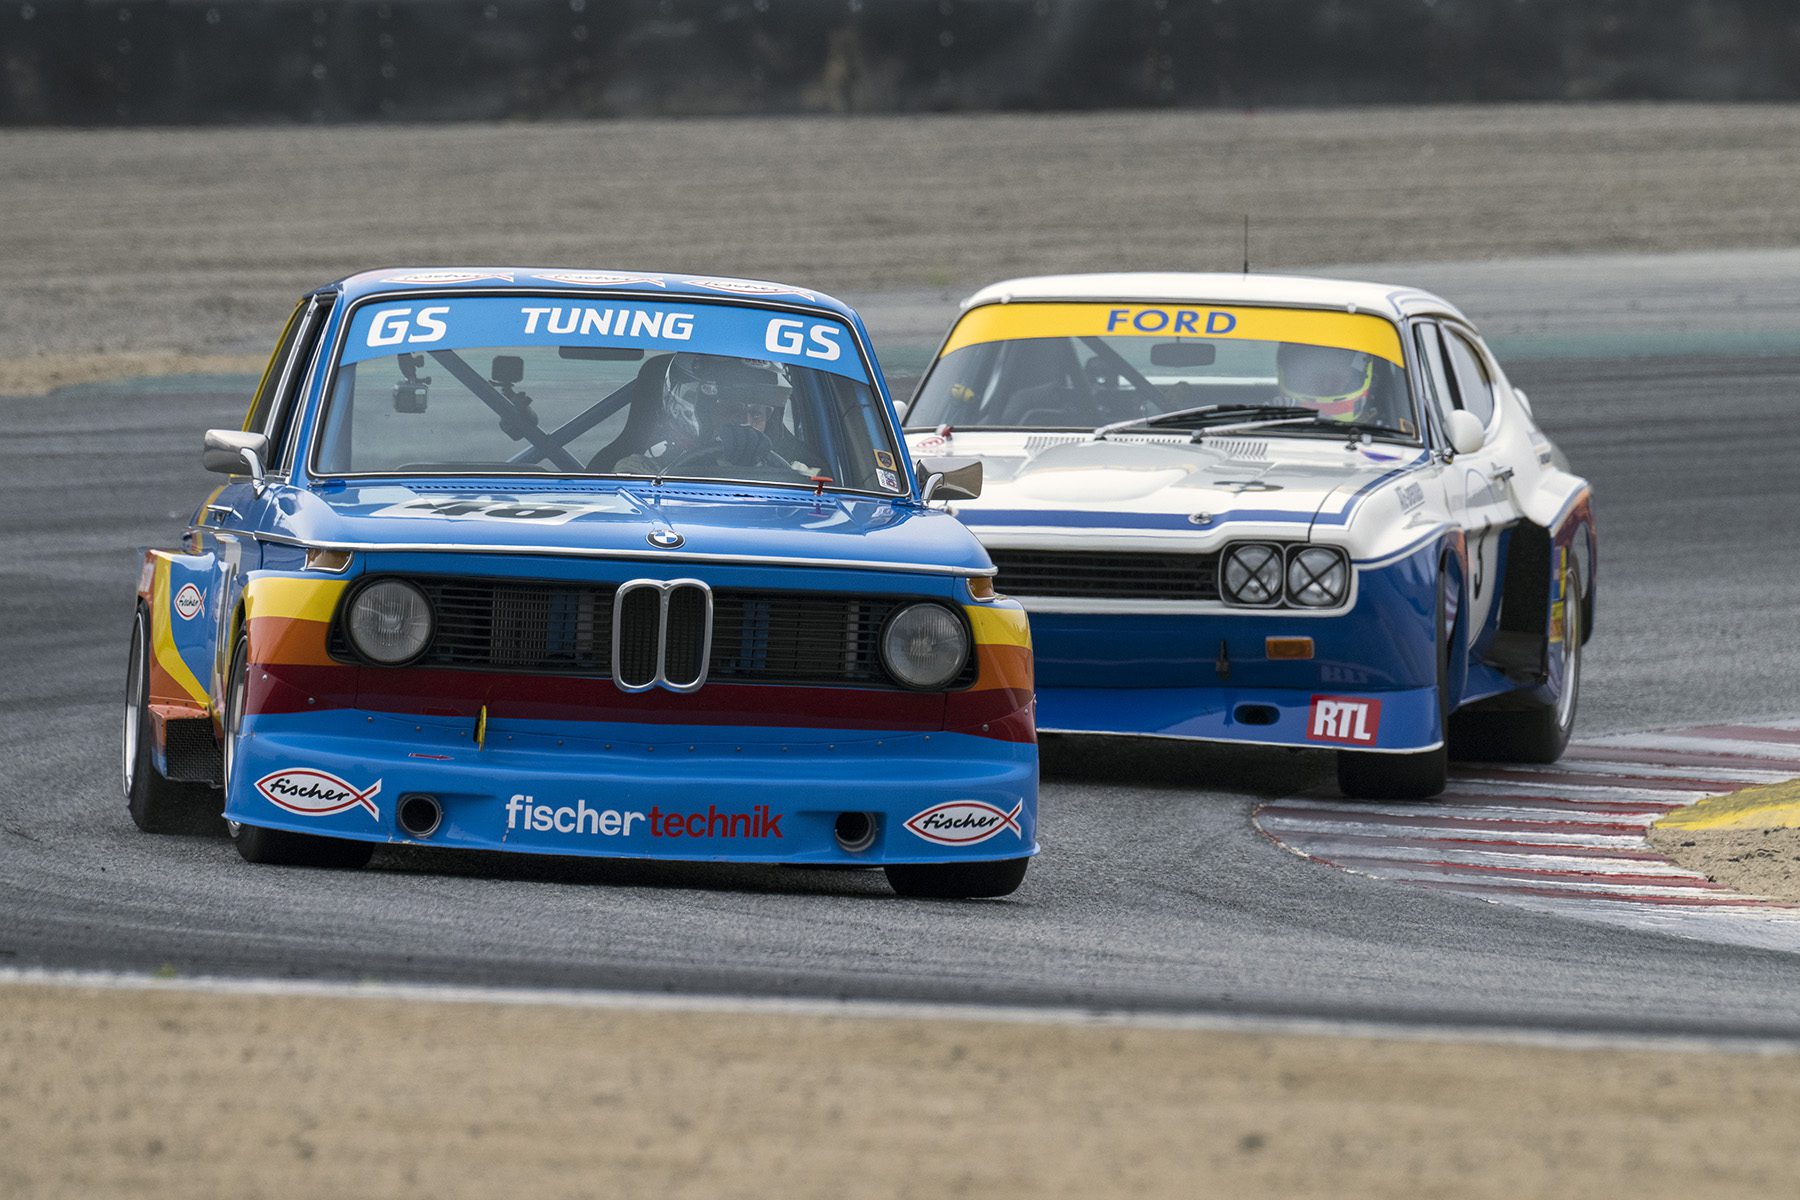
Steve Walker’s 1975 BMW 2002 leads Zak Brown in his 1975 Ford Capri RS 3100 through Turn 2 during Friday Morning practice.
The Parker family nose-to-tail in their Cobras
Jim Hague/1970 Ford Mustang Boss 302 hustles through Turn 5 in the always competitive Historic TransAm class
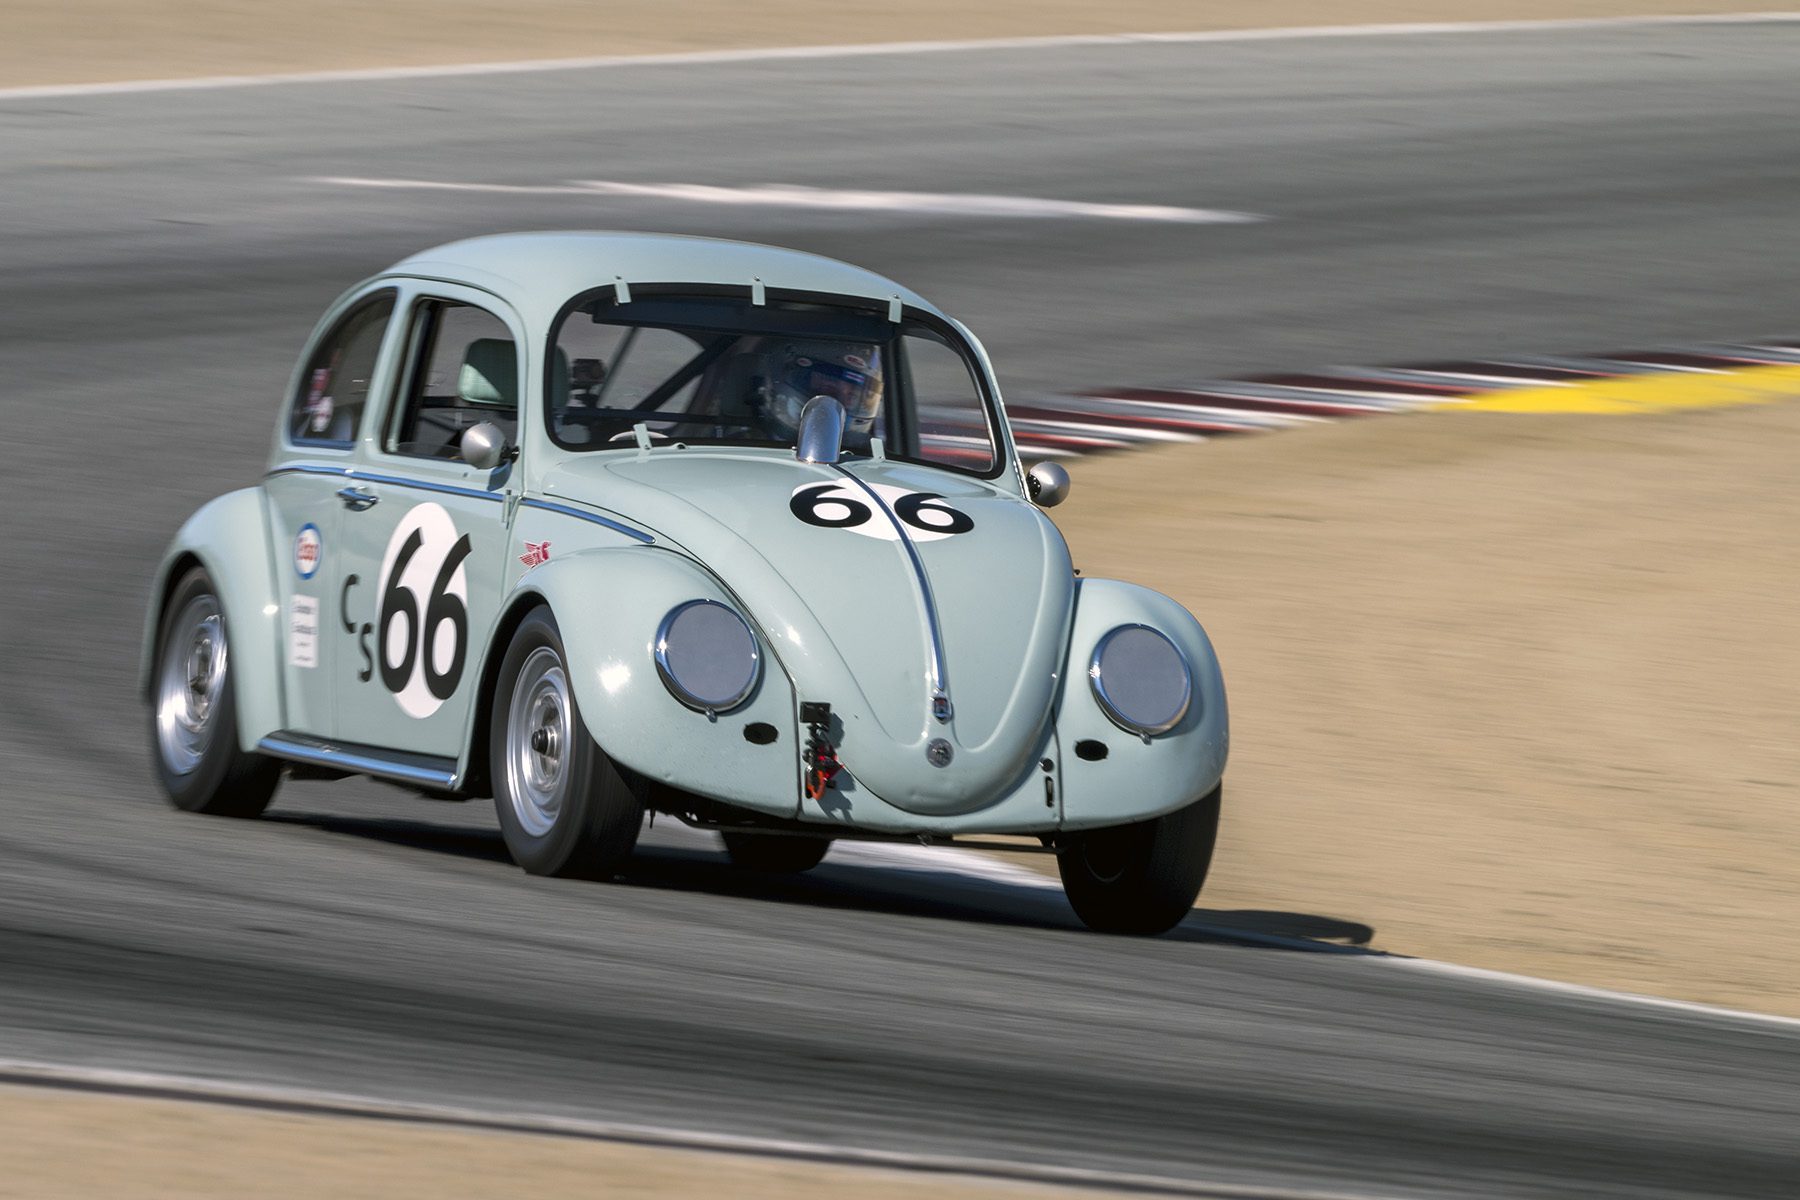
Steven Smith pushing “Gilbert” his 1965 VW Beetle 1600 through Turn 5
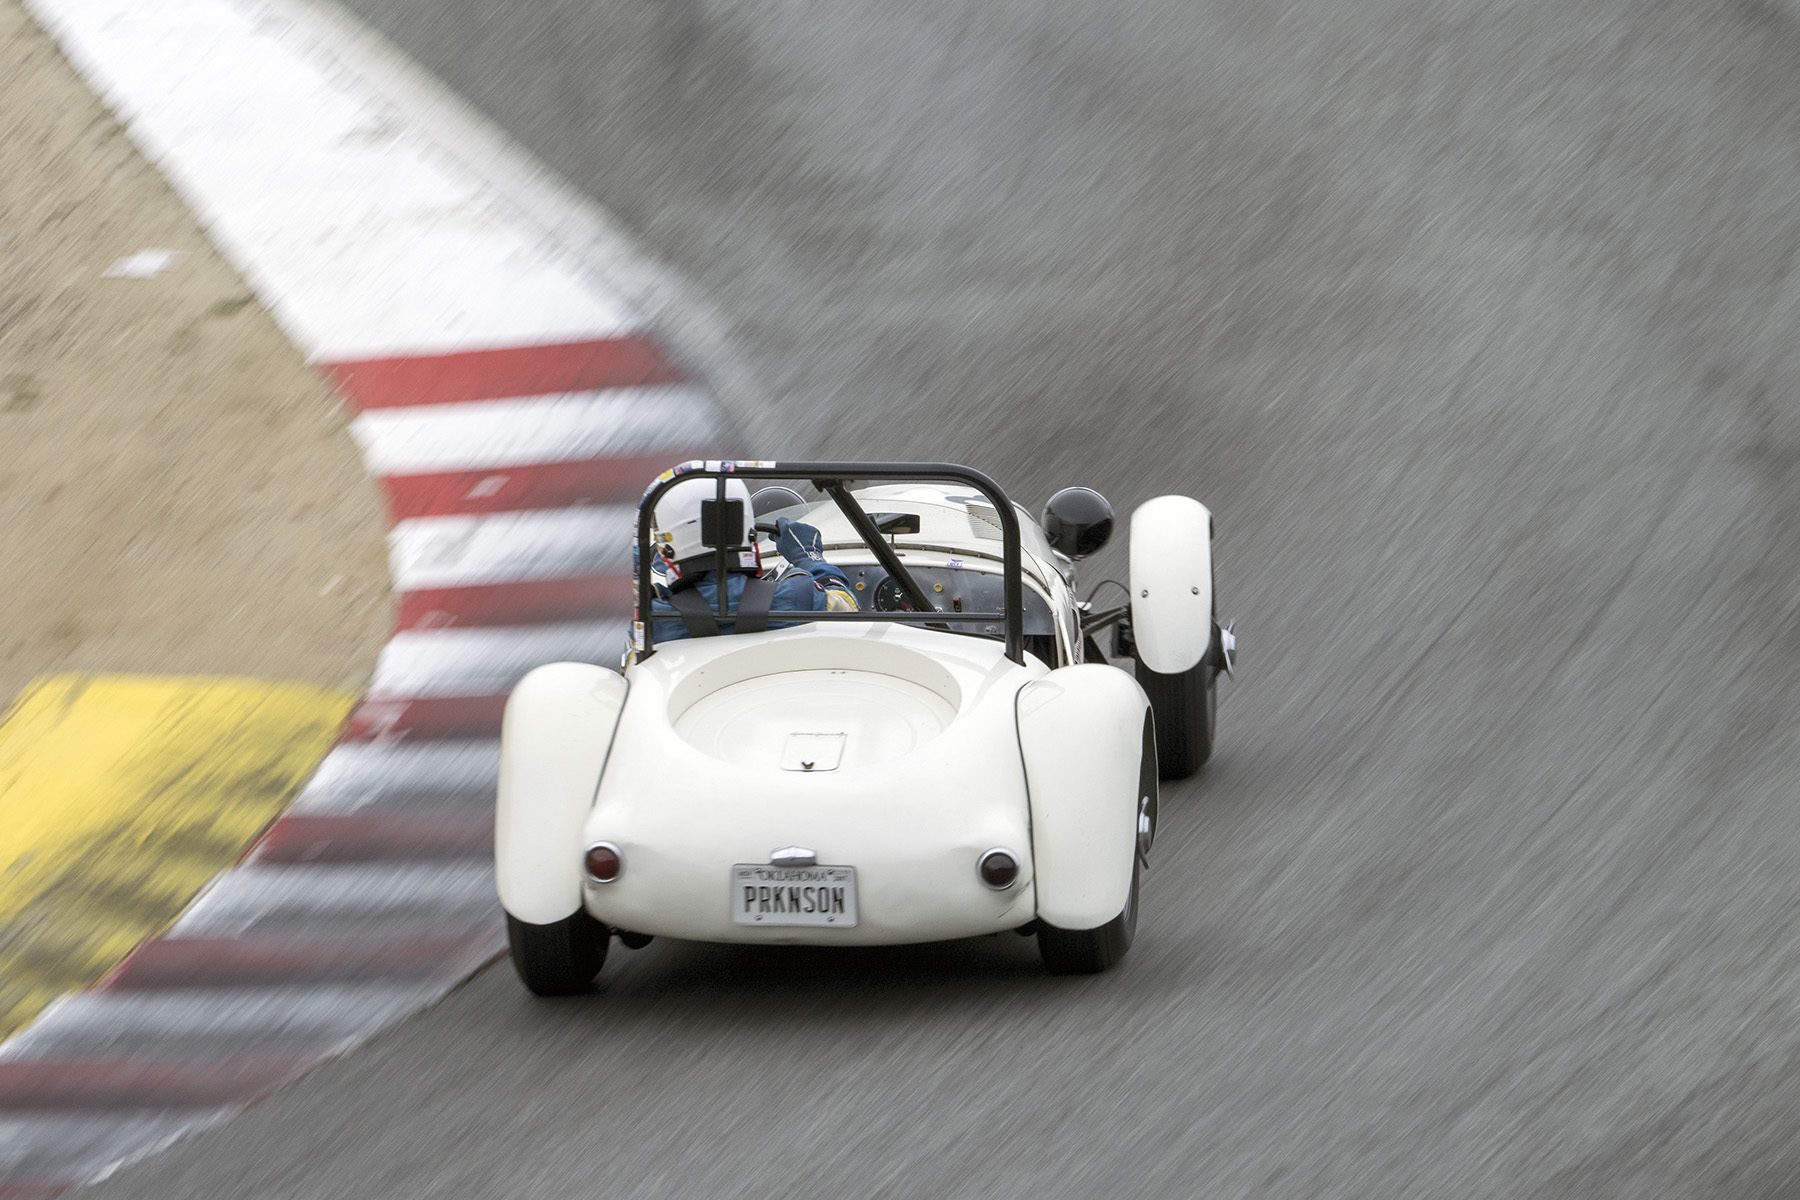
John Buddenbaum/1949 Jaguar Parkinson Special turns into The Corkscrew
Gregory Campbell/1955 Porsche Devin Speedster in Turn 8 about to descend The Corkscrew
Anthony Wang’s 1958 Ferrari 250 Testa Rossa looks great in yellow as he goes through Turn 6
Wesley Abendroth/1955 Chevrolet Mistral Flat Out through Turn 6
Paddins Dowling/1934 ERA R2A alongside Brad Baker/1931 Bugatti T51 in Turn 6 during Group 1 practice
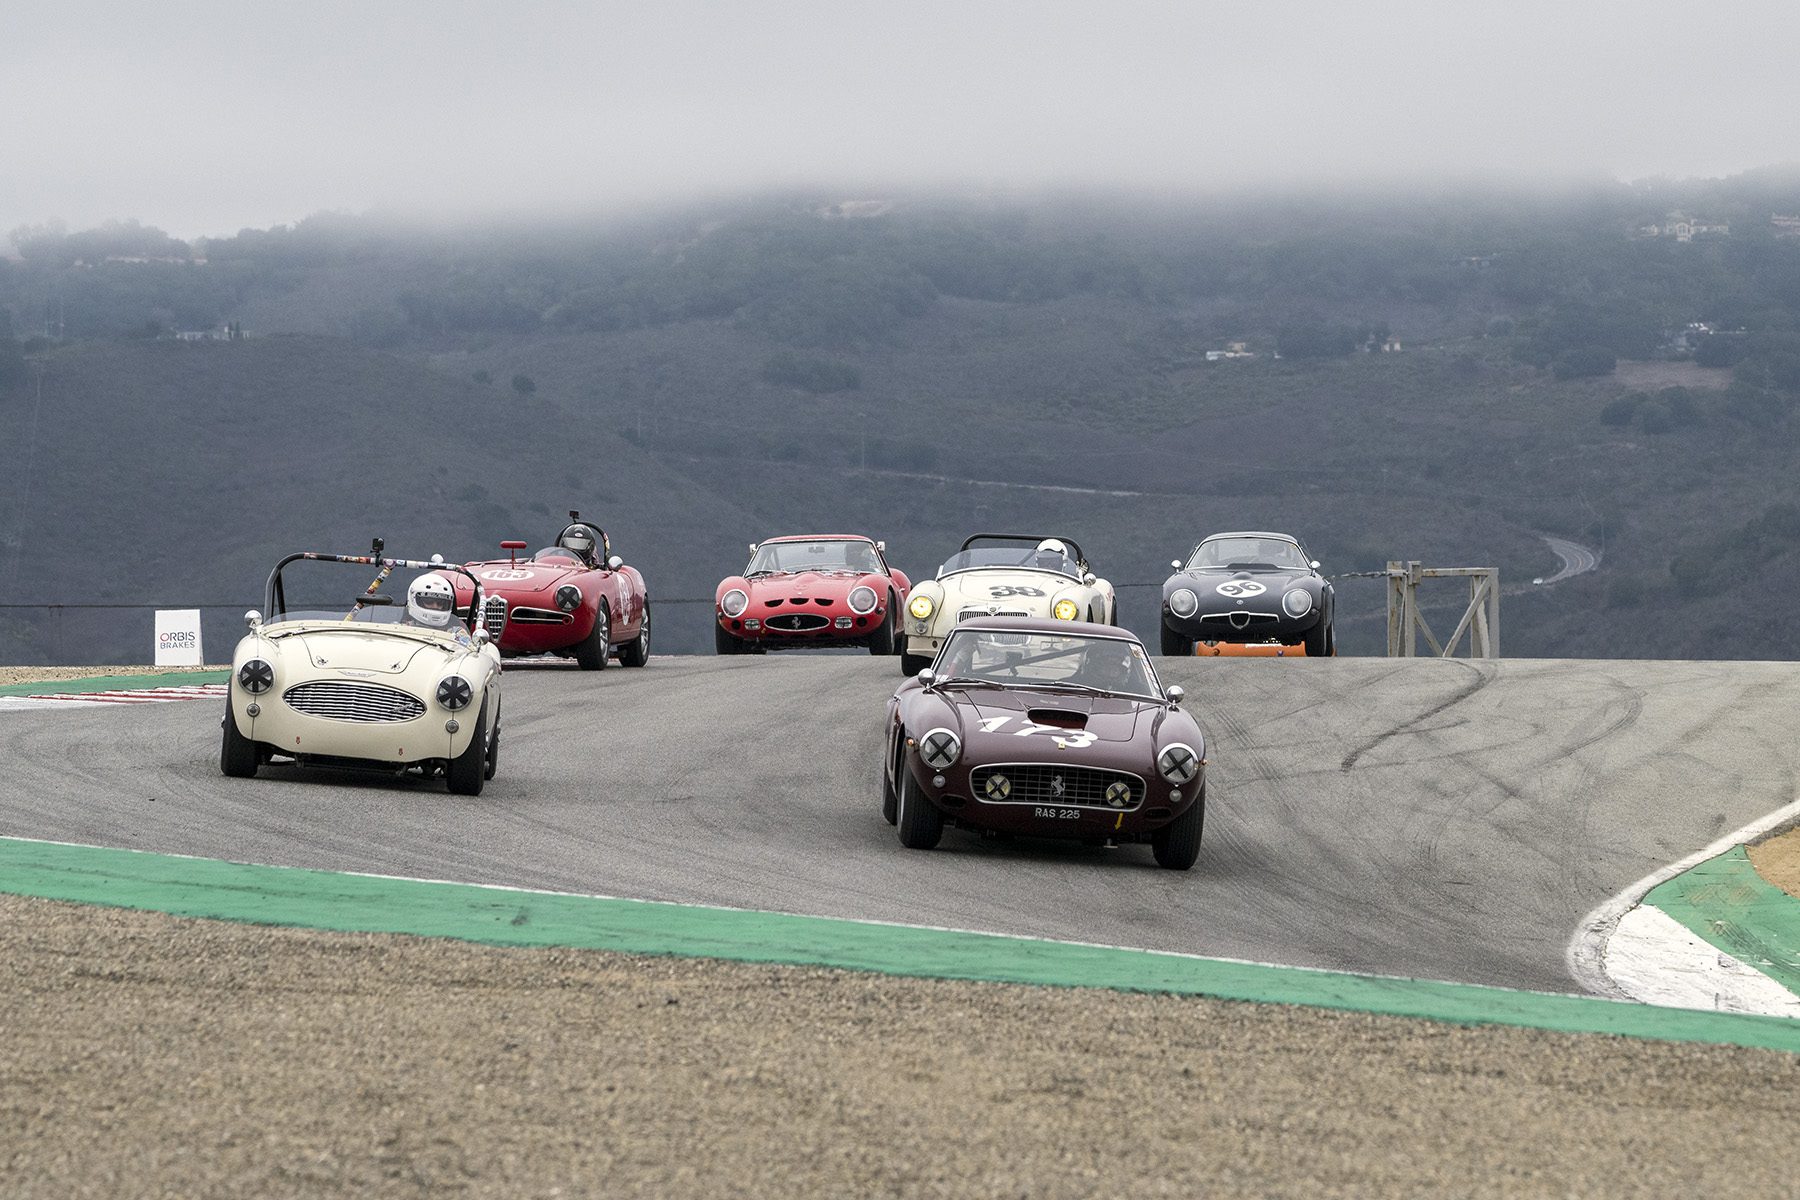
Rob Walton/1961 Ferrari 250 GT SWB Berlinetta heads Kevin Adair/1959 Austin Healey 3000S and the rest of the Group 4 field into The Corkscrew
William Lyon/1961 Porsche Abarth Carrera heads a train including David Perkins/1964 Alfa Romeo GTZ, Ranson Webster/1961 Porsche Abarth Carrera, and Jeffrey ONeill/1963 Ferrari 250 GTO into The Corkscrew
Mario Andretti in the 2013 McLaren MP4-28a during the McLaren Formula 1 Demonstration
Peto O’Ward in the McLaren MP4/5B during the McLaren Formula 1 Demonstration
Mika Häkkinen in the McLaren MP4/2 during the McLaren Formula 1 Demonstration
Geir Ramleth/1963 Lotus 23B out brakes Horatio Fitz-Simon/1963 Lotus Elan 26R into Turn 11
Robert Smalley’s 1968 Porsche 911in Turn 2 during the under 2.5-liter TransAm race.
Group 2 action in Turn 2 – Robert S. Davis/1953 Siata 208s is momentarily ahead of Chris MacAllister/1955 Jaguar D-Type who is followed by James Alder/1952 Jaguar XK 120
Uwe Biegner/1953 Porsche 356 turns into Turn 8 aka The Corkscrew
Juan Gonzalez/2008 Porsche 997 RSR heads Ranson Webster/2012 Porsche GT3 Cup through Turn 5
Max Jamiesson/1935 Ford Sprint Car leads Ivan Zaremba/1935 Railton Light Sport Tourer through Turn 6
Brian Mullin hustles his 1938 Talbot T26 along as he exits Turn 6
John Buddenbaum pushing his 1949 Jaguar Parkinson Special through Turn 6
Nicholas Colonna/1958 Devin SS in Turn 6
Conrad Stevenson/1964 Alfa Romeo GTZ is followed by Paul Christensen/1956 Porsche 356A Speedster, and others into Turn 8
John Kerr/1932 Miller-Schofield Champ Car leads Max Jamiesson/1935 Ford Sprint Car and Brian Mullin/1938 Talbot T26 into Turn 8
R. Spencer Trenery/1961 Cooper Monaco about to descend The Corkscrew
John Murray’s 1968 BMW 2002 leads the under 2.5-liter TransAm field into Turn 2.
Nicholas Colonna/1958 Devin SS heads Thor Johnson/1959 Lotus 17 during Friday morning practice.
Jeffrey ONeill/1963 Ferrari 250 GTO exiting Turn 2
Ben Wysard/1952 Porsche Glockler about to exit Turn 8 and start the descent through The Corkscrew.
Chris MacAllister/1964 Shelby Cobra FIA 289 in Turn 11
Charles McCabe/1936 ERA R6B followed by Paddins Dowling/1934 ERA R2A and Brad Baker/1931 Bugatti T51 into The Corkscrew descent with the old Fort Ort in the background.
Steve Schmidt/1958 Porsche 356A Speedster through The Corkscrew
Charles McCabe/1936 ERA R6B in Turn 6 during Saturday morning practice
Charles Christensen/1972 Porsche 911S gets a little air as he heads Jonathan Feiber/1974 Porsche RSR 3.0 in Group 5
Rob Kauffman/1965 Ford GT40 heads Charles Wegner/1965 Shelby GT350 through Turn 2
Ned Spiker’s Maserati 200s in Turn 6
Horatio Fitz-Simon/1963 Lotus Elan 26R in Turn 11
Ned Spiker/1961 Ferrari 250GT SWB leads Ranson Webster/1961 Porsche Abarth Carrera
My wife, Shannan, and I didn’t start out chasing properties or portfolios. We started with our life goals and then made adjustments that put us on track to achieve them. With two young kids, our primary goal was simple: build income streams that supported our family instead of competing with it. And what we desired most was the freedom to choose what to do with our time.
That journey led us into midterm rentals (MTRs). We saw how providing quality housing for traveling professionals could create consistent cash flow without the daily demands of short-term rentals. As our MTR business grew, so did our confidence that this model could help other families reclaim their time as well.
Eventually, we turned that experience into a coaching business, where we now help investors build and scale mid-term rental businesses that meet the local needs of mid-term housing while also providing a semi-passive income to the operators.
Along the way, we adopted a simple filter for every decision: Will this generate income? And just as important, how passive can we make it?
That mindset is what led us to RVshare.
Why Adding an RV Rental to Our Business Made Sense
In mid-2024, we noticed something interesting. Families in our area were renting RVs for vacations and road trips, often paying what we recognized as strong monthly cash flow. It sparked an idea: what if we added an RV as a complementary income stream? A stream that required even less effort than an MTR, but could produce similar results?
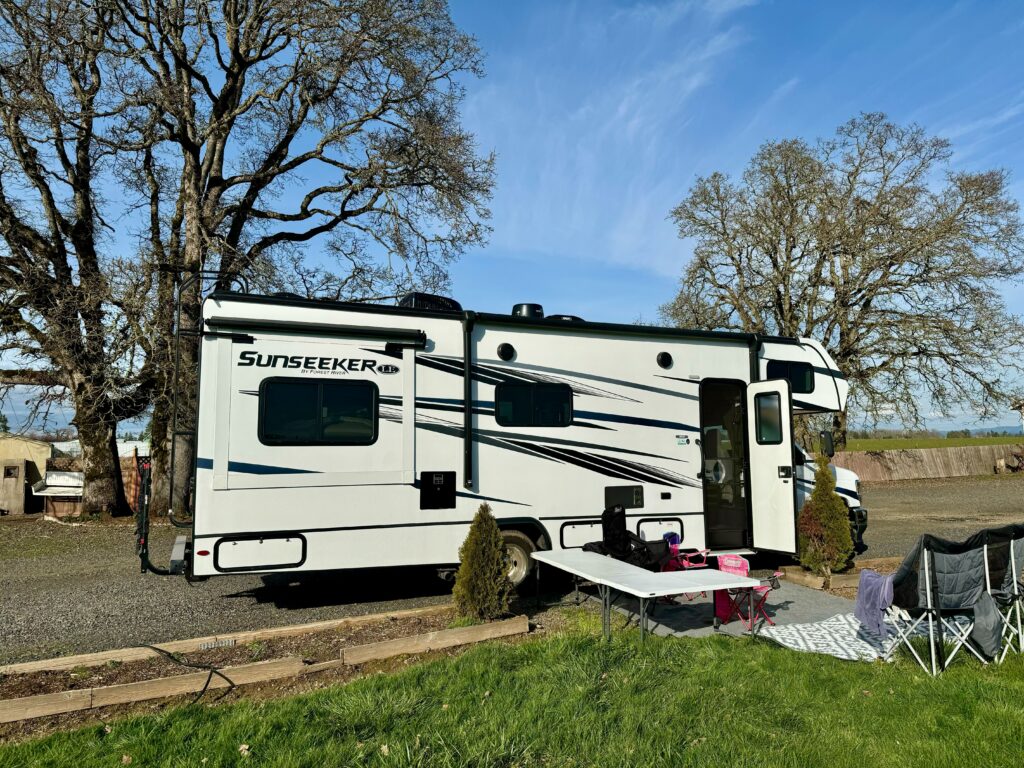
So we bought a brand-new RV and listed it on RVshare.
The response exceeded our expectations. The RV booked quickly, required minimal ongoing management, and by the end of the year had generated $15,000 in profit. In peak months, it earned as much as one of our midterm rental units, with far less time and operational effort.
Our Best Tips for a Successful RV Rental Business:
We value communication above all. So, timely communication with inquiries and bookings is #1. This paves the way for great reviews which then promote more bookings.
Great photos supported by clear descriptions including video tutorials and walkthroughs really make an impact on guest happiness and positive experiences.
Why Renting Our RV Works for Our Family
What is even better than the business is that the RV still served its original purpose: giving our family the freedom to travel, explore, and create memories together. Instead of sitting unused, it became an asset that worked for us.
RVshare didn’t replace our midterm rental business. It strengthened it. The additional income allowed us to reinvest more confidently into our MTR portfolio and our coaching company, while adding diversification and margin to our overall strategy.
What this experience reinforced is something we now teach: freedom comes from stacking smart income streams, not overcomplicating them. The best investments are aligned with the life you want to live. They don’t just focus on profit.
Today, midterm rentals remain the foundation of our business, but RVshare has become a powerful supporting pillar proving that you don’t need more complexity to increase income, just better alignment. For us, success means building income in a way that serves our family, strengthens our business, and protects our time.


 Miraculously I’ve been able to attend most of them along the way. They’re a favourite event of my son’s, so I don’t see that trend anytime soon either.

 There was also a great presence from Oldies, and Aftermath a club that was established fairly recently.


 I don’t have exact numbers, but I wouldn’t be surprised if the Majestics said it was one of the largest they’ve held thus far.


 As you can see, there was an endless supply of shiny things.
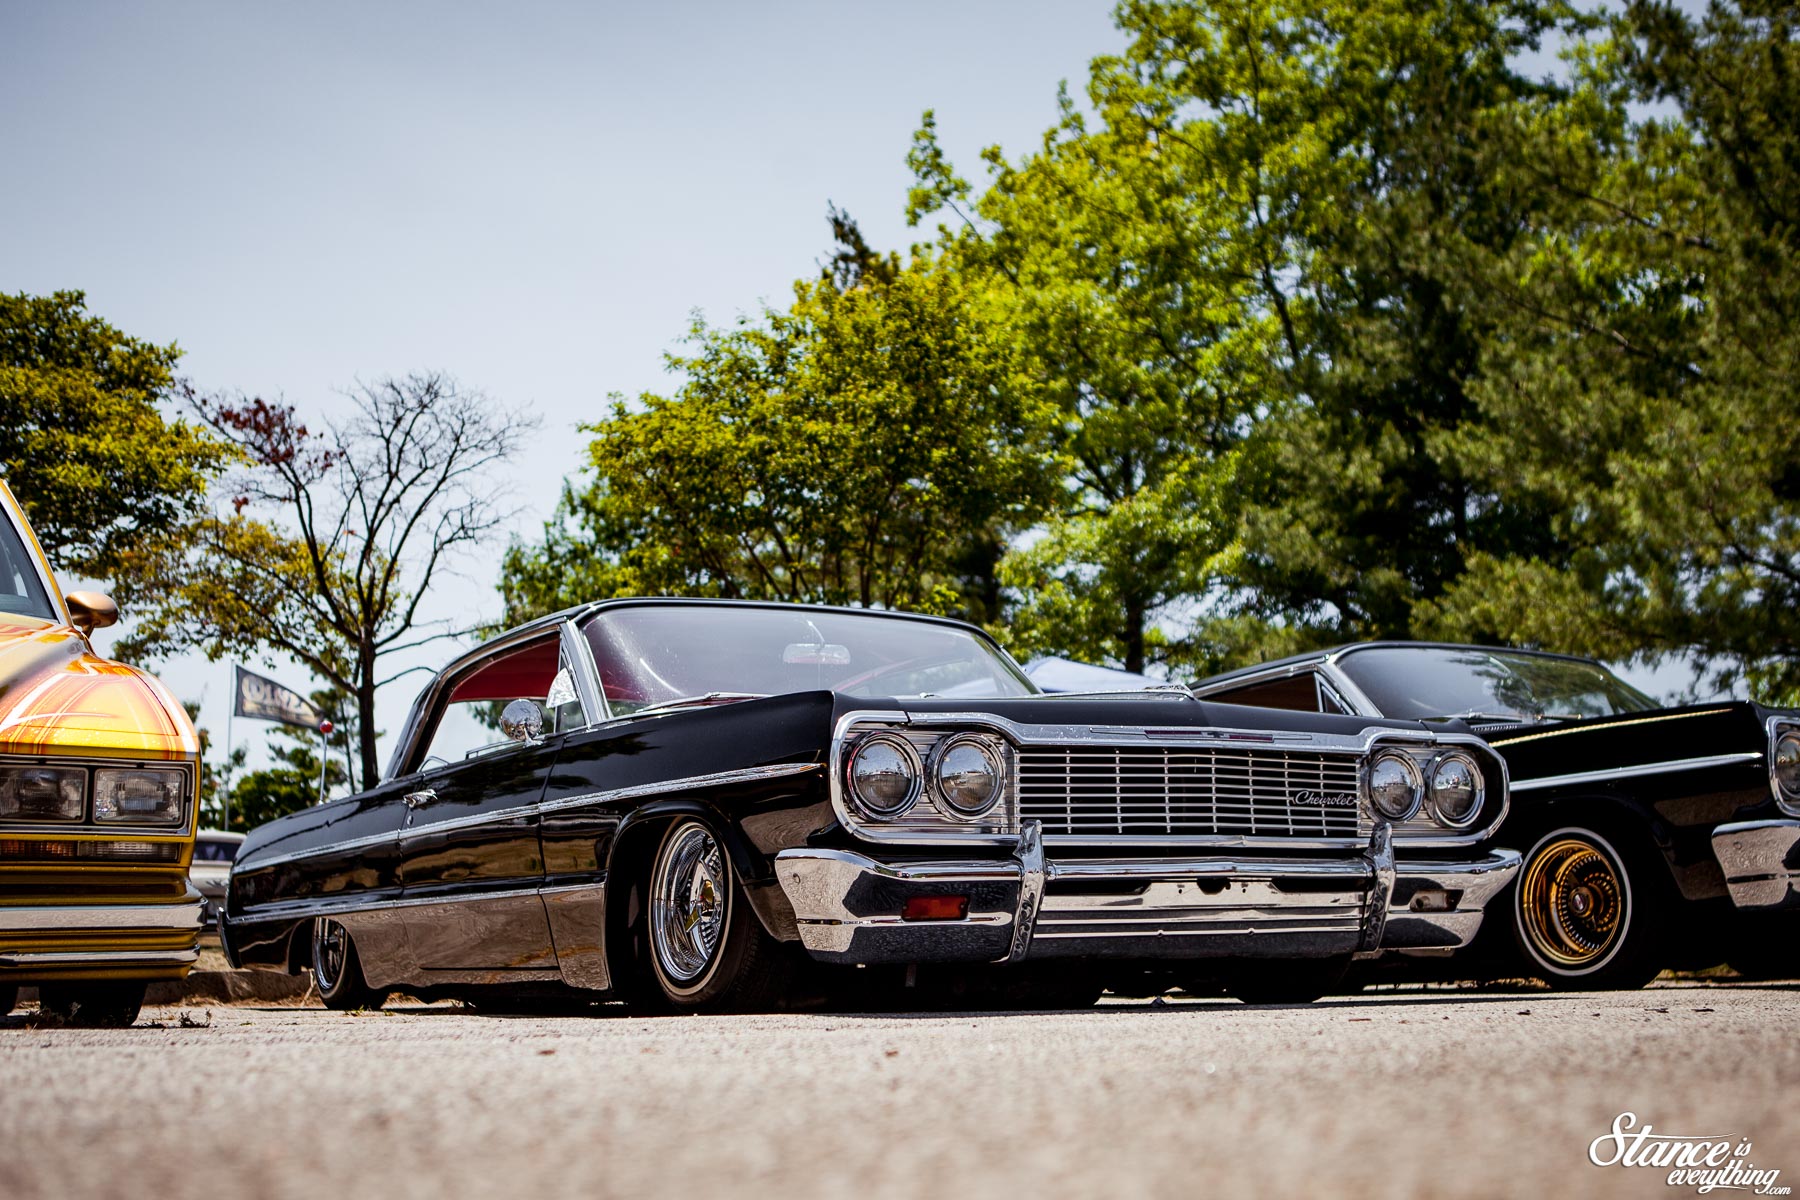

 Impalas and wires abound, which is more than ok by me.
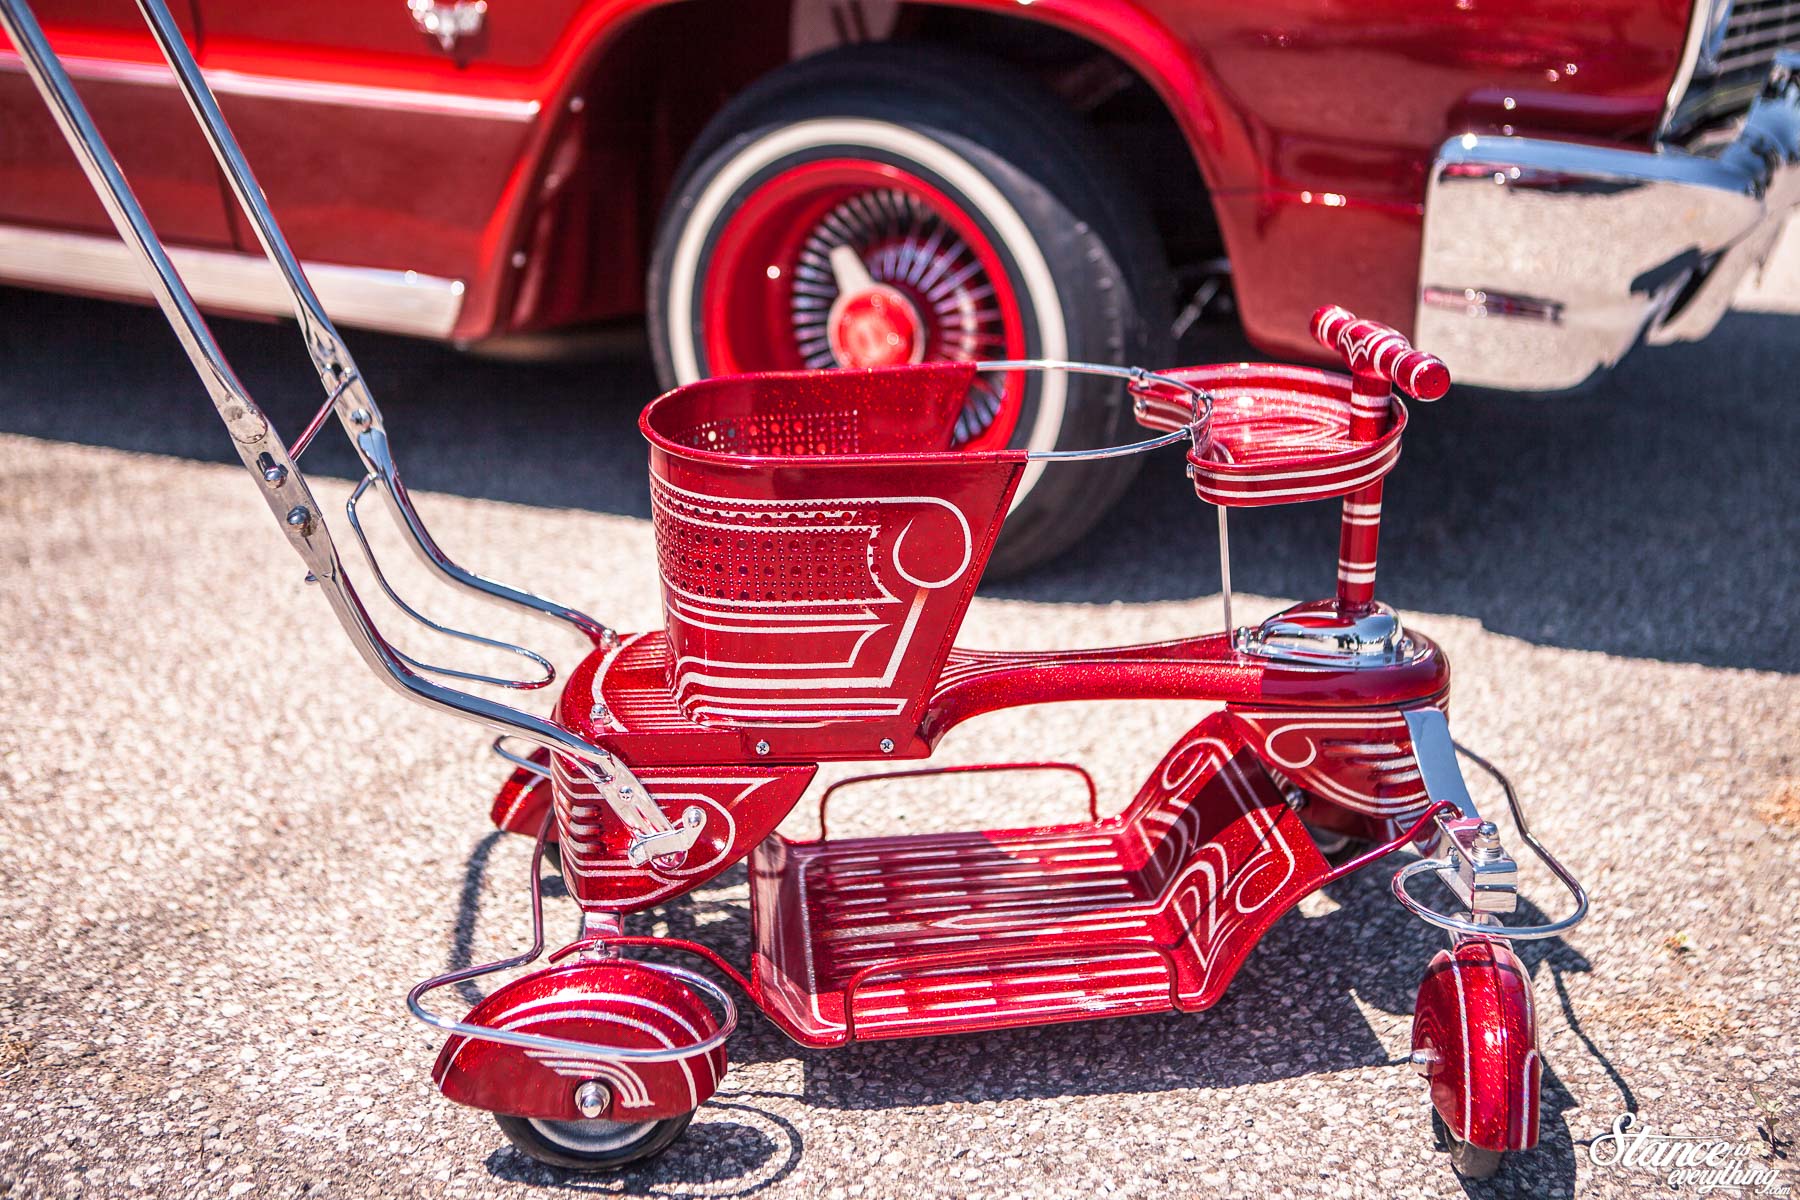

 You may have noticed that this post is fairly light on specifics pertaining to each car because quite honestly, I’ve broken down the science of these cars before, and it’s really not required.
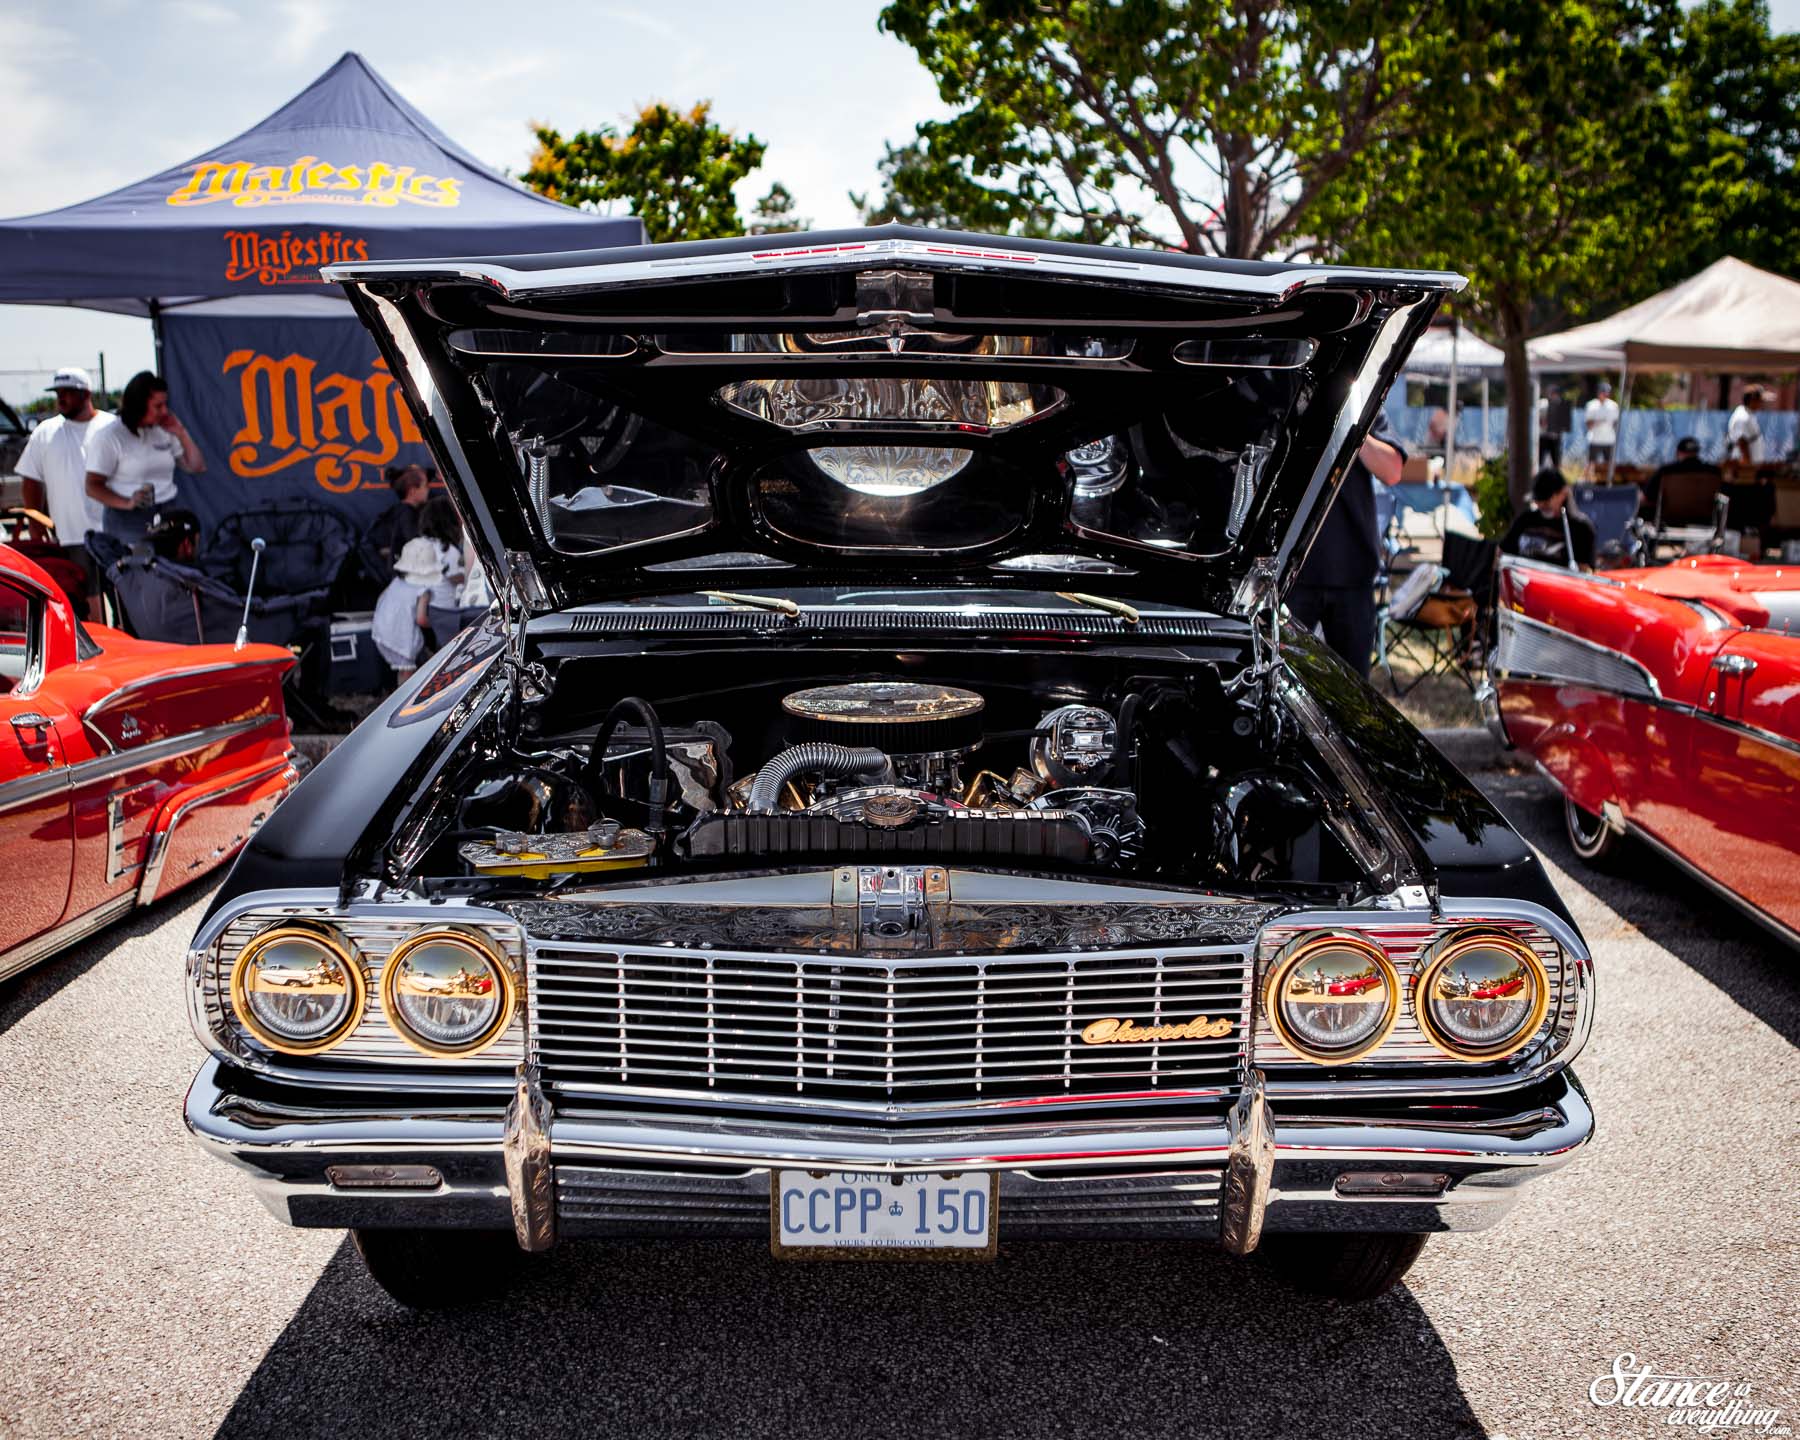


 To me it’s like drifting, these cars are built for a purpose that’s a little different than their factory intended purpose.


 – Recap & Photo Gallery On-the-Ground Coverage + Gallery")